
Of course, keeping with SMS for MFA is a bad idea – but you know that – but there might be reasons why you need to keep it, and so this blog post exists to help you deploy the CYOT (choose your own telephony) option for Entra ID SMS or Voice for multi-factor authentication.
Microsoft will turn off SMS and Voice for MFA early in 2027, but there are still billions of SMS messages for MFA being sent every year. Ideally you move to a phish resistant MFA solution and that is what Microsoft are providing within Entra ID, but are moving the availability of the weaker methods of SMS and Voice to your own billing and your own choice of telecoms provider.
These telecoms providers also support SMS for self-service password reset (SSPR) as well as MFA. SMS for SSPR will stop in your tenant some time early 2027 unless you move to the Choose Your Own Telephony (CYOT).
Now when we say your own choice, what we really mean is you get to choose one of the providers that Microsoft have listed in their Azure security store. For this article, and for no other reason than they provide a per-call price (rather than a per-user or per-month price) I have gone with Soprano.
The general process is to pick your telephone provider, configure login to their app, and then build out the required Azure components (and there is a script to do this). Once the Azure function app and associated Enterprise app and other components are in place you inform the telecoms provider of the App ID that was made by the script and then wait for the Enterprise app to be approved by the provider.
The time you need to allocate to this work is in the region of 3 to 4 hours over at least two days, plus time to move from evaluation to production mode (see the end of the article).
Once the app is approved you can test and configure users to use the new telecoms provider for SMS and Voice MFA, moving a few users over and then moving more and more over until no-one is using Microsofts default service in Entra ID.
There is documenation for this, but I found it over-wordy and confusing and then there is the script at Github and its documentation and that was even worse – so here is the overview with pictures!
Lets being: We start in Entra ID Admin Center https://entra.microsoft.com and select Authentication Methods under the Entra ID menu on the left. On this page you click Add telecom provider (a new option to the top menu):
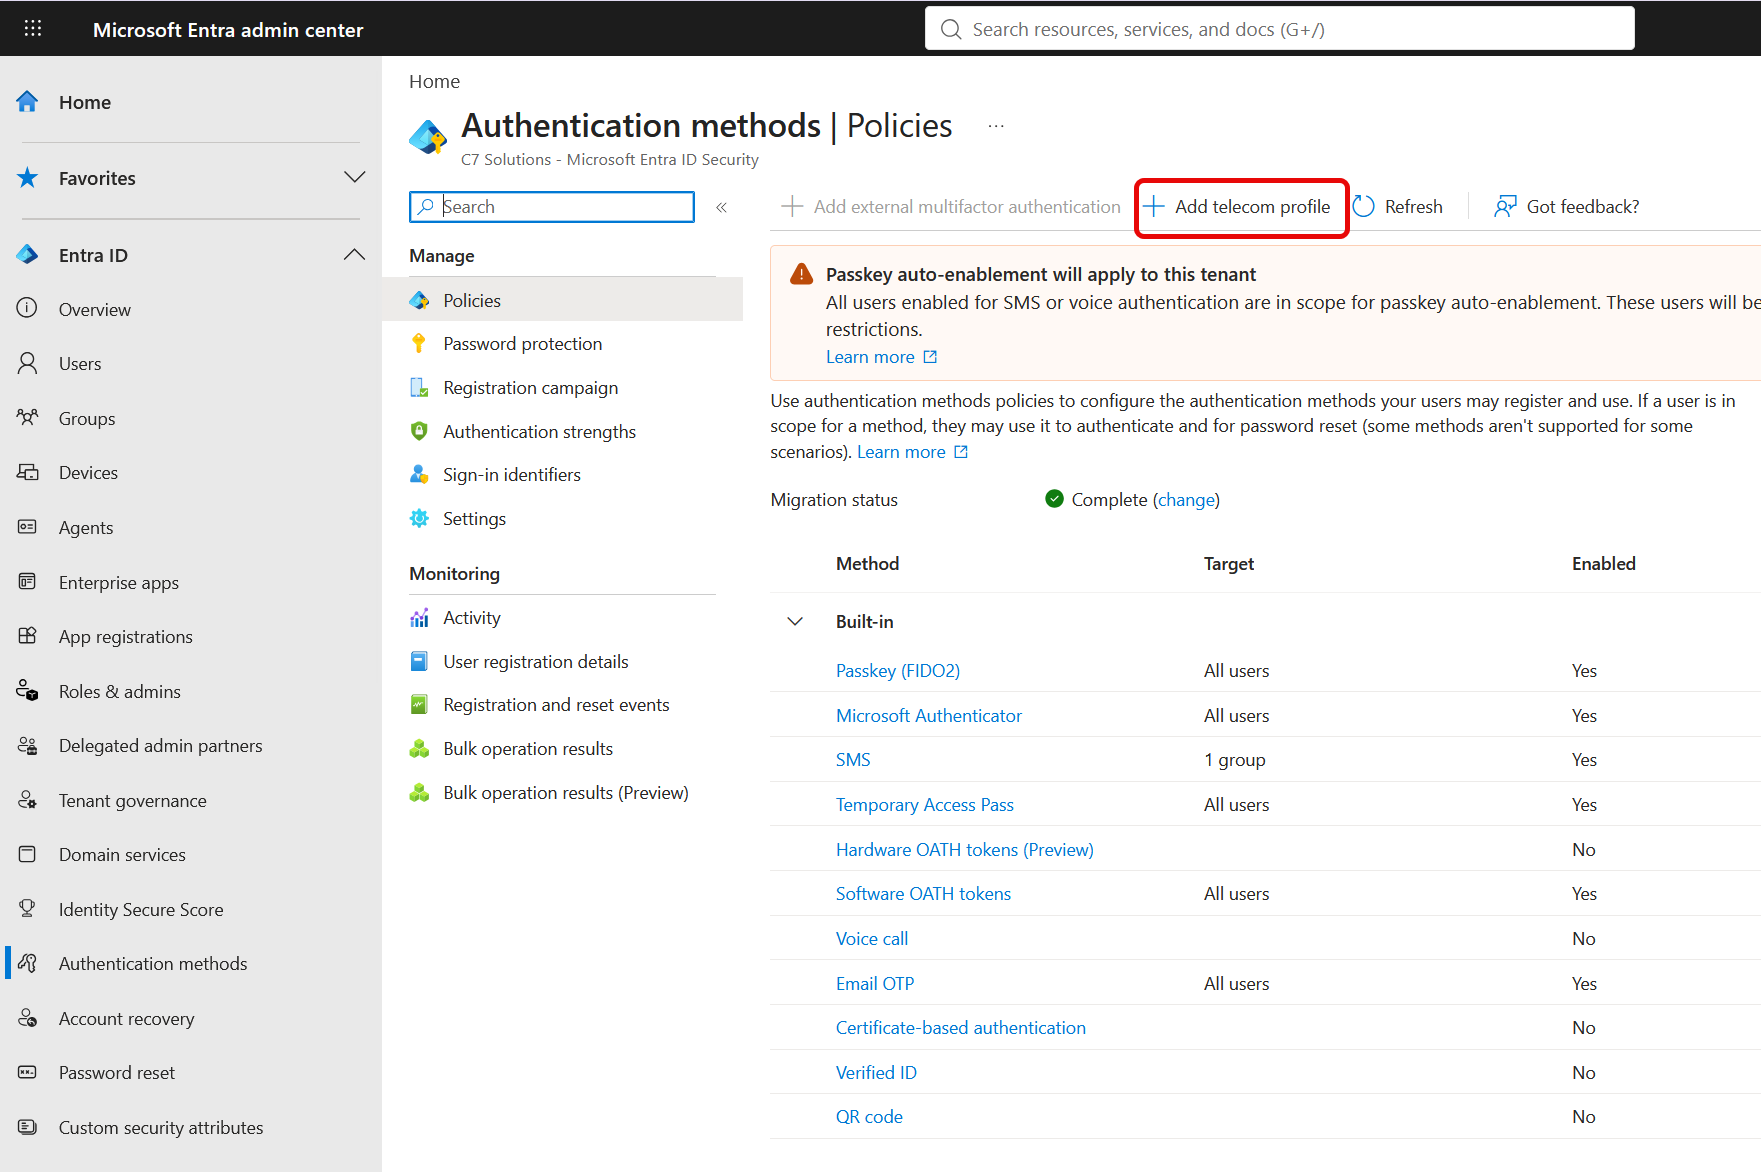
First step is to choose your telecom provider and you can click #1 to start this process:
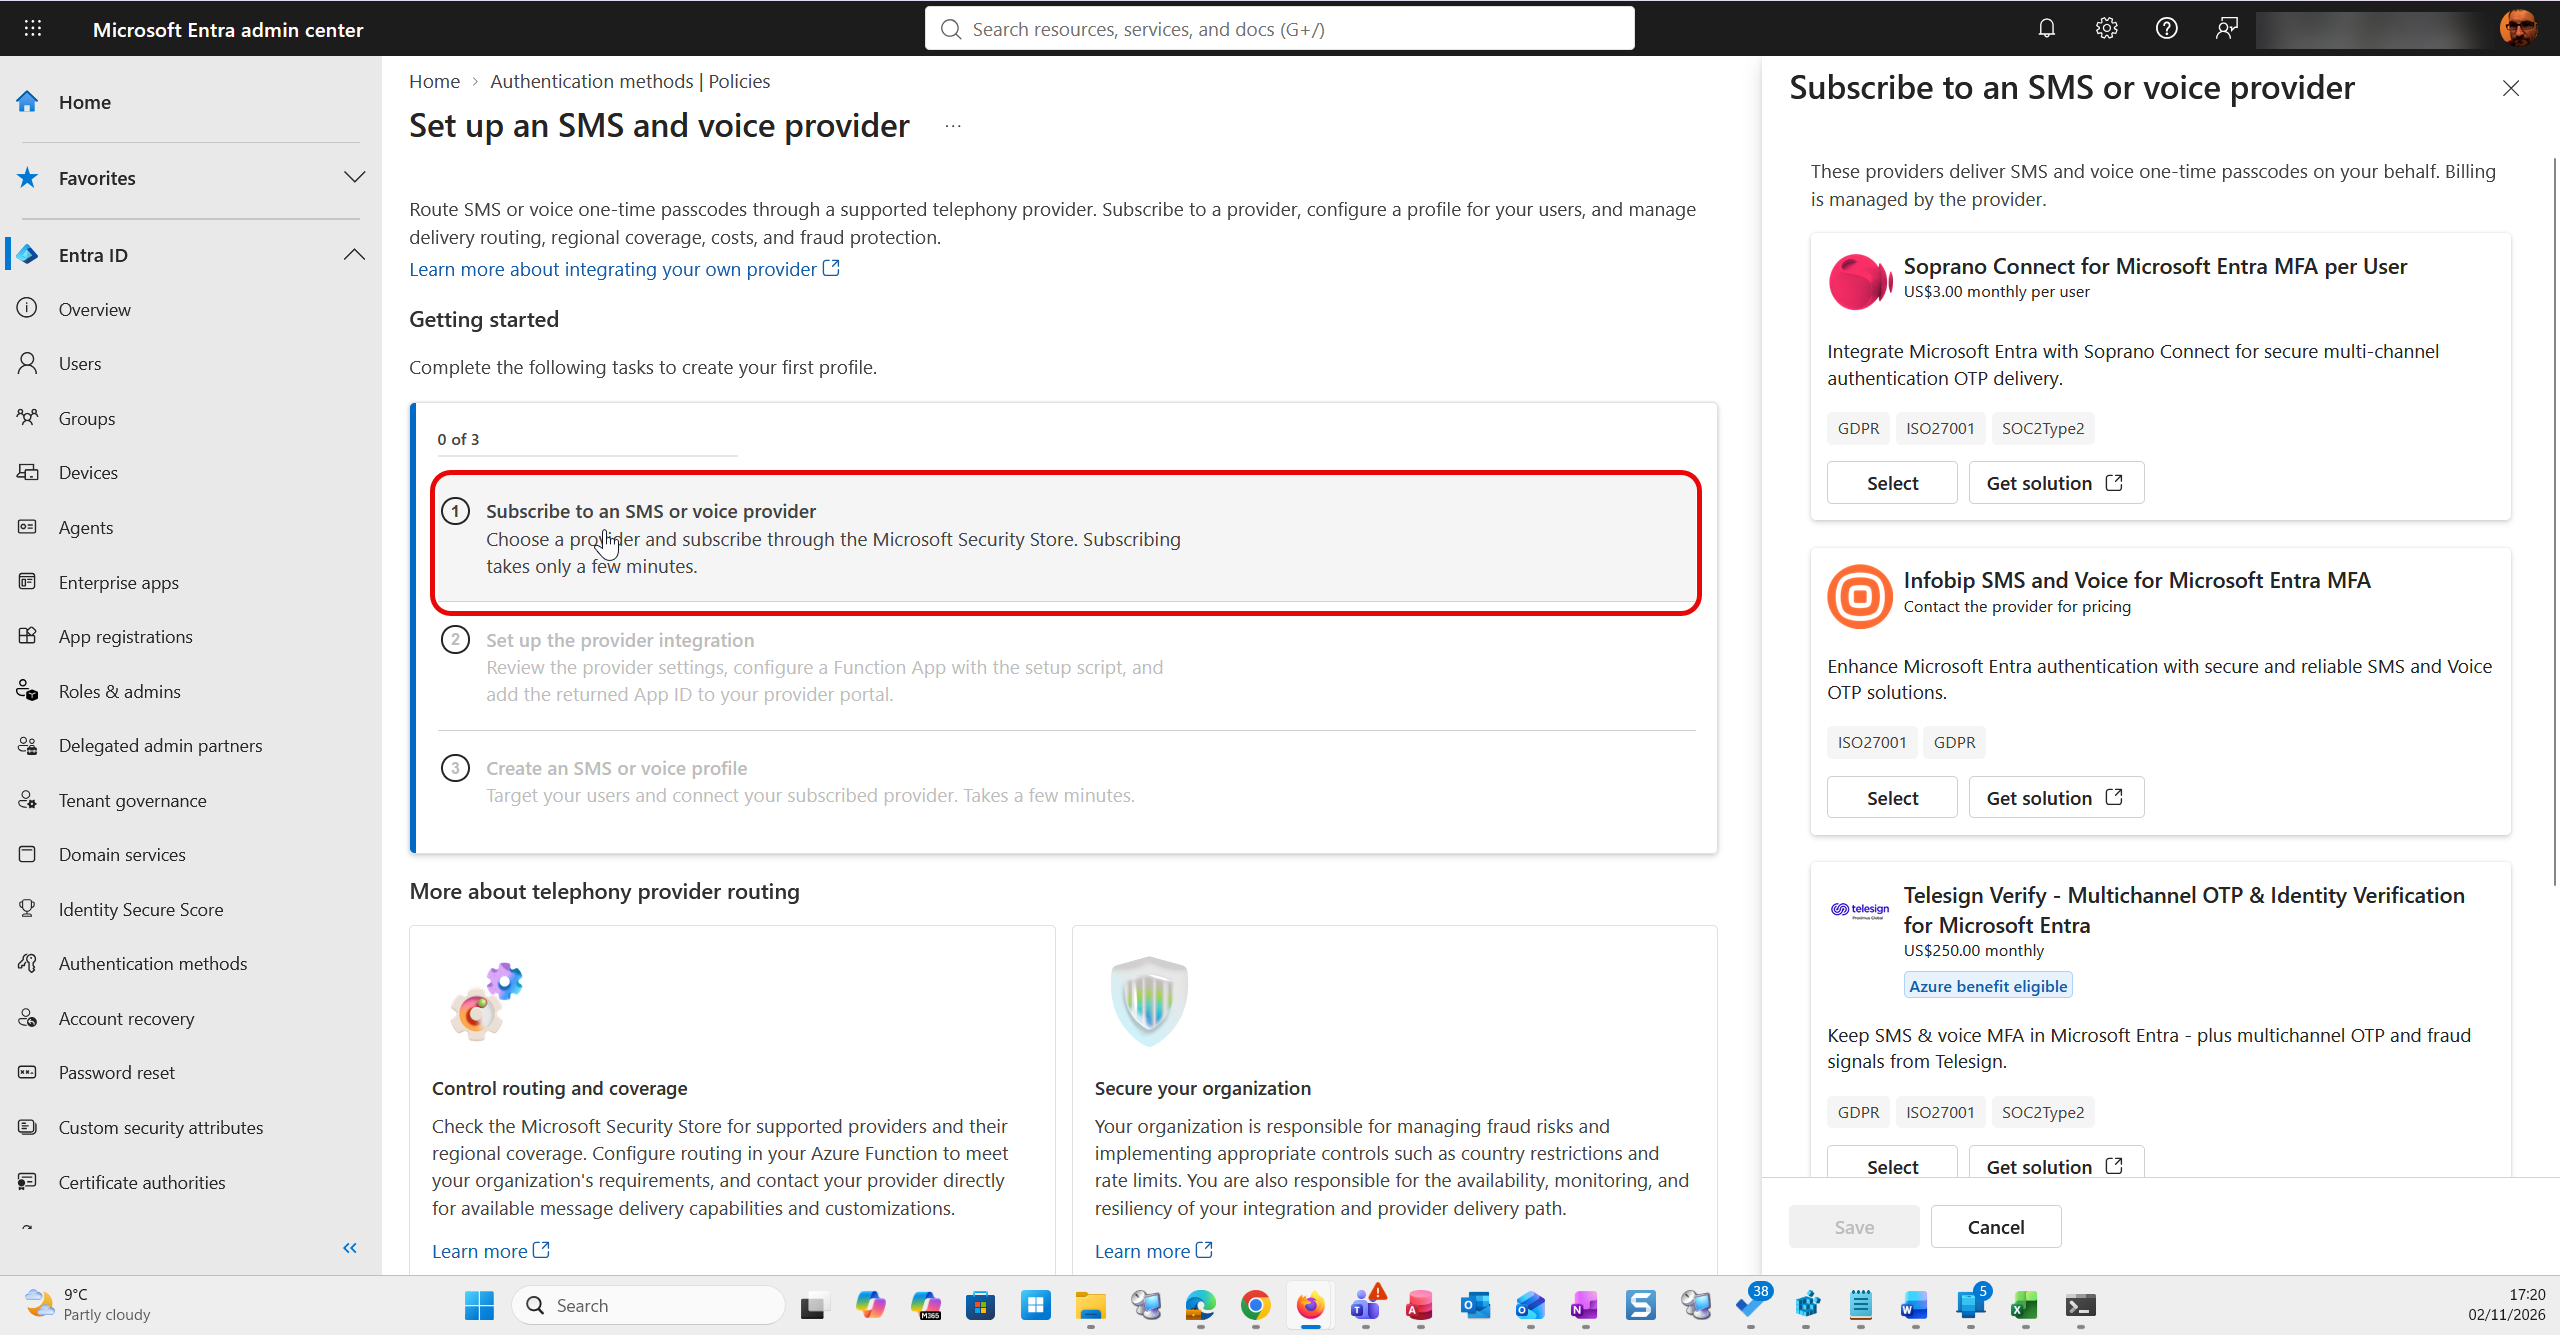
The list on the right is displaying in random order and for this blog post I picked the second Soprano Connect option starting at US$0.0085/message, though I am in the UK, so its really US$0.085/message. Click Get Solution for your chosen solution:
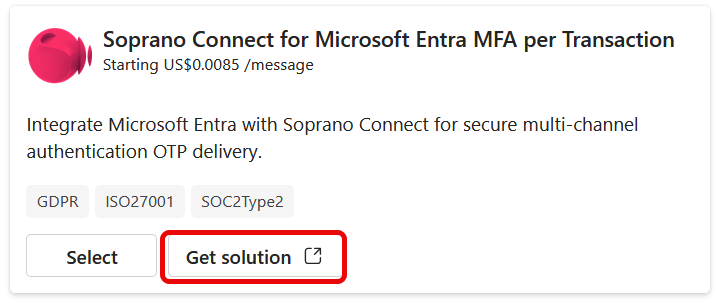
This opens a second tab in the browser targeted to the securitystore.microsoft.com. Here I see some marketing and pricing, for example this is where I found out that United Kingdom is a medium-cost country for SMS and so is USD 8.5c per message. The UK is also a low-cost country for the 30 second voice authentication calls at USD 1c. All these costs in this solution are billed to your Azure subscription that you will create in the next step.
Click Get Solution on the new tab to start the configuration process – if you don’t want the provider you just clicked on, or want to see what others offer, close the tab and choose another in the original list. Keep the original page open, we need to go back here later on to continue the configuration in Entra, but for now we start the configuration at your chosen provider and Azure.
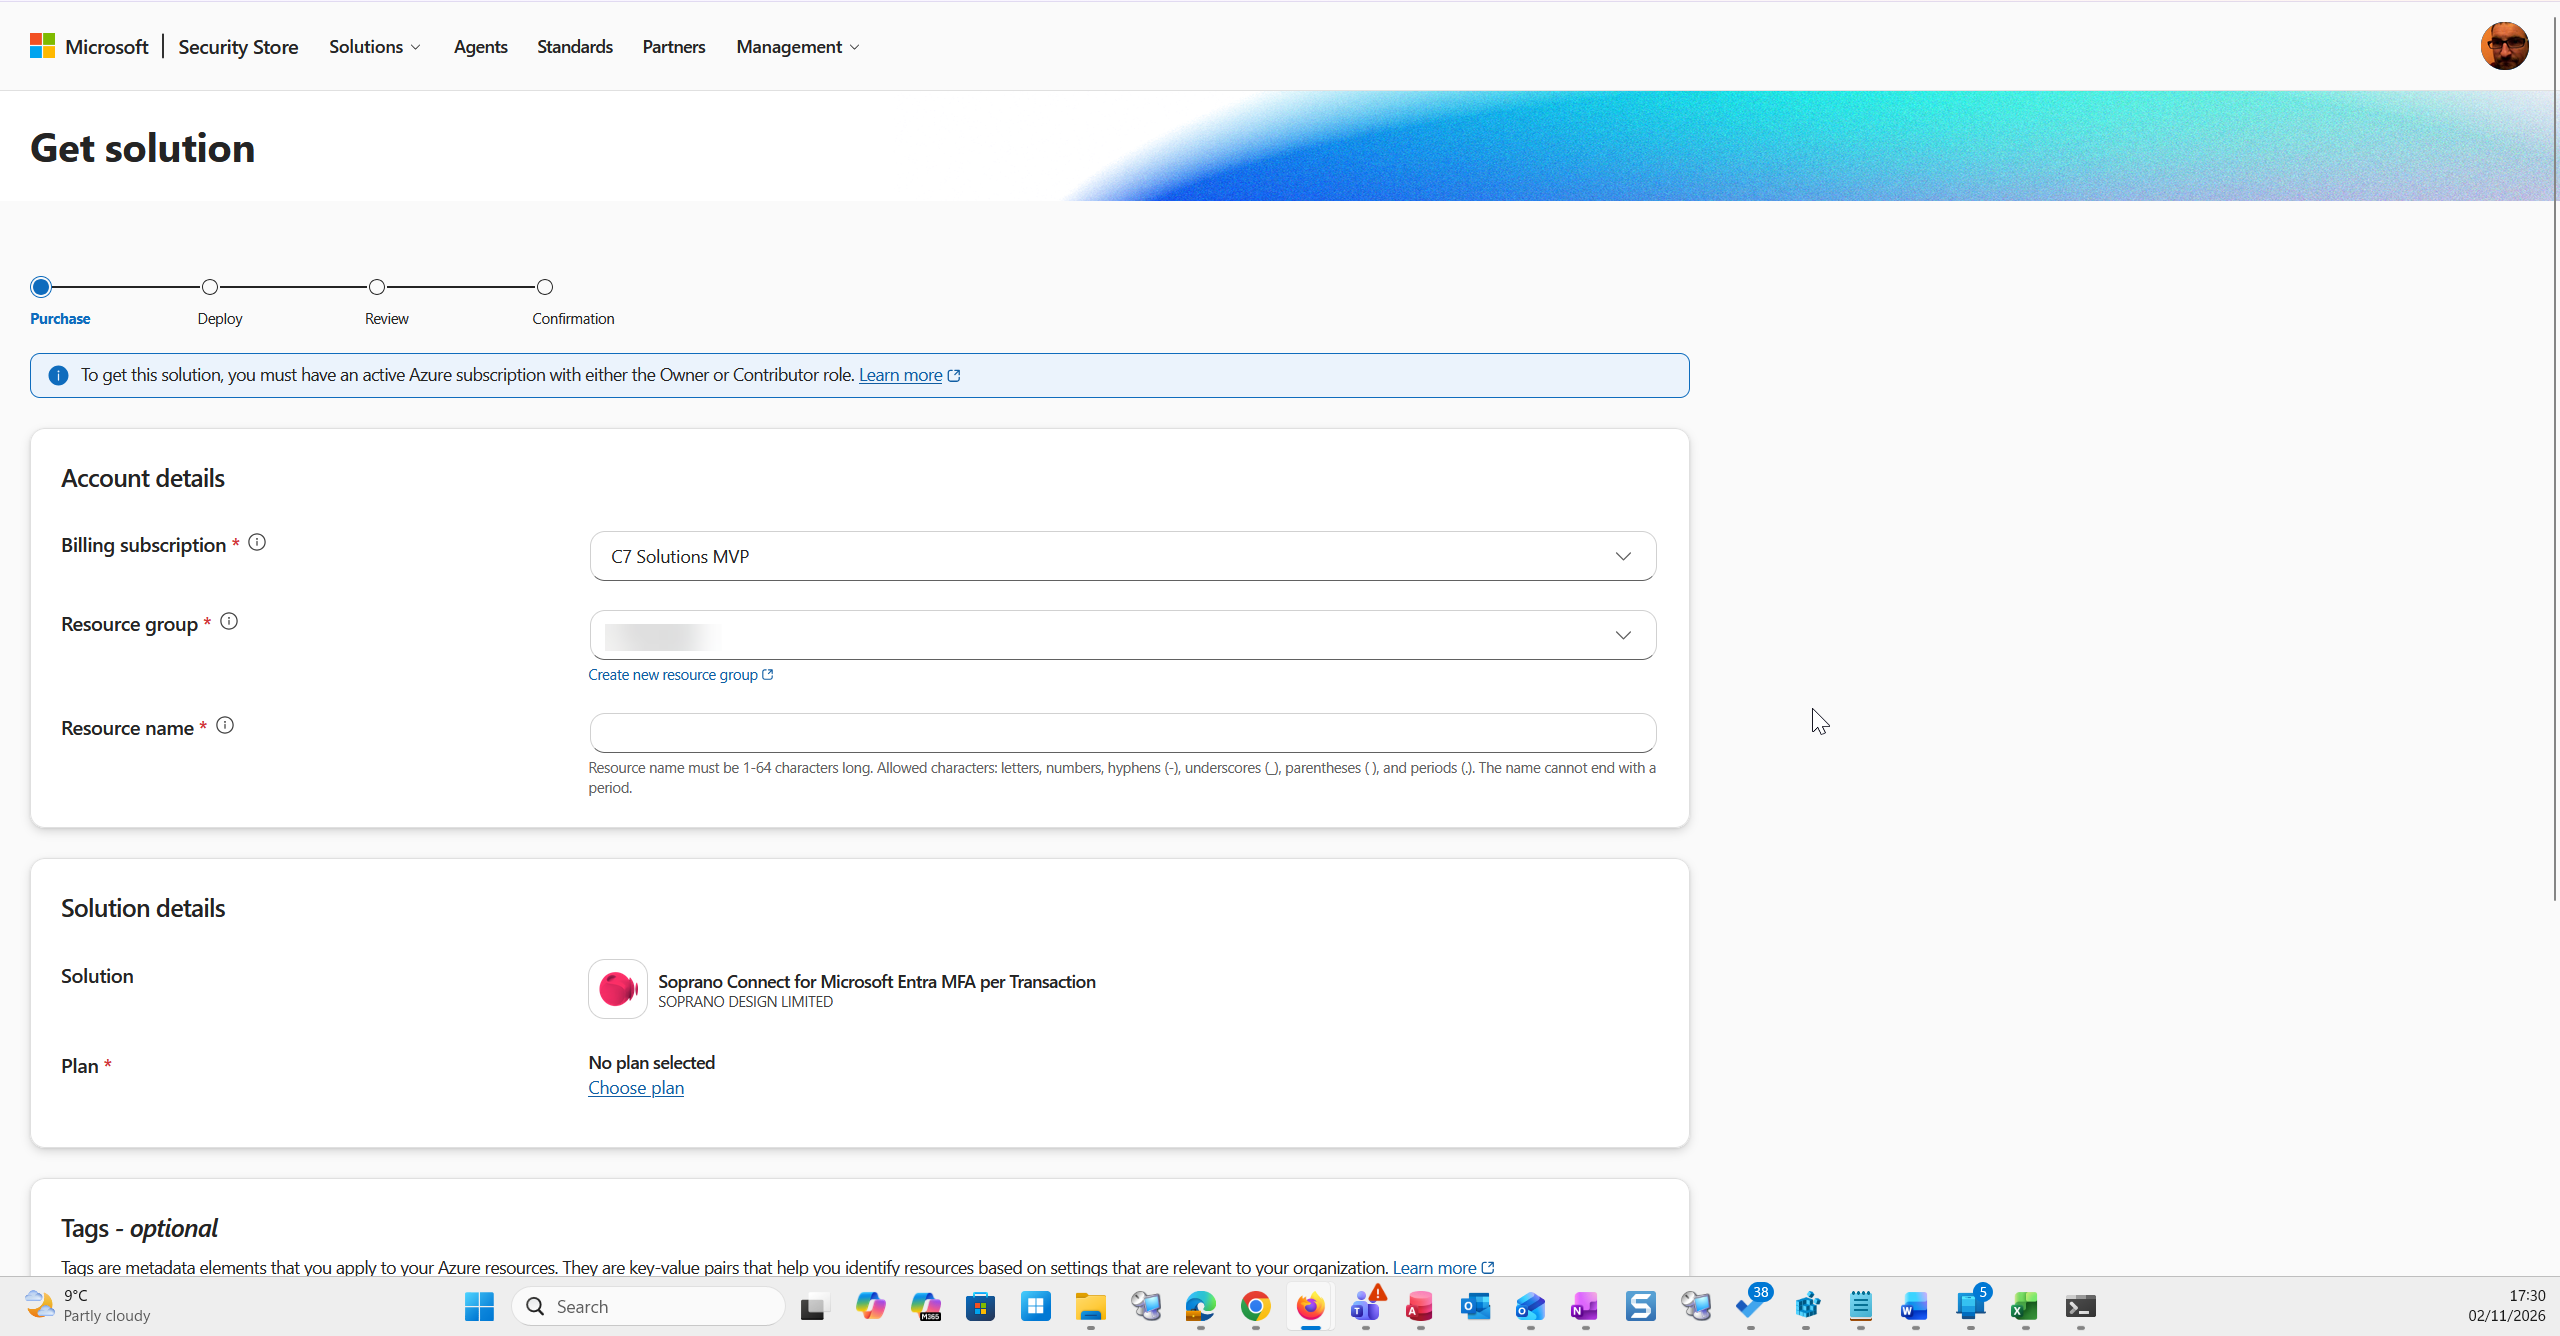
If you click “create a new resource group” then that will open another tab, do keep track of these, and allow you to choose your subscription and create a resource group. This is for the billing component. The function app, app hosting, key vault and more also need creating later via a script and that will also create a resource group, and will prefix all objects, by default, with “epp”. Keep this in mind for creating your resources now, as you have to make the billing resource group before the script is run if you follow the guidance steps and then the script creates a second resource group:
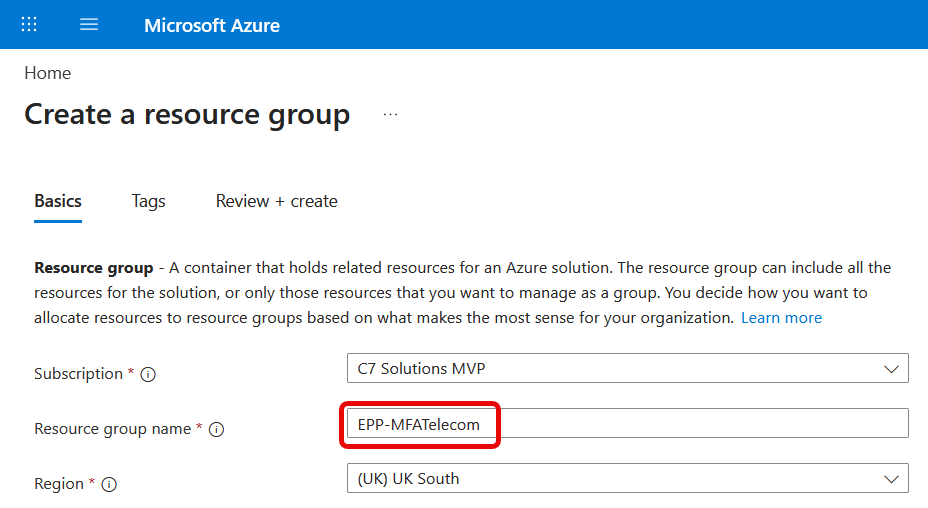
If you create a new resource group you can then keep the Azure tab open as you will need it soon, but back on the Microsoft Security Store tab you will need to refresh the page to pick up the new resource group you have just created. Enter a resource name for the billing object and pick the plan you wat from your chosen solution. Add any Azure tags you need and click Next:
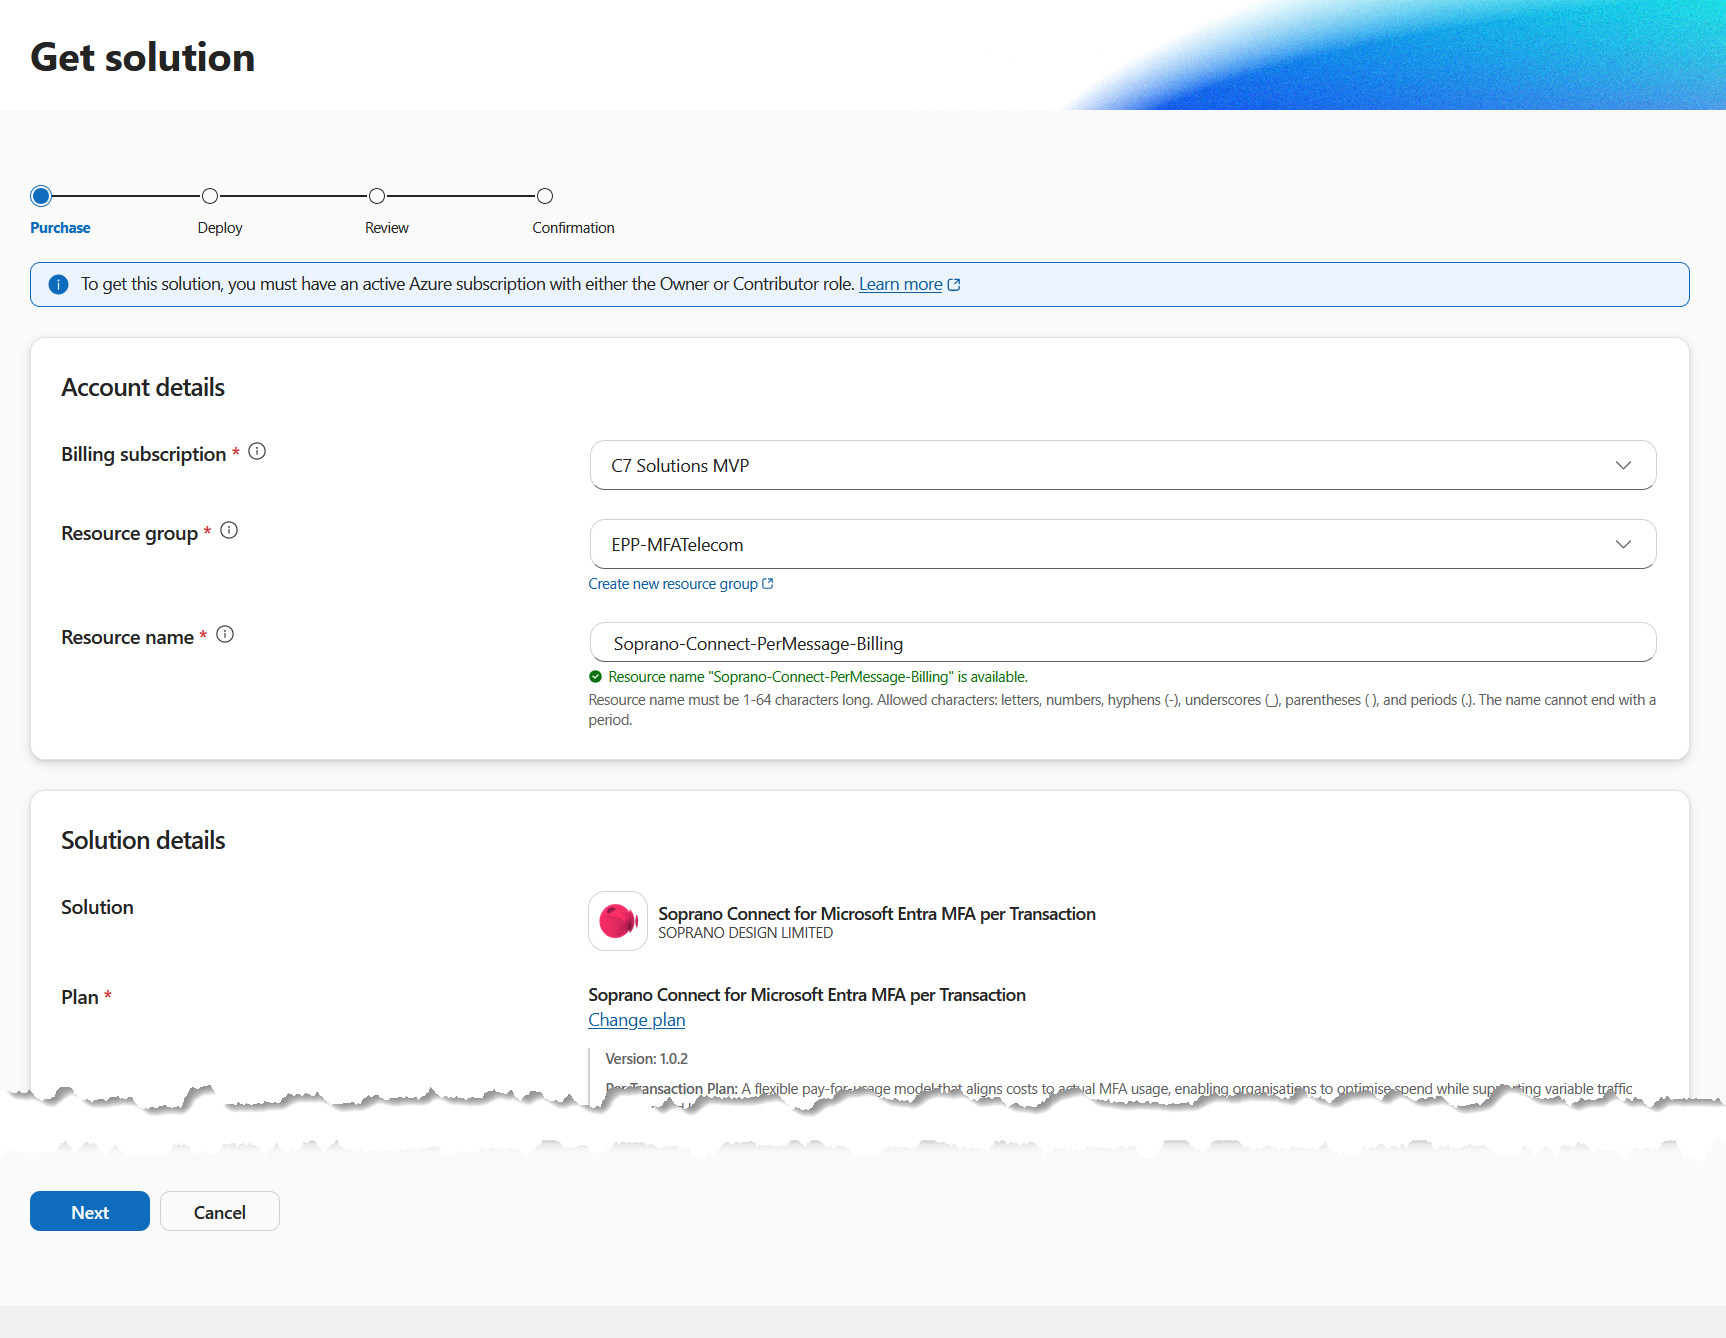
The Deploy page is just a confirmation of the last page, so click Next, and the Review page is just another confirmation! Place your order here:
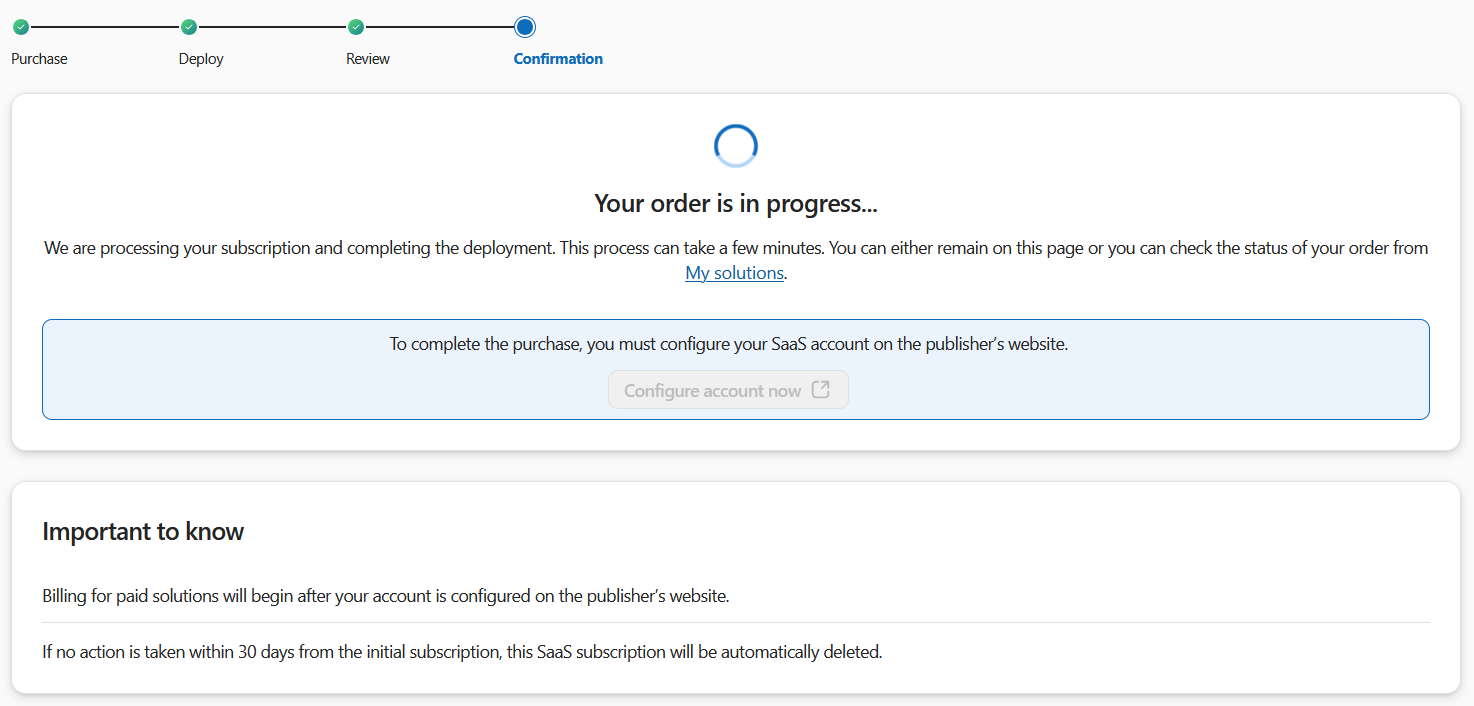
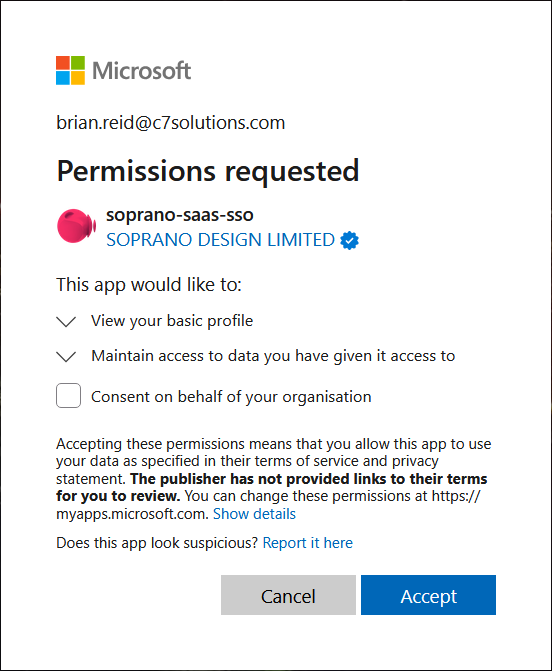
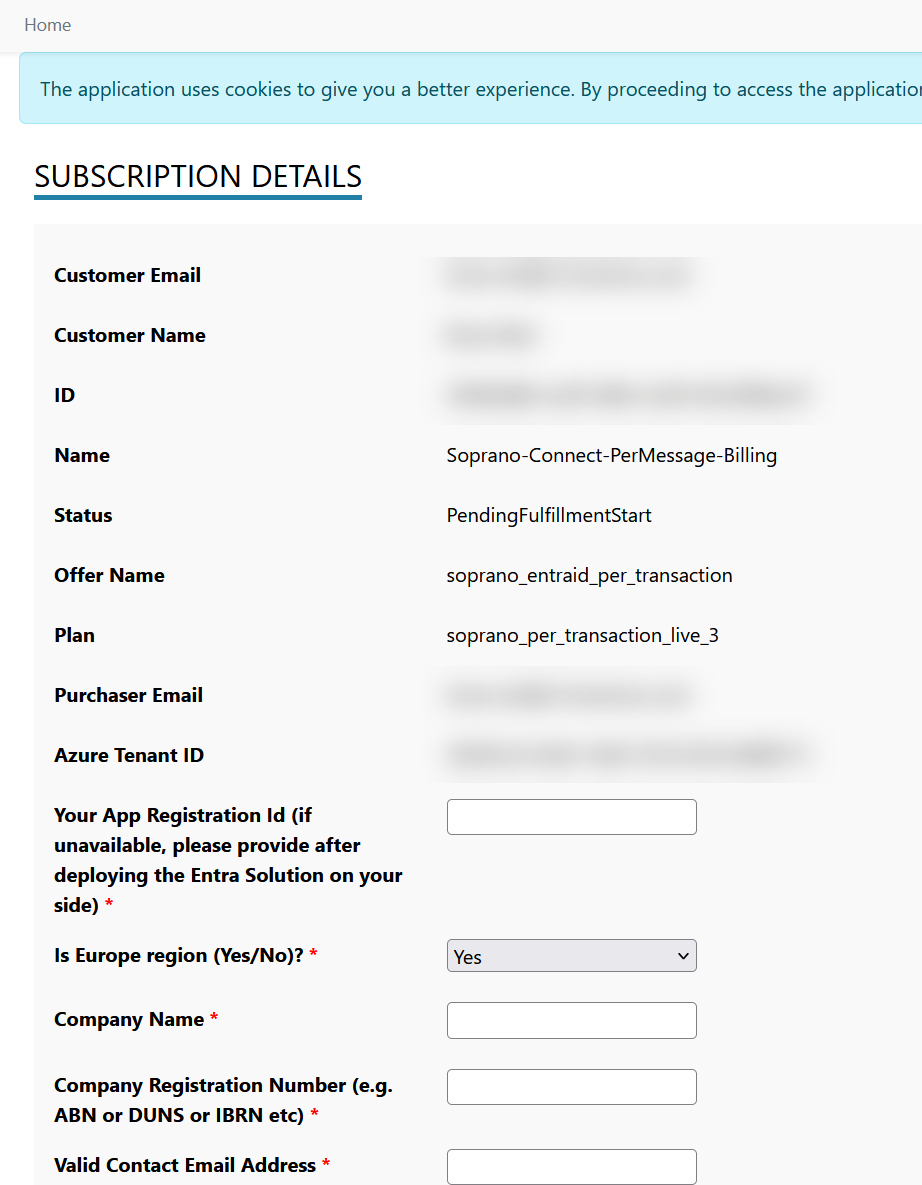
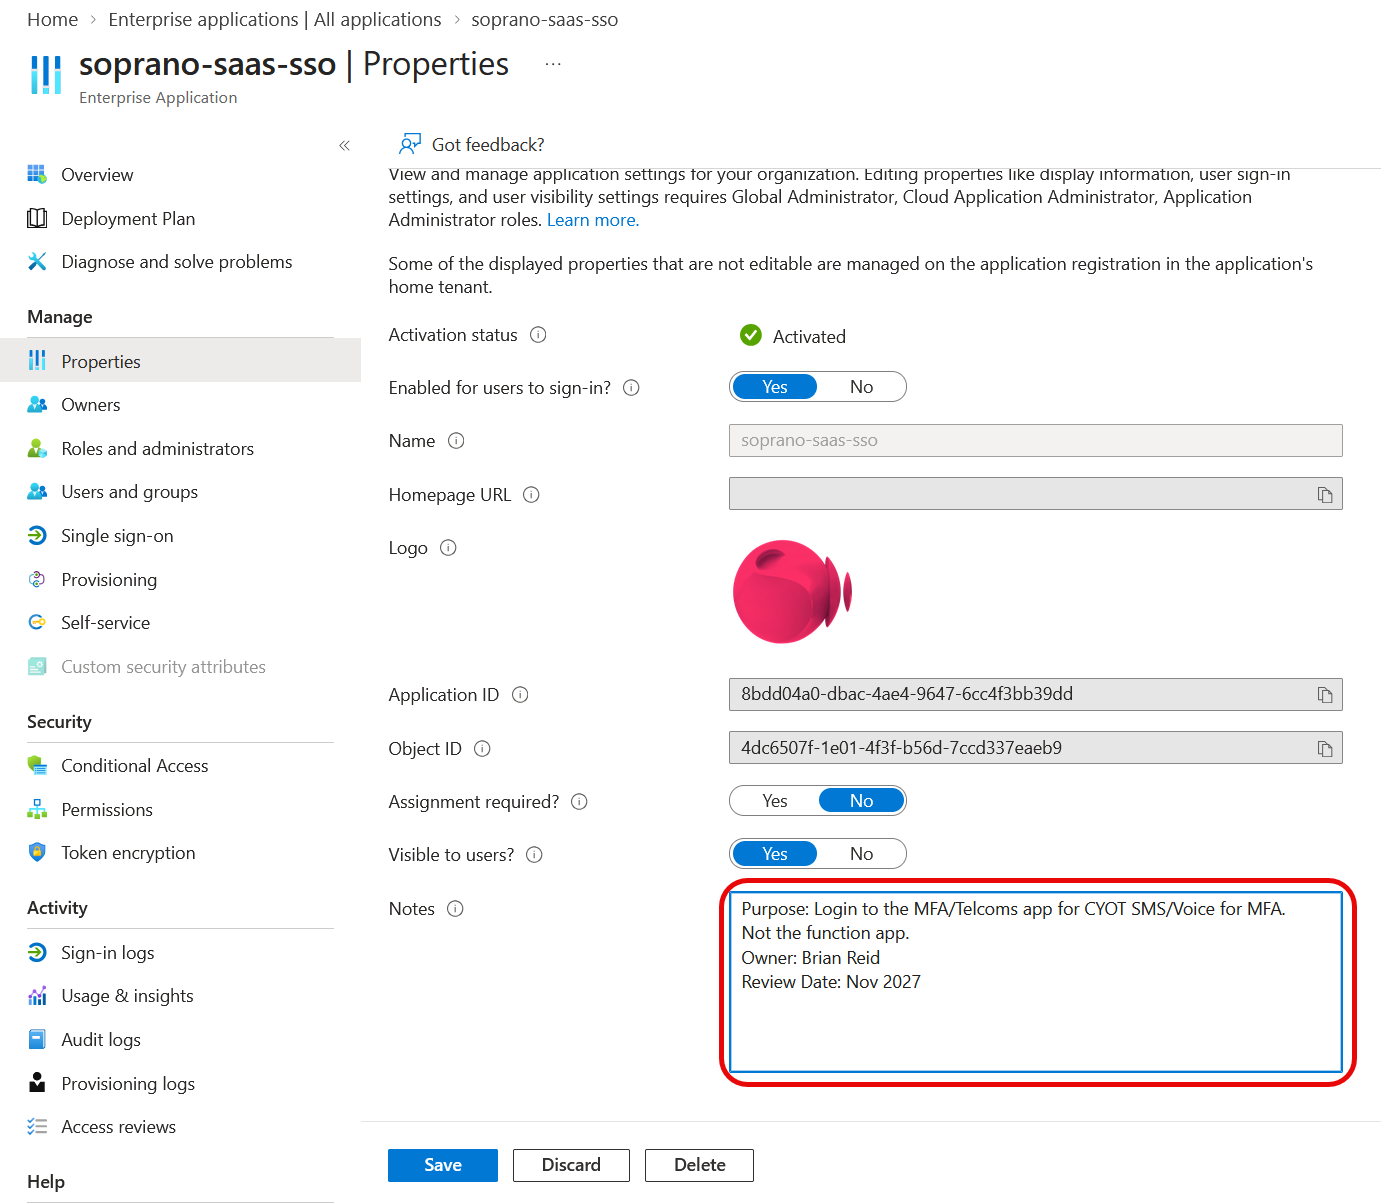
To configure your account you need to click the Configure account now button and this opens another tab and asks you to consent permissions for the service sign-in application. This is not the function app/Enterprise app that will be created later, so you will have two Enterprise apps for this service. I always recommend making notes in the Enterprise app for what they are used for, so that you can do good governance on these apps. The following three images are the app consent (not required for all users, so don’t consent on behalf of the organization) and the company sign-up page for your chosen provider – for me here I need some company info such as D&B number and the App Registration ID. Note that this is not the application just created, but is the application to be created via the script that we will come to next! The final image is the just created Enterprise App and adding a record of why it was created and who is responsible for it:
Now its time to deploy the function app and associated Azure components for this to work. Entra ID will call the function app, and authenticate to it, and the app will communicate with the telecoms provider. This function app is JavaScript by default but could be Python or C#.
You deploy these components by downloading a script from GitHub and running that script in Azure. This needs Az PowerShell, and that can be easily started from Azure Cloud Shell. This is found on the top row of the Azure portal once you have signed in (https://portal.azure.com):

Start the Cloud Shell and then in another tab review the instructions for the script at GitHub: https://github.com/Azure-Samples/ExternalPhoneProvider-AzureFunction-Sample/blob/main/docs/GETTING-STARTED.md
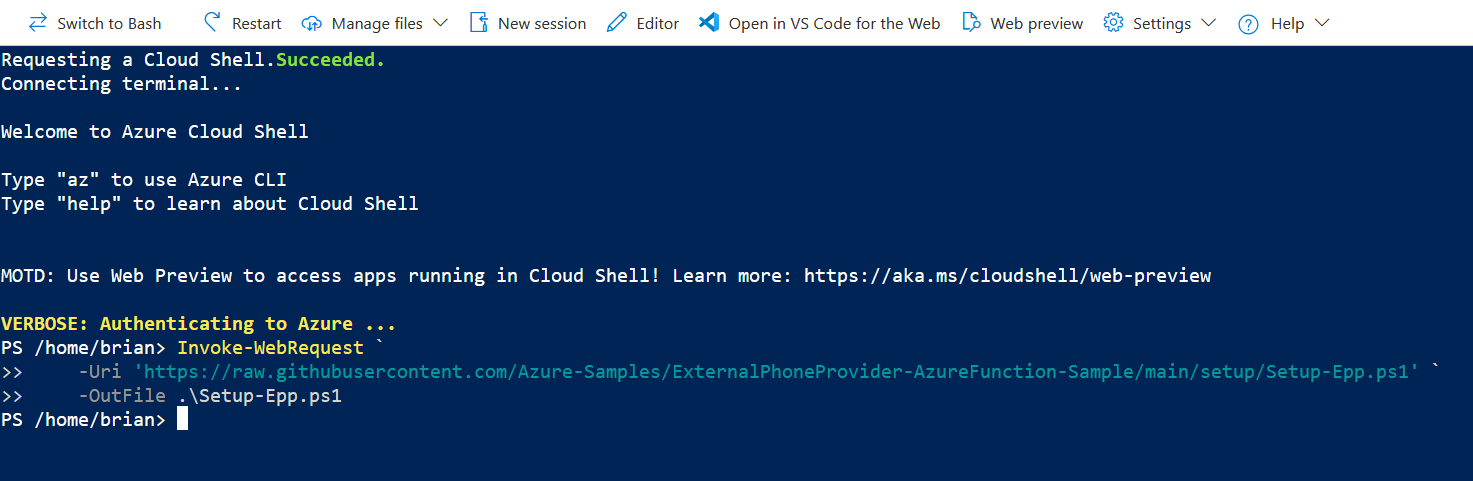
If you have never used Cloud Shell before, it will ask if you want to create storage to keep the session persistent. This is not necessary for this script, though you must keep a copy of all the output at the end of the script as this information is needed for the Landing Page tab for configuring your chosen provider.
Run the following two lines in Cloud Shell:
Invoke-WebRequest `
    -Uri 'https://raw.githubusercontent.com/Azure-Samples/ExternalPhoneProvider-AzureFunction-Sample/main/setup/Setup-Epp.ps1' `
    -OutFile .\Setup-Epp.ps1

.\Setup-Epp.ps1
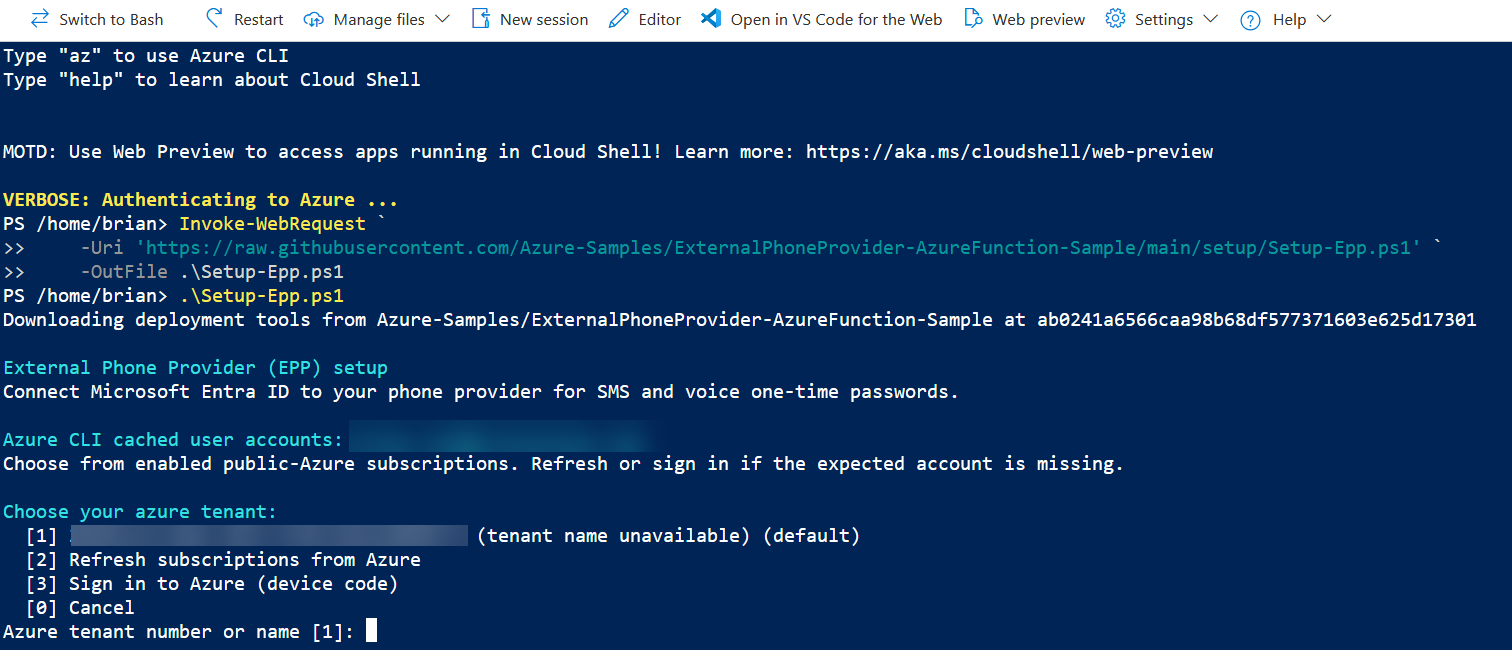
The script prompts for all choices. Here is what I chose:
- 1 (to deploy in my tenant, tenant ID listed)
- 1 (to deploy in my default subscription, also listed but not shown here)
- 13 (last option) to create a new application (default), or pick one from a list if it is already created and you are running the script again.
- “EPP Application” means nothing to me, so I changed it to “EPP Entra MFA Telecoms App”
- EU was listed next for me, but I want to deploy in Azure region UKSouth, so I picked option 10 and entered uksouth. The script pointed out this was not in the EU! I know!!!
- Provider Name: Soprano
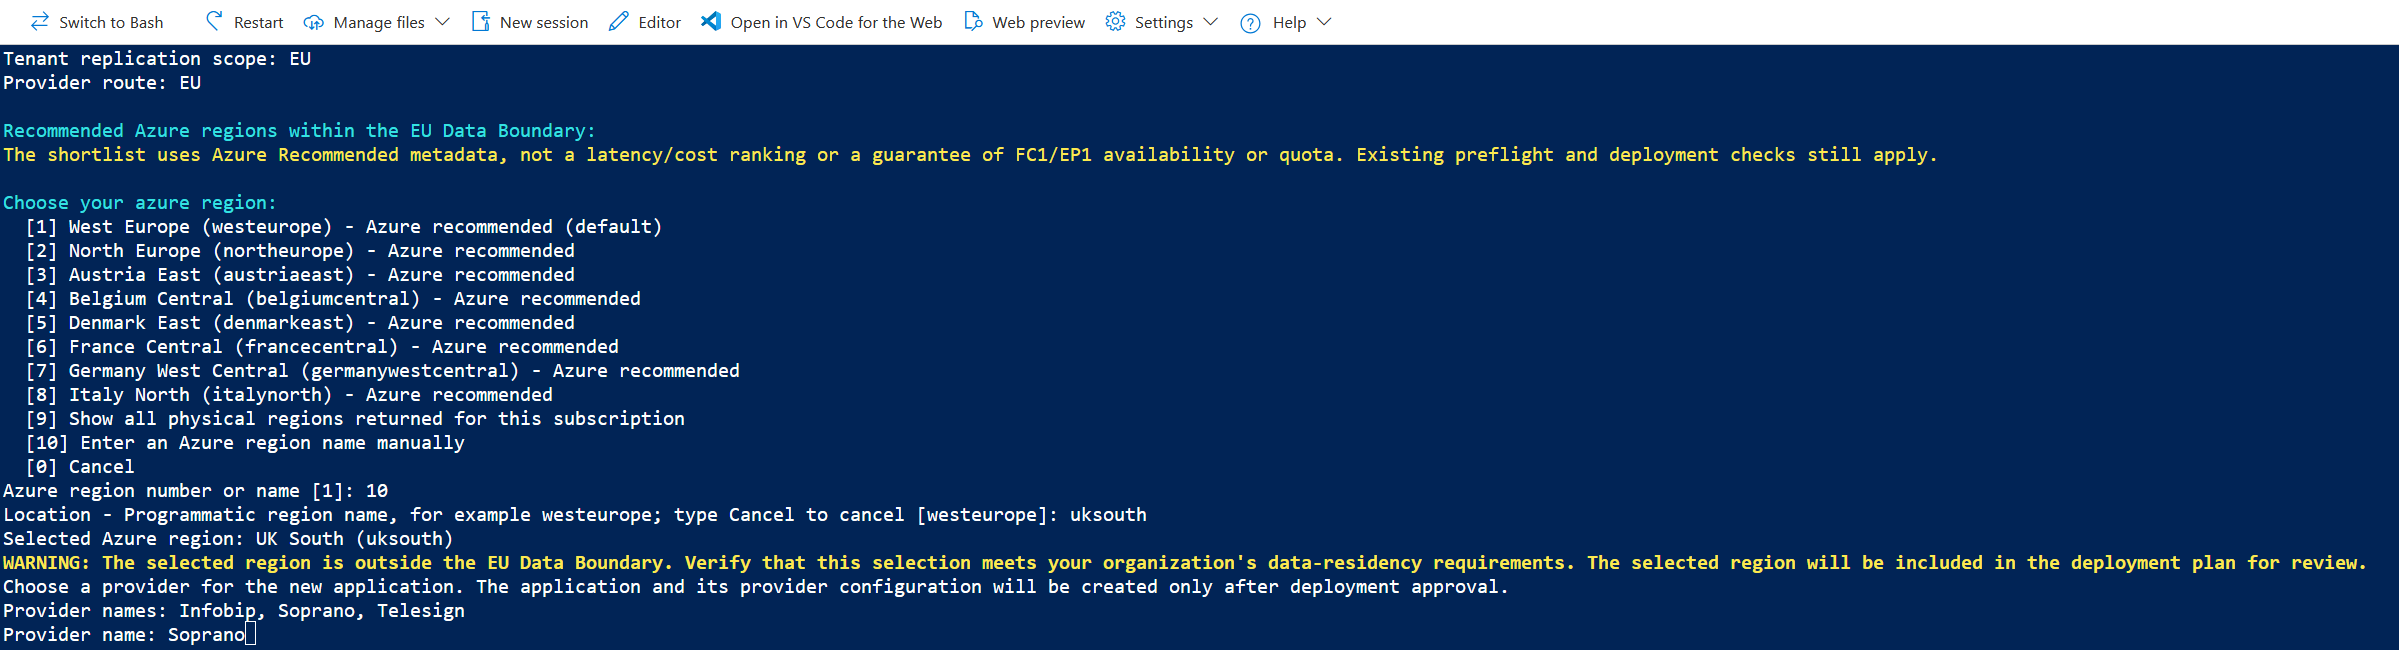
- 1: Flex Consumption (so the Azure resources cost about $1 a month, but not ideal for production solutions as they are cold start).
- Resource Name Prefix: epp is suggested, but as I created a billing resource group called “EPP-MFATelecom” earlier, I am going to set something similar to that as the prefix (note that still means two resource groups are created for this project). The prefix must be lowercase and between 2-8 characters: eppmfa
- Install Azure CLI Bicep: Yes
Once all the steps are completed you are asked to confirm. Nothing is created until you confirm. There is also a lot of text returned to the console. I recommend you copy all this and save the notes with your project resources.
For example, in the output will be the SMS and Voice endpoint for the app, the resources that will be created and the namespaces registered in Azure. You will also be told how the Enterprise App is secured to yours and the providers tenant, and that the function app will allow authentication only from the Microsoft phone-provider enterprise app – maybe that is what EPP is “Enterprise Phone Provider”??
Enter Yes to start the deployment. By default this will create a new resource group called “epp-epp-rg-<app-id-hash>”. Though the script command line supports a number of options, setting the resource group name entirely is not an option.

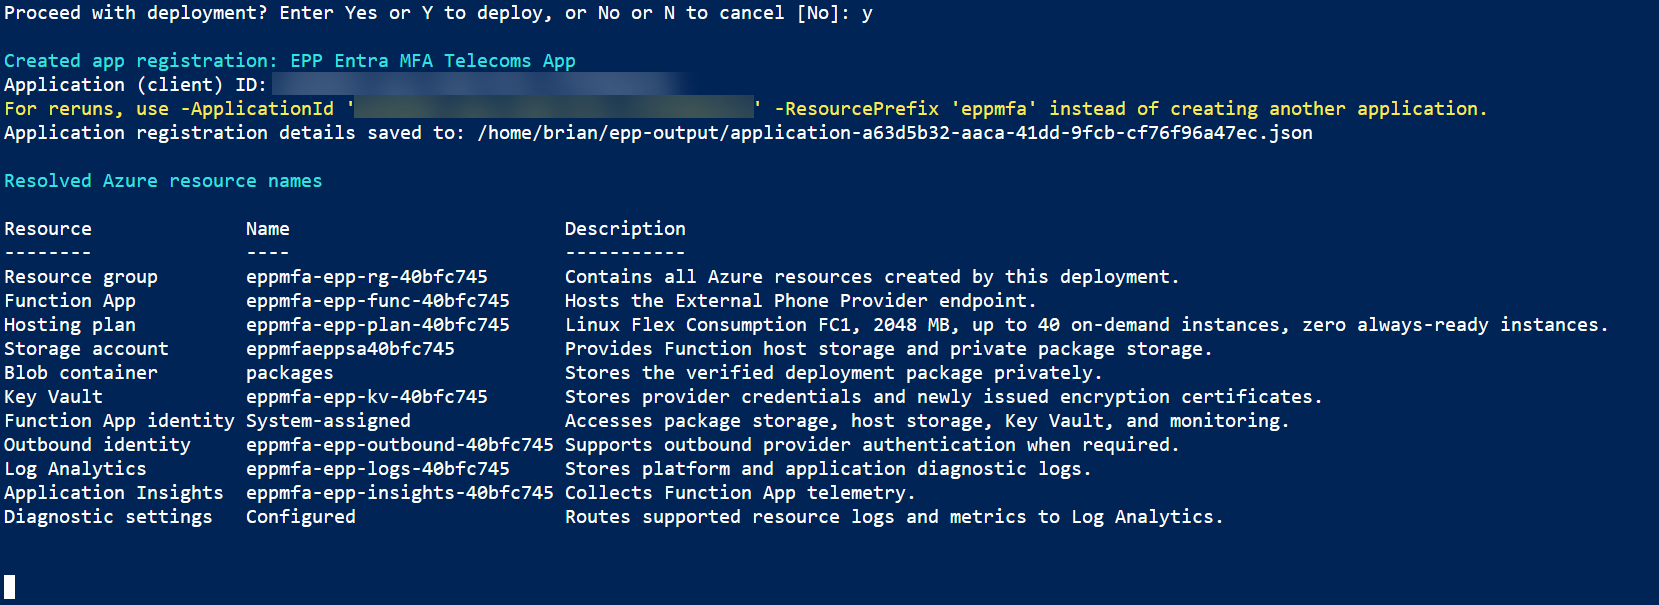
Note that at the top of the output it says that if you run the script again you need to include the ApplicationID and the ResourcePrefix as parameters of the script. If the script completed, there will be a certificate as well, so CertificateAction Reuse should be used.
.\Setup-Epp.ps1 -ApplicationId 'xxxxxxxx-xxxx-xxxx-xxxx-xxxxxxxxxxxx' -ResourcePrefix 'xxx' -CertificateAction Reuse
Deployment will take several minutes, so keep the cloud shell session open and do not walk away, as the session can expire and close down and loose the information you need to keep.
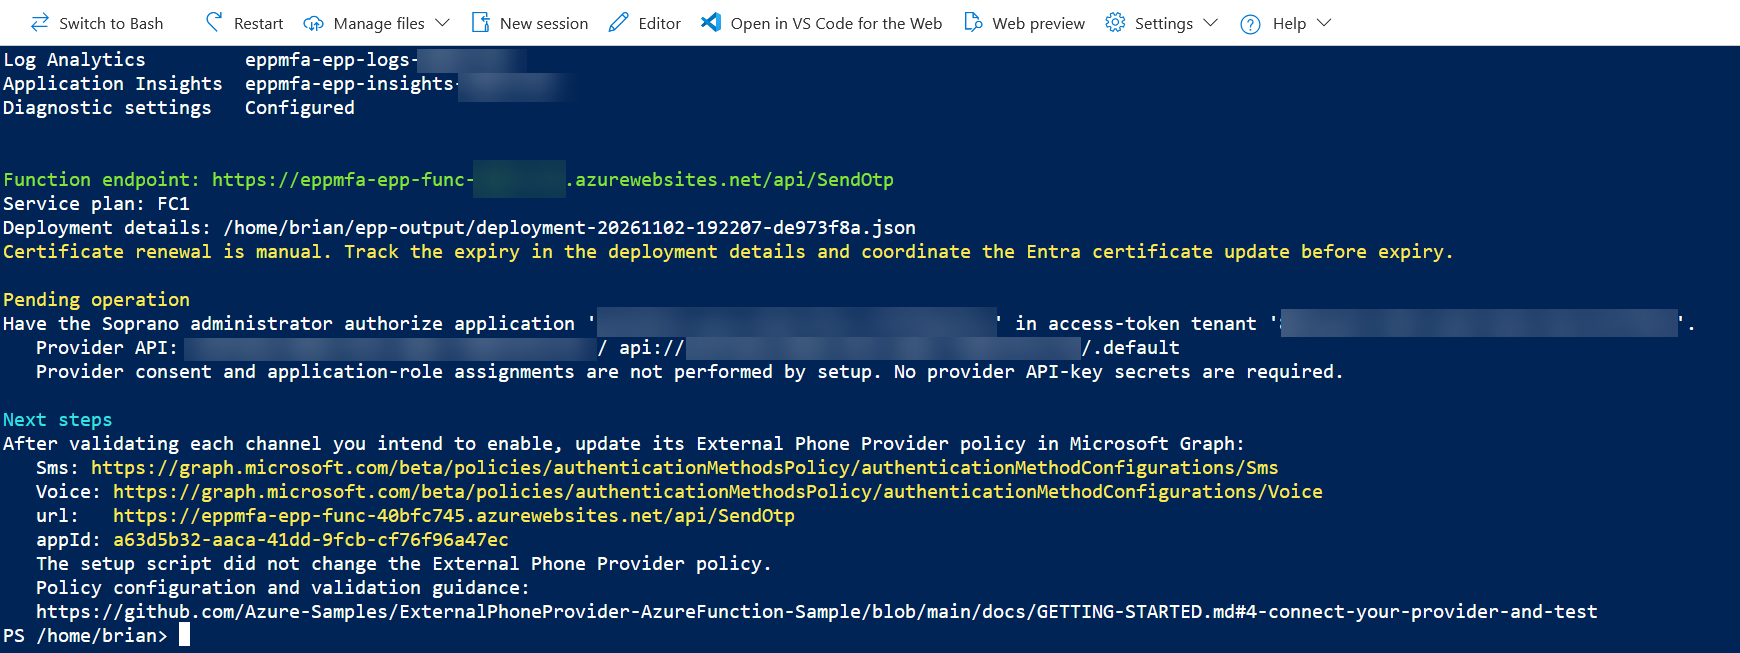
From this information, which if you have storage enabled for the Cloud Shell will be saved to a json file, you need to get the Application ID. This is displayed on the line that reads:
Have the Soprano administrator authorize application ‘xxxxxxxx-xxxx-xxxx-xxxx-xxxxxxxxxxxx’ in access-token tenant ‘provider-tenant-id‘. This is the application ID of the Enterprise App just created by the script, the one that defaults to EPP Application, but in my example I called “EPP Entra MFA Telecoms App”
This Application ID guid is needed on the Landing Page tab. This is where you enter your company name, info, registration info etc. Fill in all the defaults and click Subscribe on the landing page. Depending upon time gone by, you might need to refresh this page if it does not do anything when clicking Subscribe
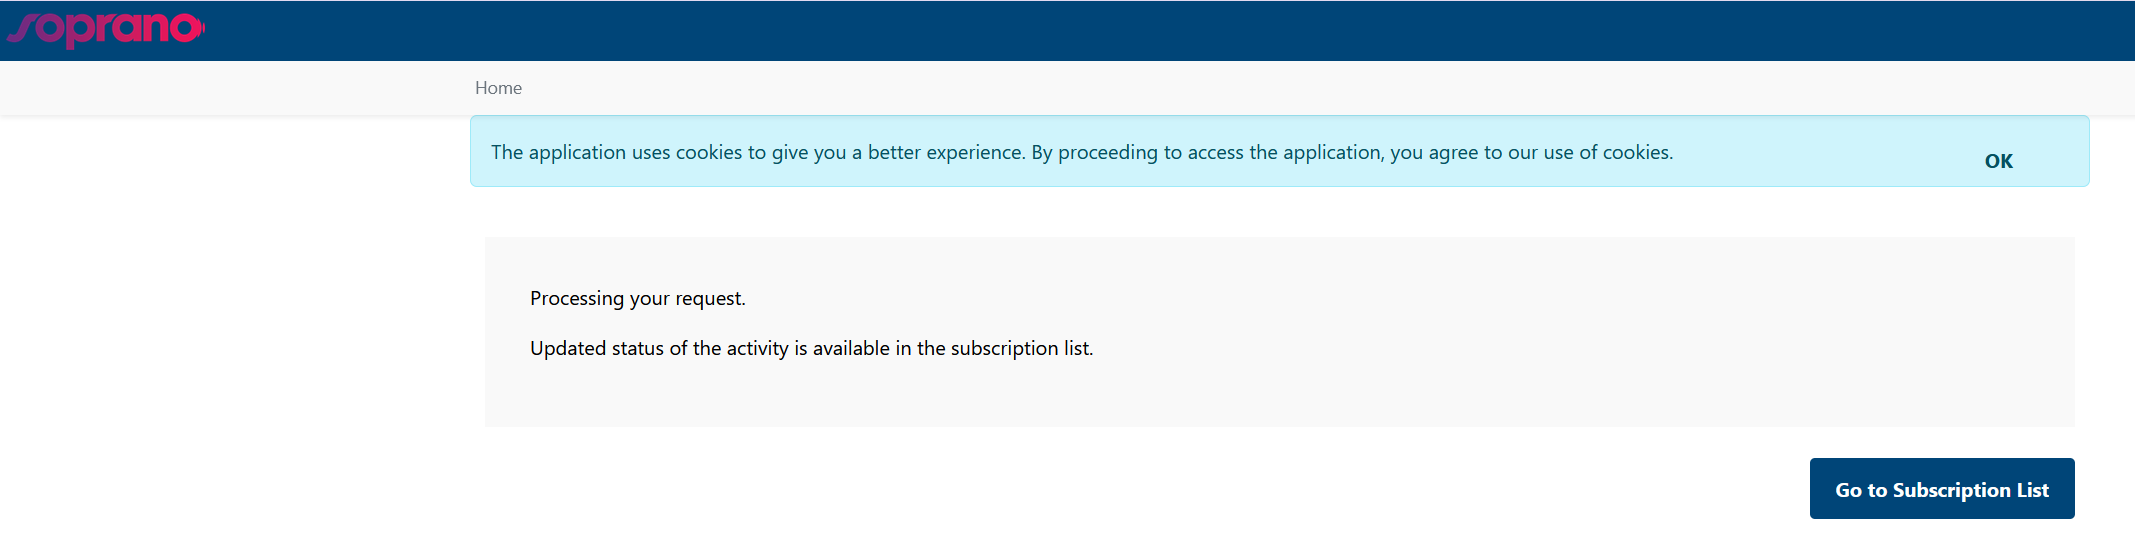
You are now waiting for your telecoms provider to register your application in their tenant, and presumably to set up other configuration they need. This may take a while!
To check the status of the provider registration you need to go back to the first tab in the browser that you opened – the Entra Admin Portal. This should be still on the “Set up an SMS and voice provider” page (the link from the Authentication Methods page. Here is where you previously pressed the “Get solution” button. This time, press “Select” for your chosen solution and click Save. This now moves the first page to Step 2 of 3. Now we have already done Step 2, it was the script from GitHub and the creation of the resources in Entra and Azure. So back on the first page in the Entra portal, select your Azure subscription and scroll down the “Set up the provider integration” flyout:
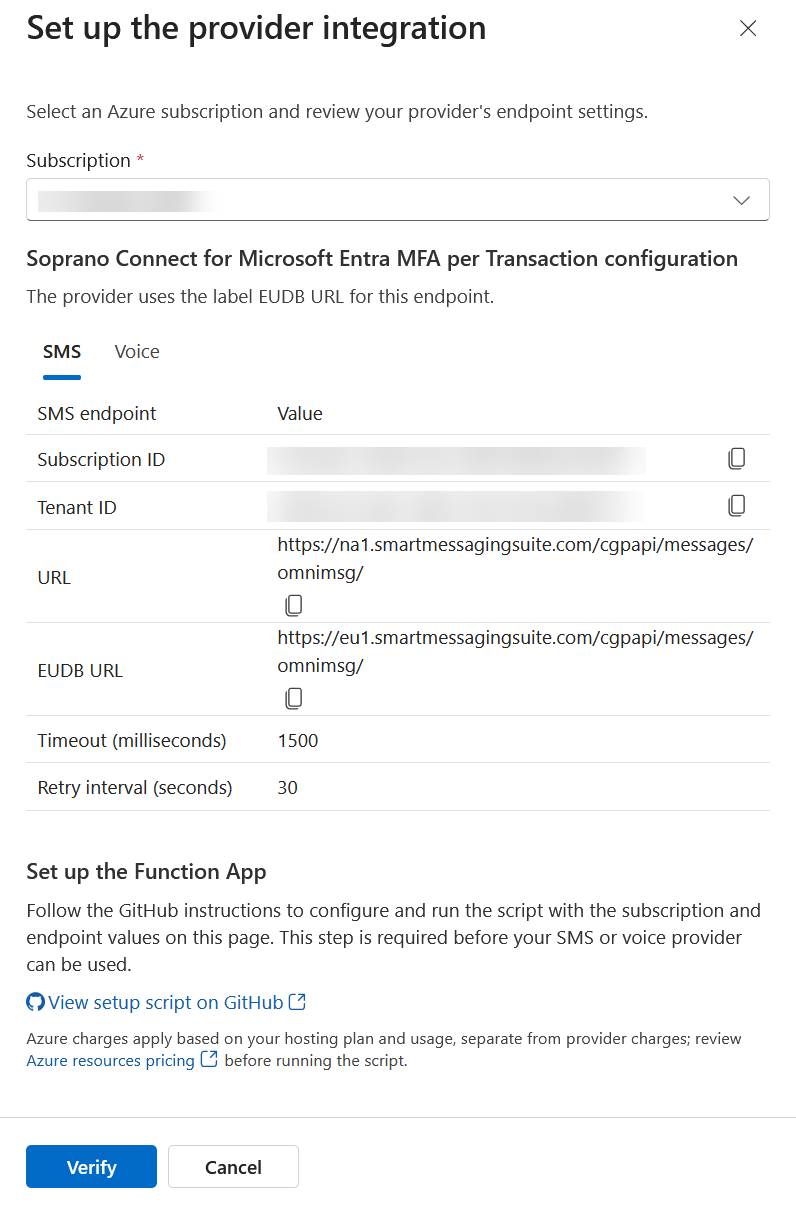
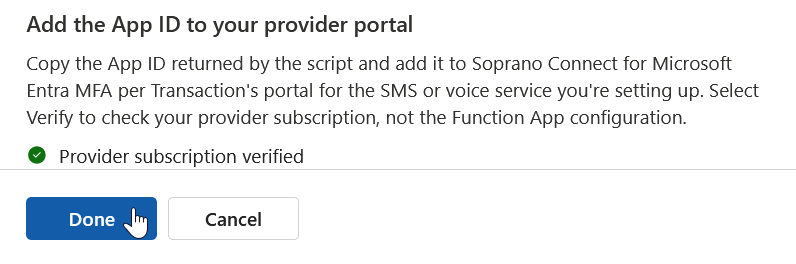
Click Verify. If you have waited long enough and the provider has done their configuration, the button should change to Done, and the message “Provider subscription verified” appears. I waited overnight for this change to take effect.
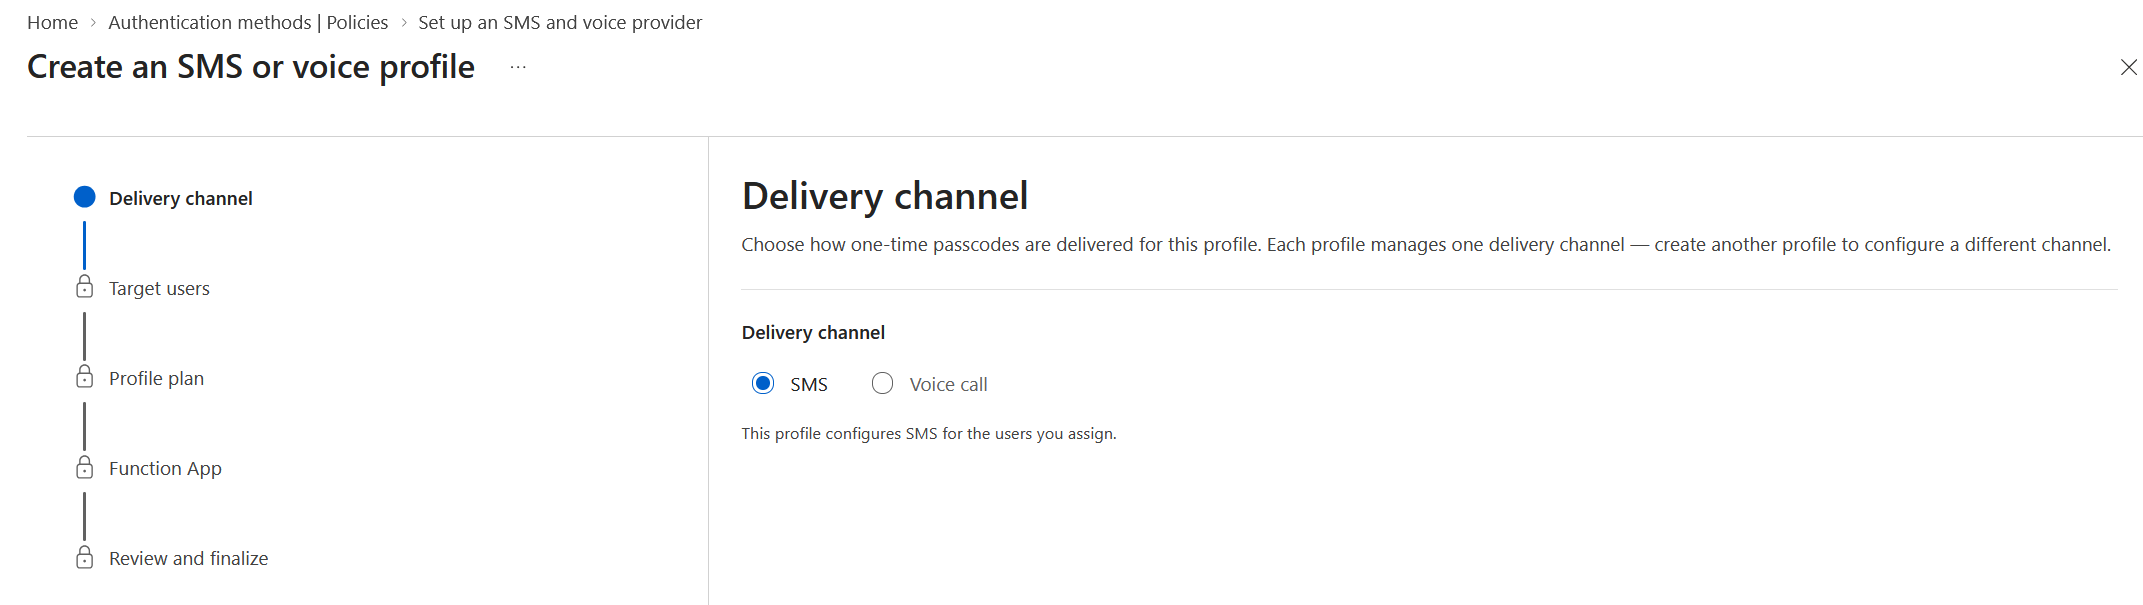
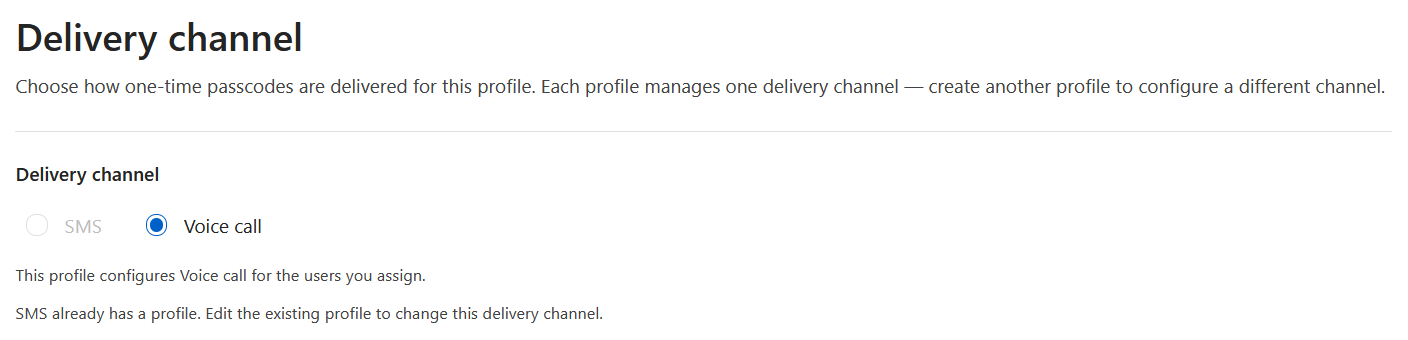
Now it is time to start Step 3 – “Create an SMS or voice profile”. Click on row #3 and the “Delivery Channel” page appears. Choose SMS or Voice:
Microsoft automatically carries over the users that had the SMS or voice method under Microsoft’s authentication policies, though you can edit this list to you can test the solution with selected users rather than all previous SMS or voice users. You will eventually return to this same list or group, but for now click Edit. In the below screenshot you can see the group I was previously assigning SMS Authentication Method to:
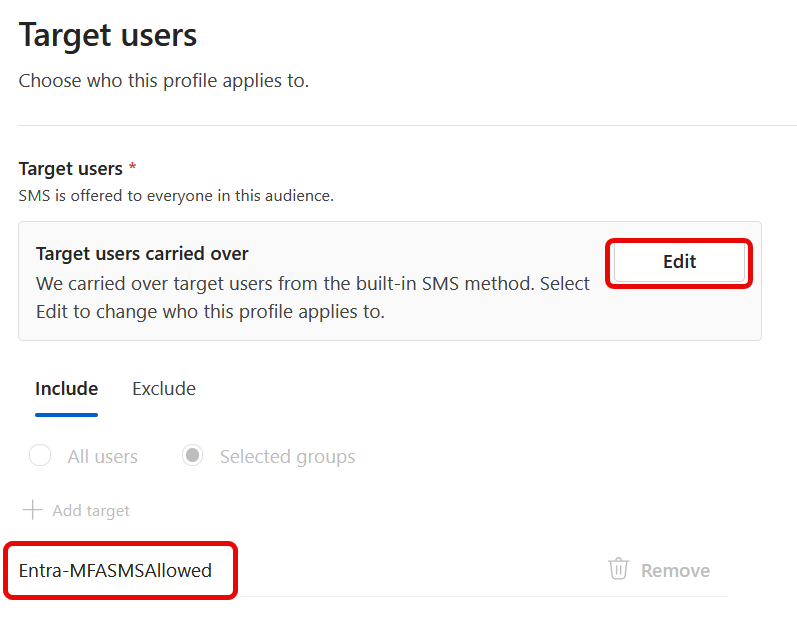
I recommend that you do not change this group assignment. At the end of this process the Microsoft built-in SMS (or Voice) method will be removed and replaced with a new External method. The new method defaults to Evaluation mode and a set percentage of requests – all other requests are still routed via Microsoft SMS channel. If you change the group here to an evaluation or pilot group, then all your other SMS users will be unable to use SMS as they will not be covered by the new Authentication Method policy.
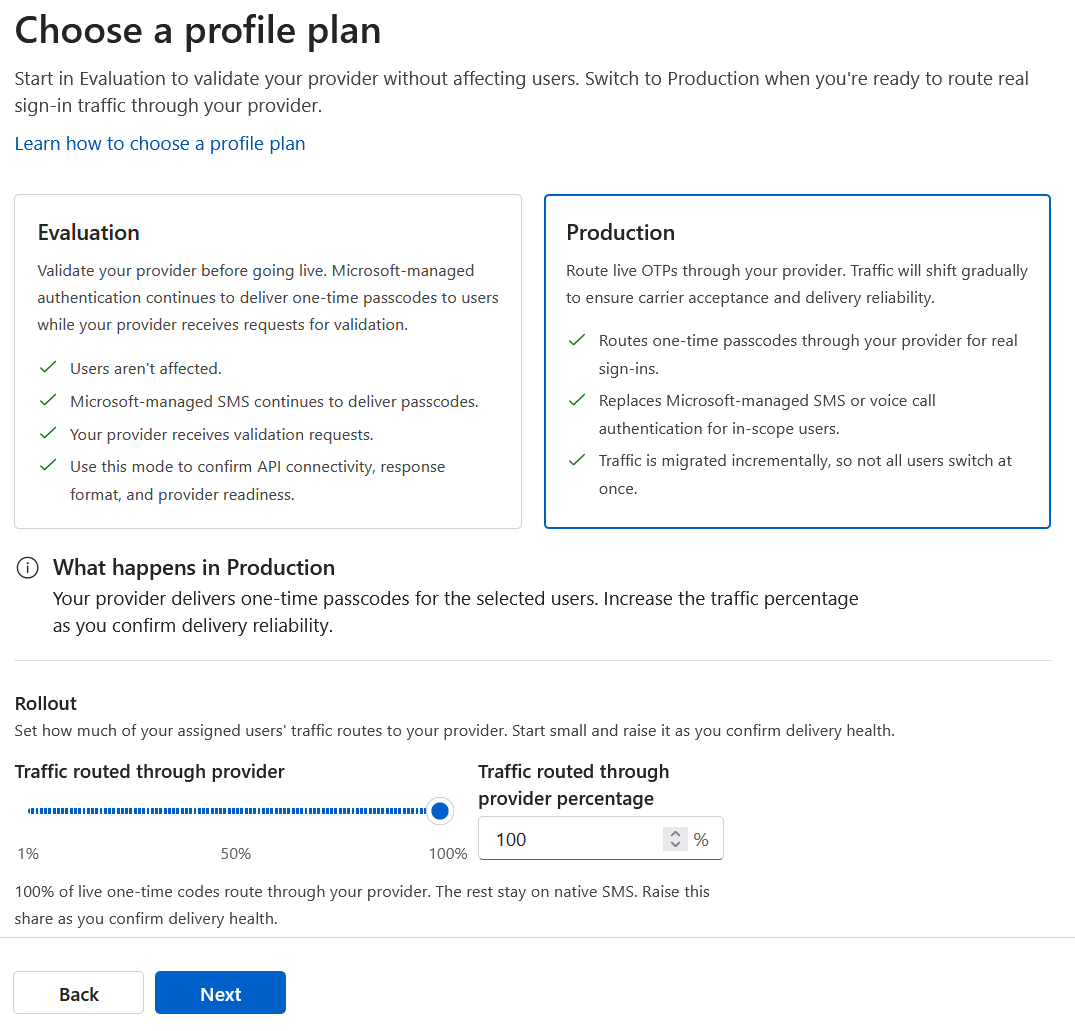
On the “Choose a profile plan” page you can opt for Evaluation or Production mode. Evaluation keeps using Microsoft Entra SMS and not your new provider, but will send a percentage of requests to the provider. The provider will not send an SMS (or voice call) in Evaluation mode. You check that the system is working by reviewing logs and Function App activity, then increase the percentage and then move to “Production” mode once you are happy.
Production mode will send SMS requests through your new provider, but as with Evaluation mode, will only send the selected percentage. The remainder of the requests remain with native SMS provided through Entra ID.
In my example as I had only one user in the group, I moved immediately to Production and 100%:
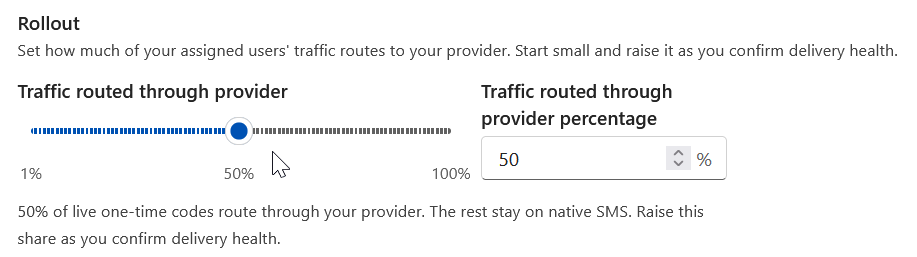
In a production environment, you might end up here: 50%
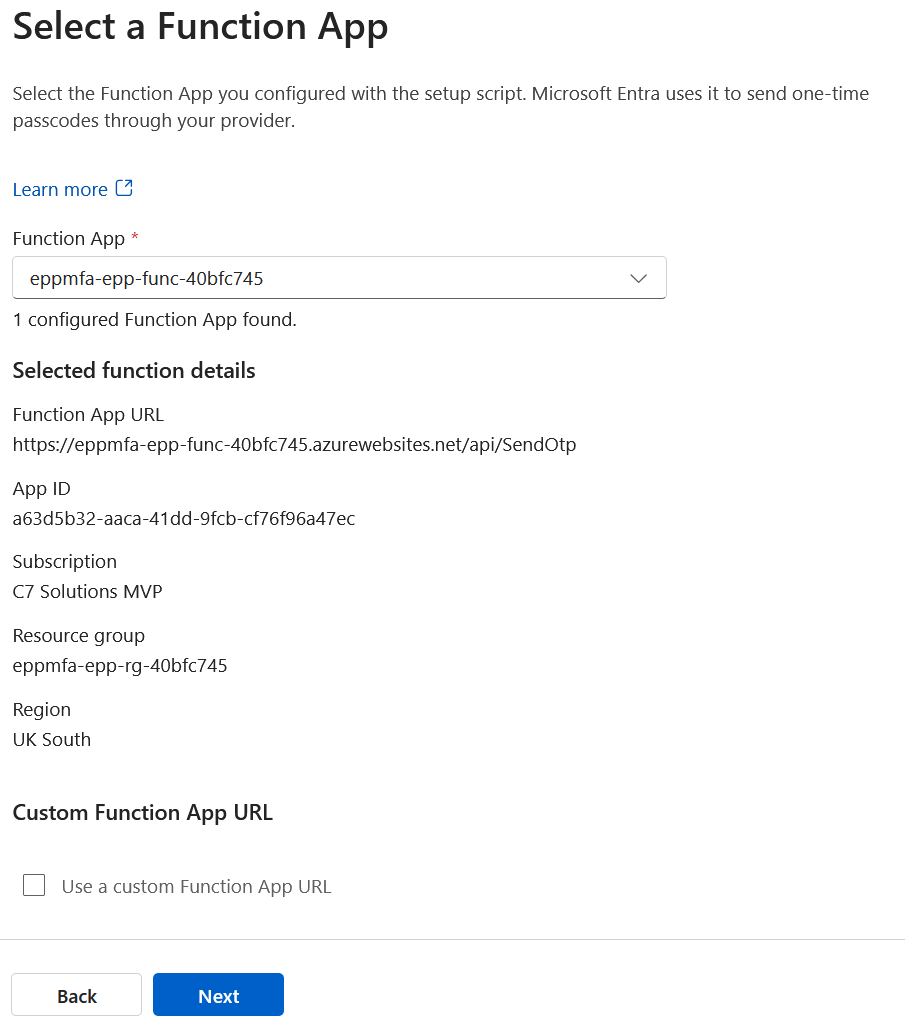
On the last page of the “Create an SMS or voice profile” wizard choose the Function App that the script created for you earlier (yesterday!). This function app will start with the resource prefix, which defaults to “epp”. Entra will send SMS or Voice requests to the URL of the function app, authenticated as coming from the Enterprise App created earlier. The function app will route the request to the provider who will open the telephony channel and call you (for voice MFA) or send the text message:
Anyone else attempting to use the function app URL will get a 401 Unauthorised error. Click Next and confirm your choices and click “Create Profile”. When I did this (in Firefox browser, but maybe others) the page attempts to close before the save of the profile seems complete, but the profile was created anyway. Under your “External” authentication methods you will see SMS or Voice. You can add an additional profile for Voice, and this could optionally be with a separate telecoms providers, with it’s own function app. You can only have one provider for a single method, that is SMS can only be sent through a single provider and you cannot have multiple groups of users with separate providers:
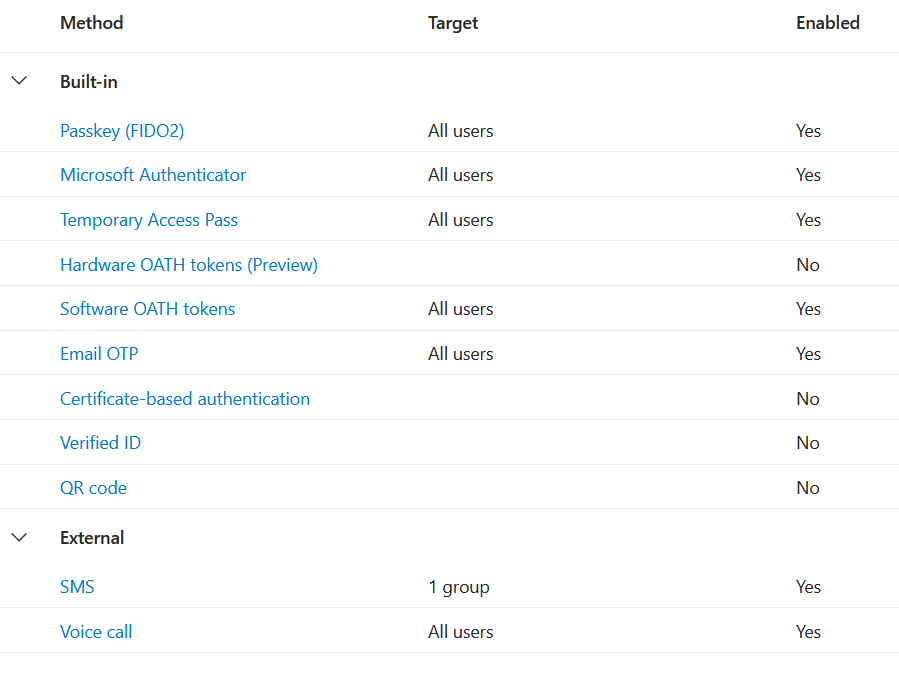
Also note that SMS has disappeared from the built-in methods on the Authentication Methods page. This is why the list of users that you are allowed to use the method should not be changed above, but instead Evaluation and the Percentage options used to move users across to the new provider.
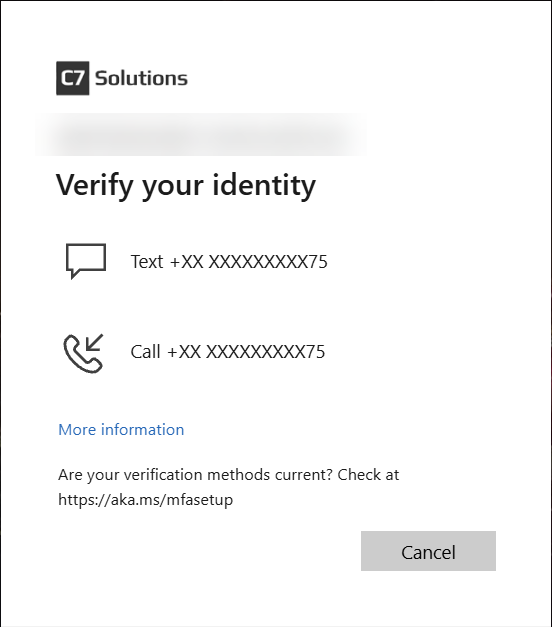
The voice calls are limited to 30 seconds, and follow a script similar to this “Hello, this is Microsoft, if you are trying to sign in press the hash key. If you are not trying to sign in press 0 and then the hash key”. (hash key translates to the pound key in the USA). Following this a six digit code will be read out twice, as voice calls require OTP codes to be entered in the login screen.
SMS messages could be delivered by RCS on Android or WhatsApp if the user has a WhatsApp account. Both of these are more secure than SMS as are both encrypted. You cannot control delivery over these methods, but Microsoft will use WhatsApp if you have an account on that phone number and if you are using Google Messager as your messaging app on Android you will get RCS messages instead of unencrypted SMS messages.
In Evaluation mode, you can view the Log Analytics Workspace in your epp-epp-rg-<hash> resource group. On the Logs tab you can select the FunctionAppLogs table and review the entries. The “Category == Function.SendOtp.User” shows your evaluation and production calls.
Leave a Reply