
Updated October 2024
Microsoft has removed Claims X-Ray from their website. If I get an answer to this tweet I might discover more. Meanwhile something similar to the below can be done using https://jwt.ms as the redirect URL.
There is a class of Enterprise App in Entra ID (previously known as Azure Active Directory) that provides SSO (Single Sign-On) for apps outside of Microsoft 365 provided by other vendors. Some of these will be very commonly used apps and others not so. For these apps to sign you into their application with your Entra ID account they federate their authentication to Entra and Entra acts and the Identity Provider (IdP) for the application. The user does not need a second identity for this application and signs in with their work or school (aka Entra ID) account.
Once signed in, Entra ID passes a sign-in token to the application that the app trusts, knows it comes from Entra, and contains information about the user and the users properties. The application reads these properties and can make decisions on what access to provide the user to their app – this is authorization and the information provided by Entra is provided as a “claim” in the token. That is, the user claims to be “Brian” and the belong to these groups x, y and z and there are other properties that can be sent in the claim such as country, department, job title and anything else that you store in Entra ID.
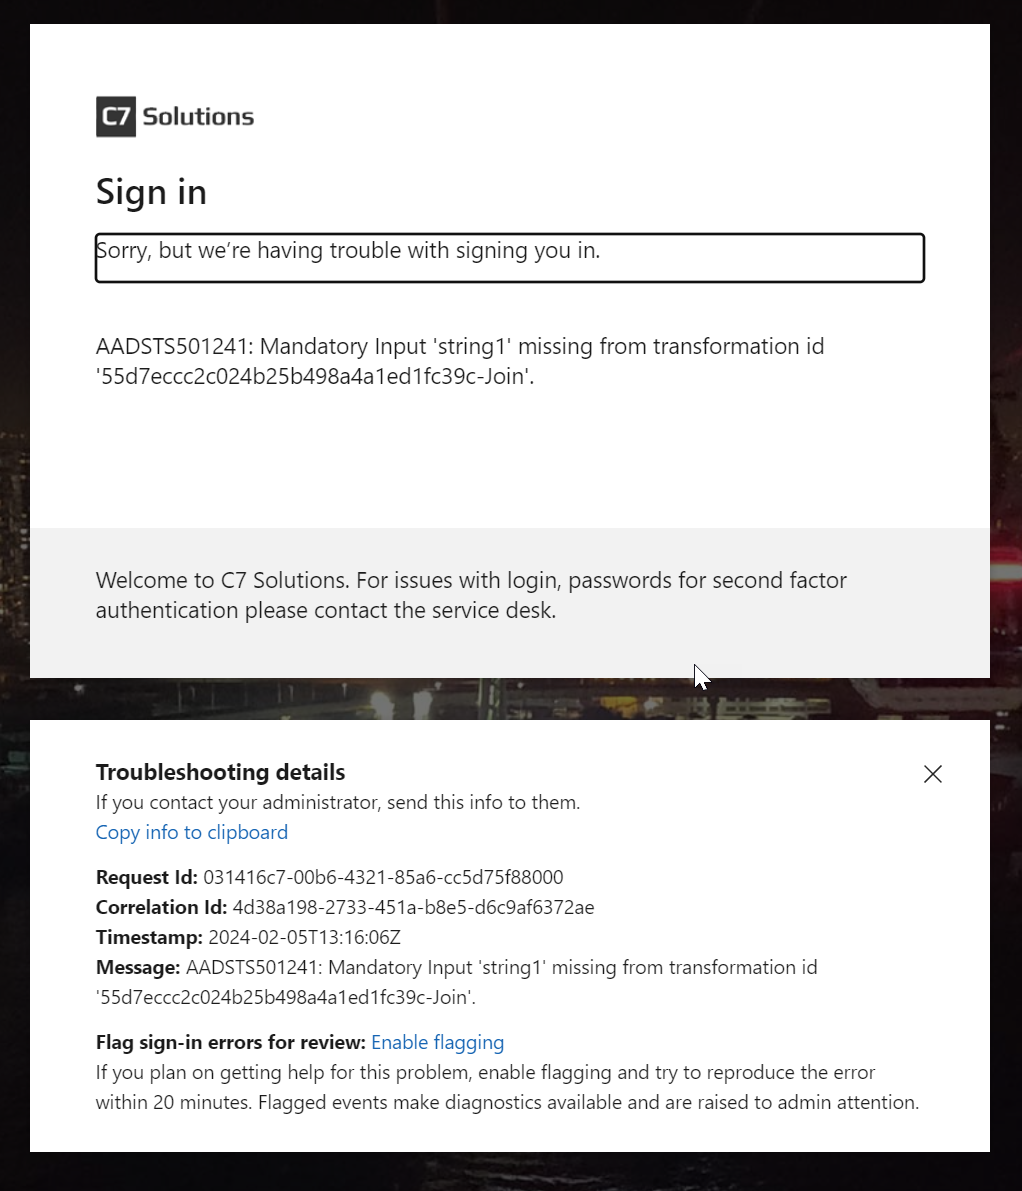
If your application does not like your claim, it is down to the application to present a useful error message, and they don’t always do this. This blog is to show you how you can test what claims are being sent for different users and make sure that the expected values match. If you authenticate, and the claim matches what you expect, then the issue is something else, often in the 3rd party application, and thats outside the scope of this blog.
So lets test. In the following steps we are going to add a new Enterprise App that Microsoft host that echo’s your claims back to you, so you can see what you are sending to the Enterprise App. Microsoft created the tool for testing AD FS, but we can use it for Entra ID as well. The tool is called Claims X-Ray (https://adfshelp.microsoft.com/ClaimsXray/TokenRequest) and we can use it to debug what Entra might be sending to your 3rd party application by duplicating the settings from your app that is not working to this application.
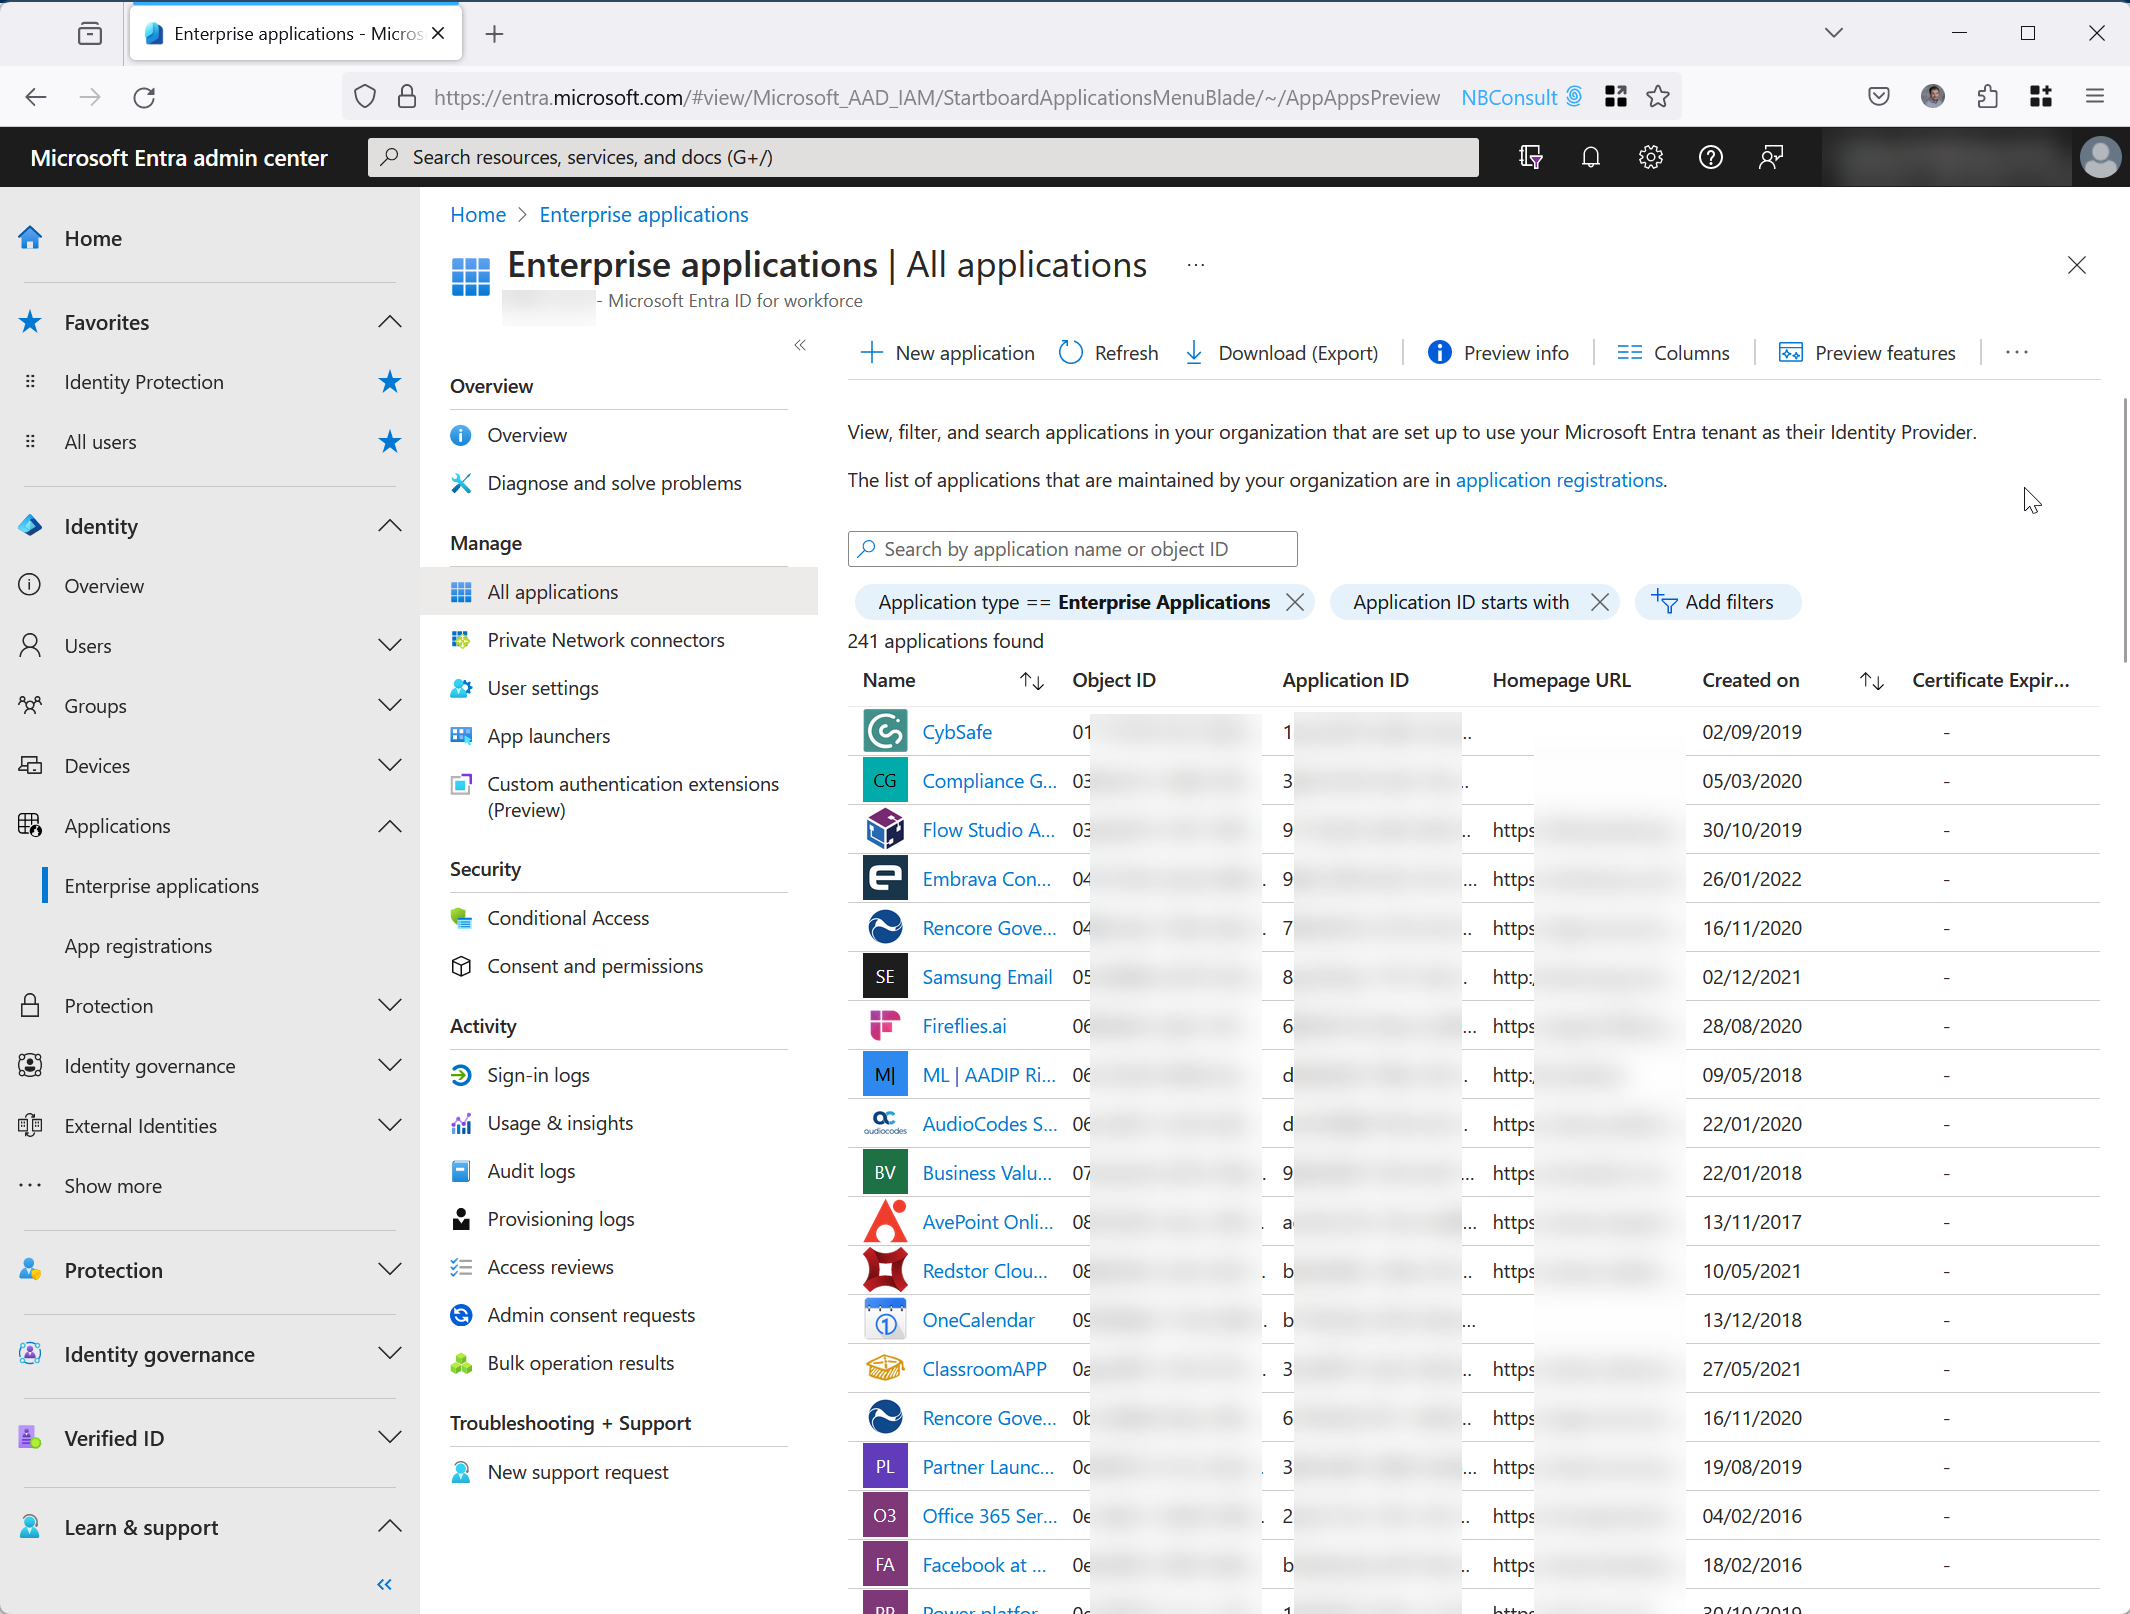
So first, create the new SAML based Enterprise App. Visit https://entra.microsoft.com > Identity > Applications > Enterprise Applications:
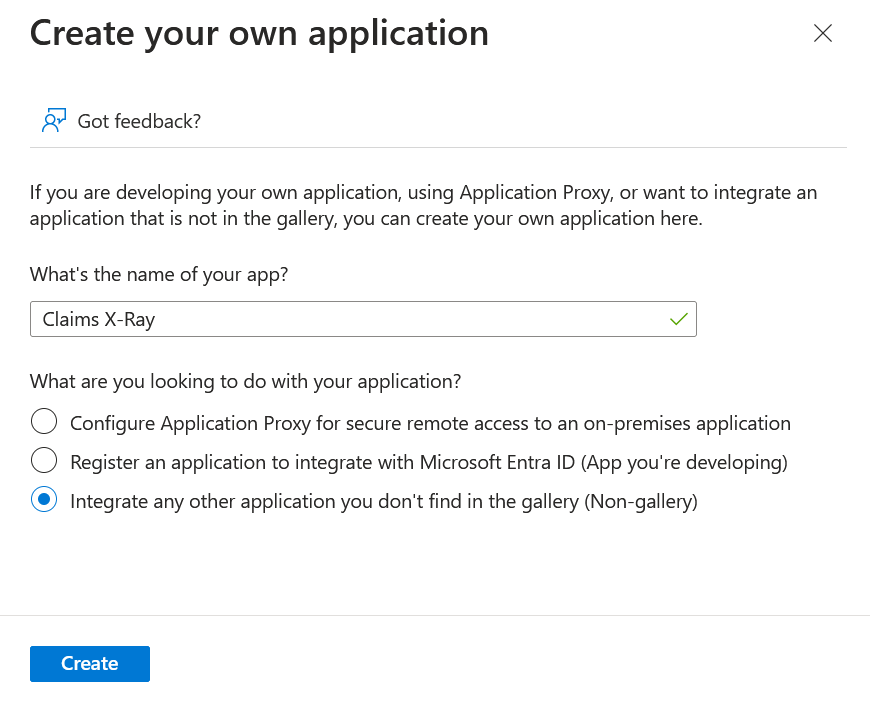
Click New Application and then Create your own application. Enter “Claims X-Ray” as the application name. The last option about a “non-gallery” app will be selected:
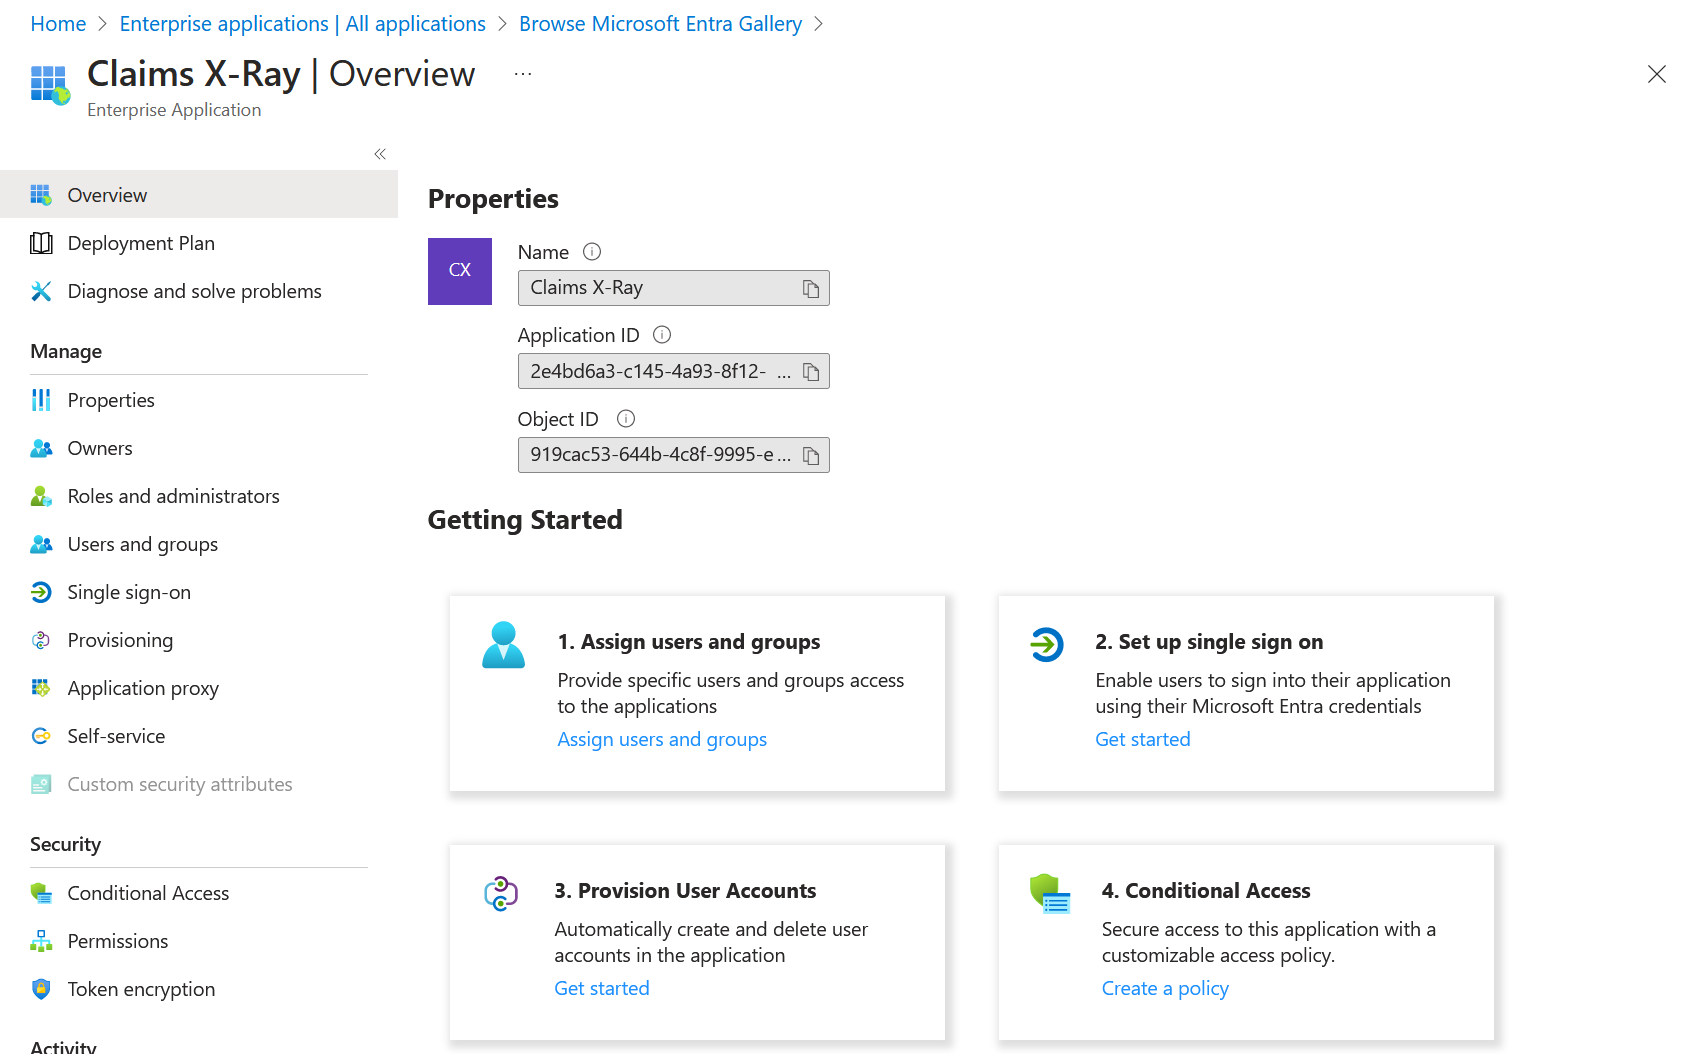
Click Create and wait for the app to be created. Once created the Overview page of the app is displayed:
Follow the Getting Started steps and for Step 1 assign your user account and maybe other accounts you want to test with. If you want to test with member and guest accounts, add both types here:
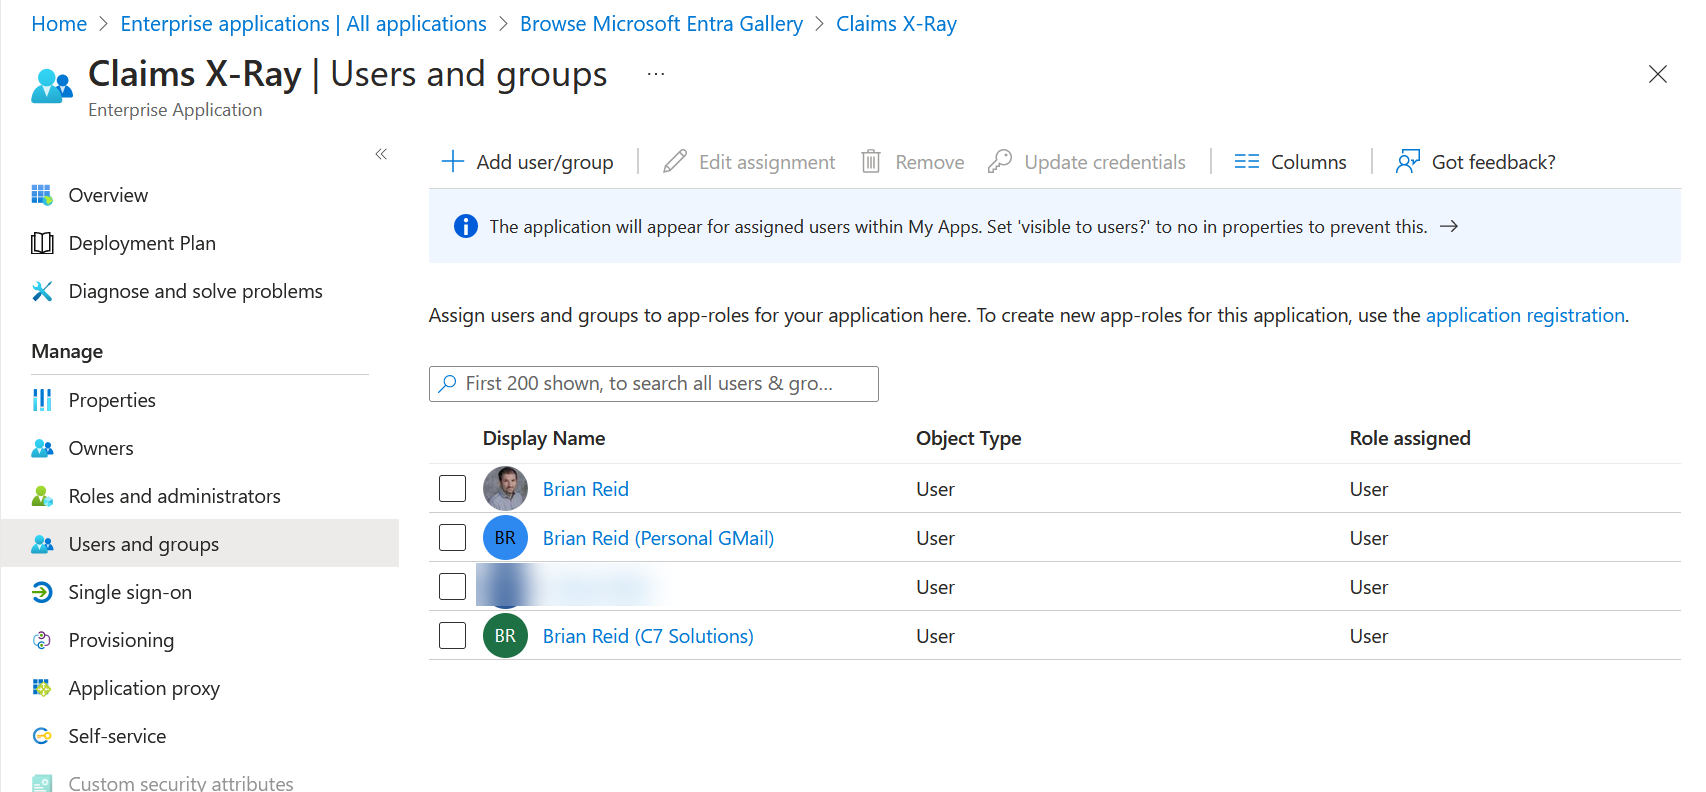
In the above I have added my own accounts from the tenant, and my guest accounts – both a Gmail guest and another tenant guest. Remember to include your current logged in account in this list so you can test in a minutes.
Alternatively, under Properties for the app you can set “Assignment Required” to No, so that any user can use the app:

Back to Overview and Step 2. Now you can set up Single Sign-On. Choose SAML from the four options available:
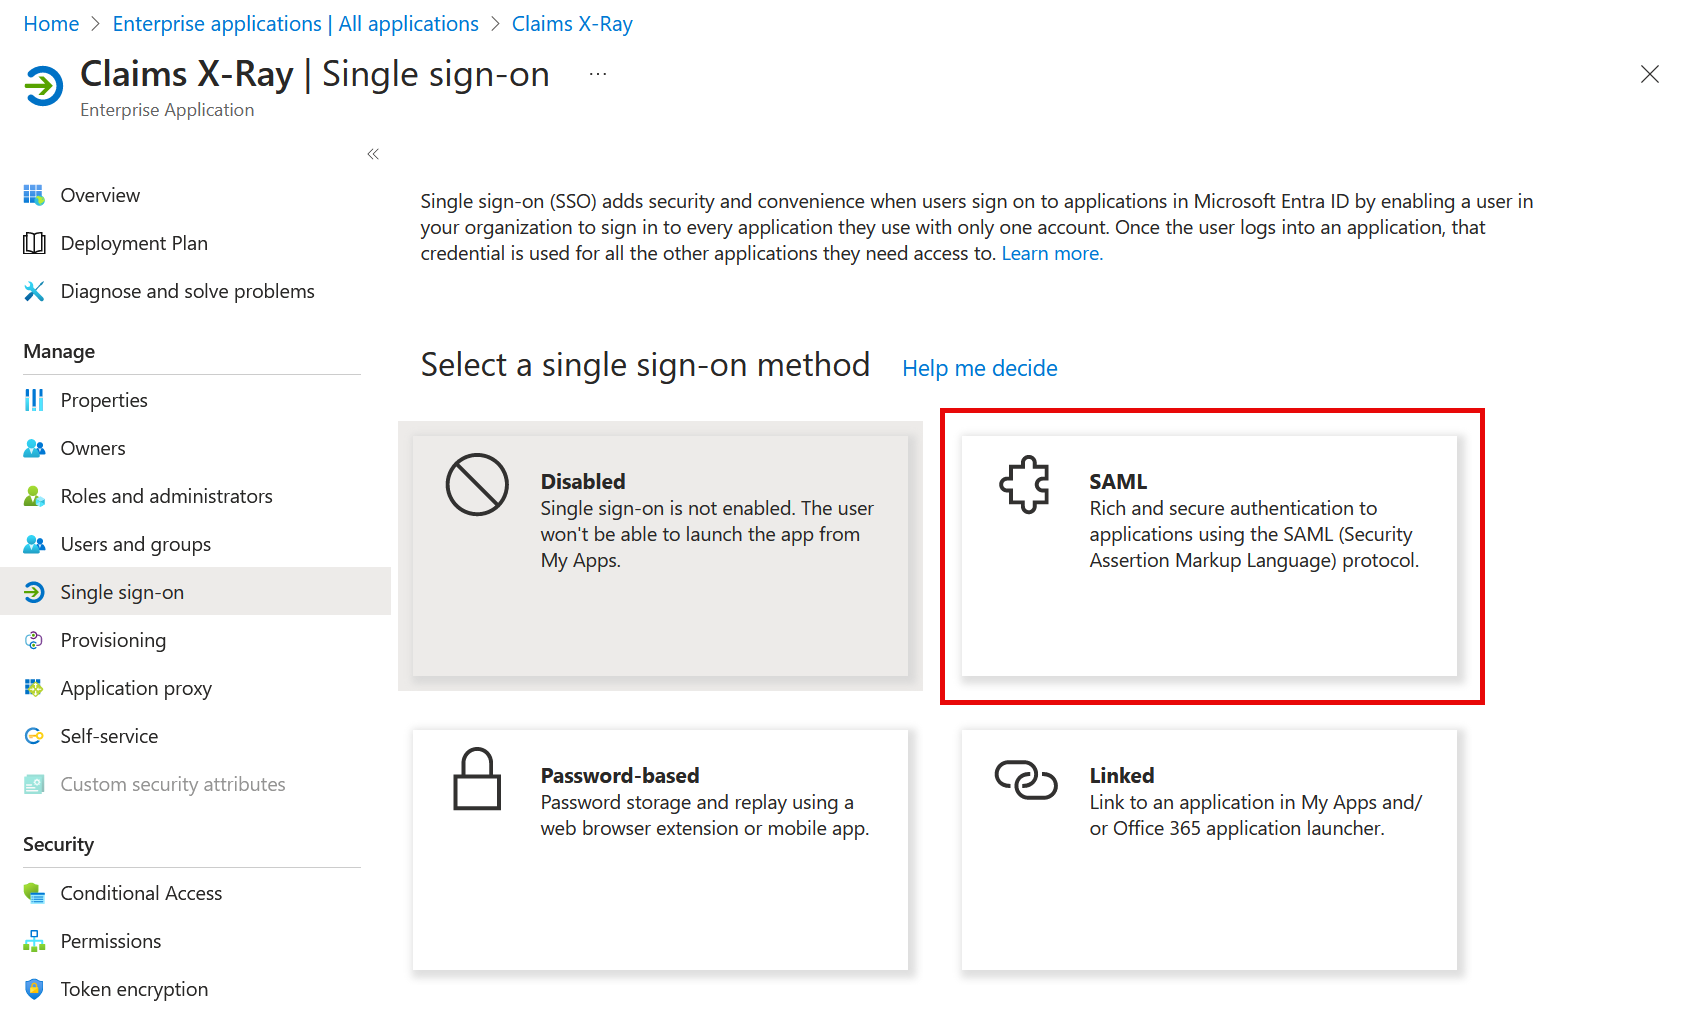
Click the Edit button for Basic SAML Configuration on the page presented to you.
- As Identifier we are going to use urn:microsoft:adfs:claimsxray
- As a Reply URL: https://adfshelp.microsoft.com/ClaimsXray/TokenResponse
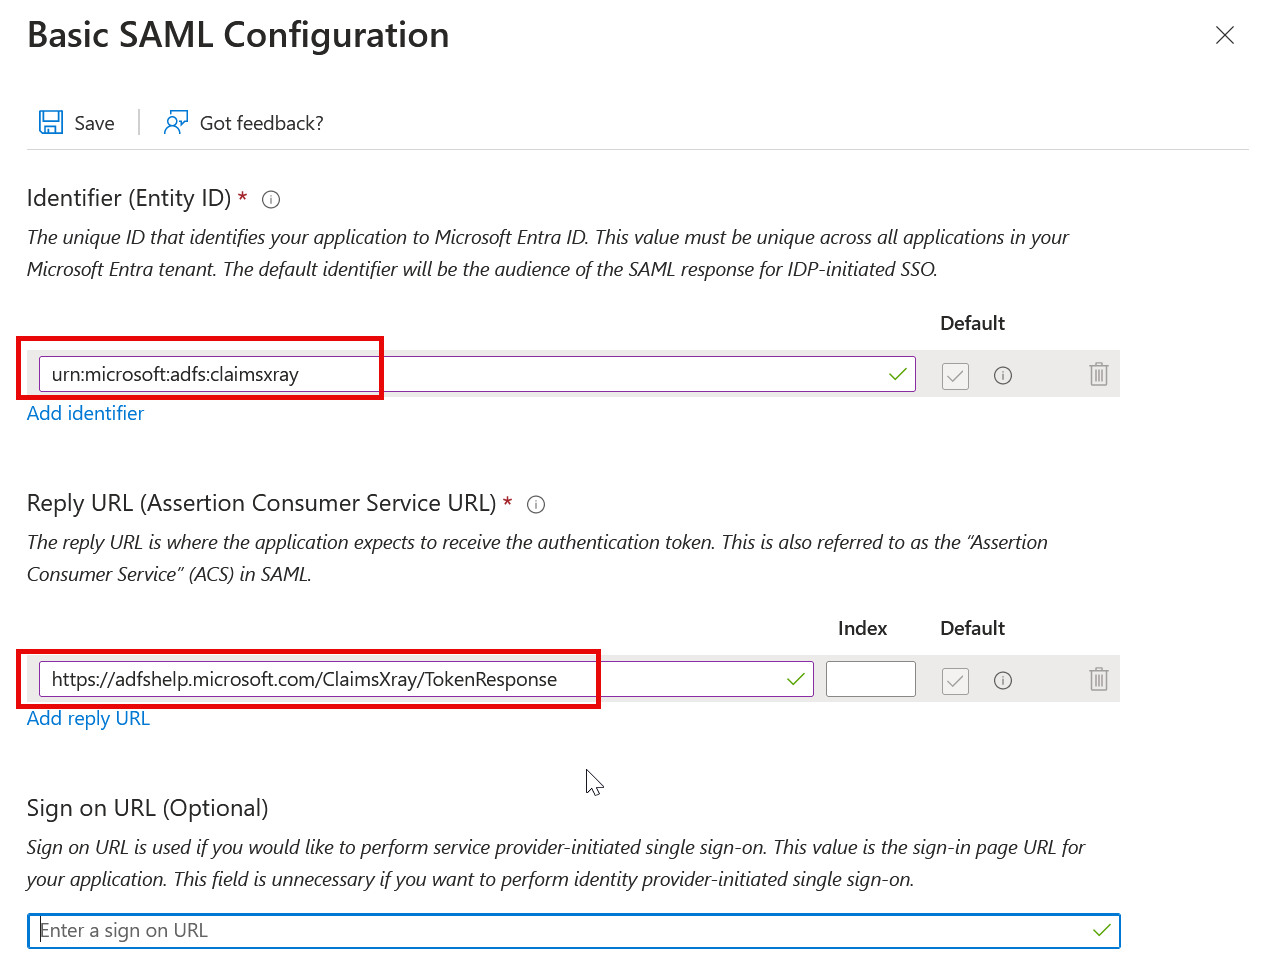
The Reply URL is where the application expects the authentication and token, with claim, to be sent. The Claims X-Ray application does not enforce the uniqueness of the Identifier, so you could create more than one Claims X-Ray application with different Identifiers, conditional access rules and claims and users etc. as each test application could be created with a different identifier but the same reply URL.
Click Save. Don’t forget this important step, or the app and testing will fail at the first attempt!
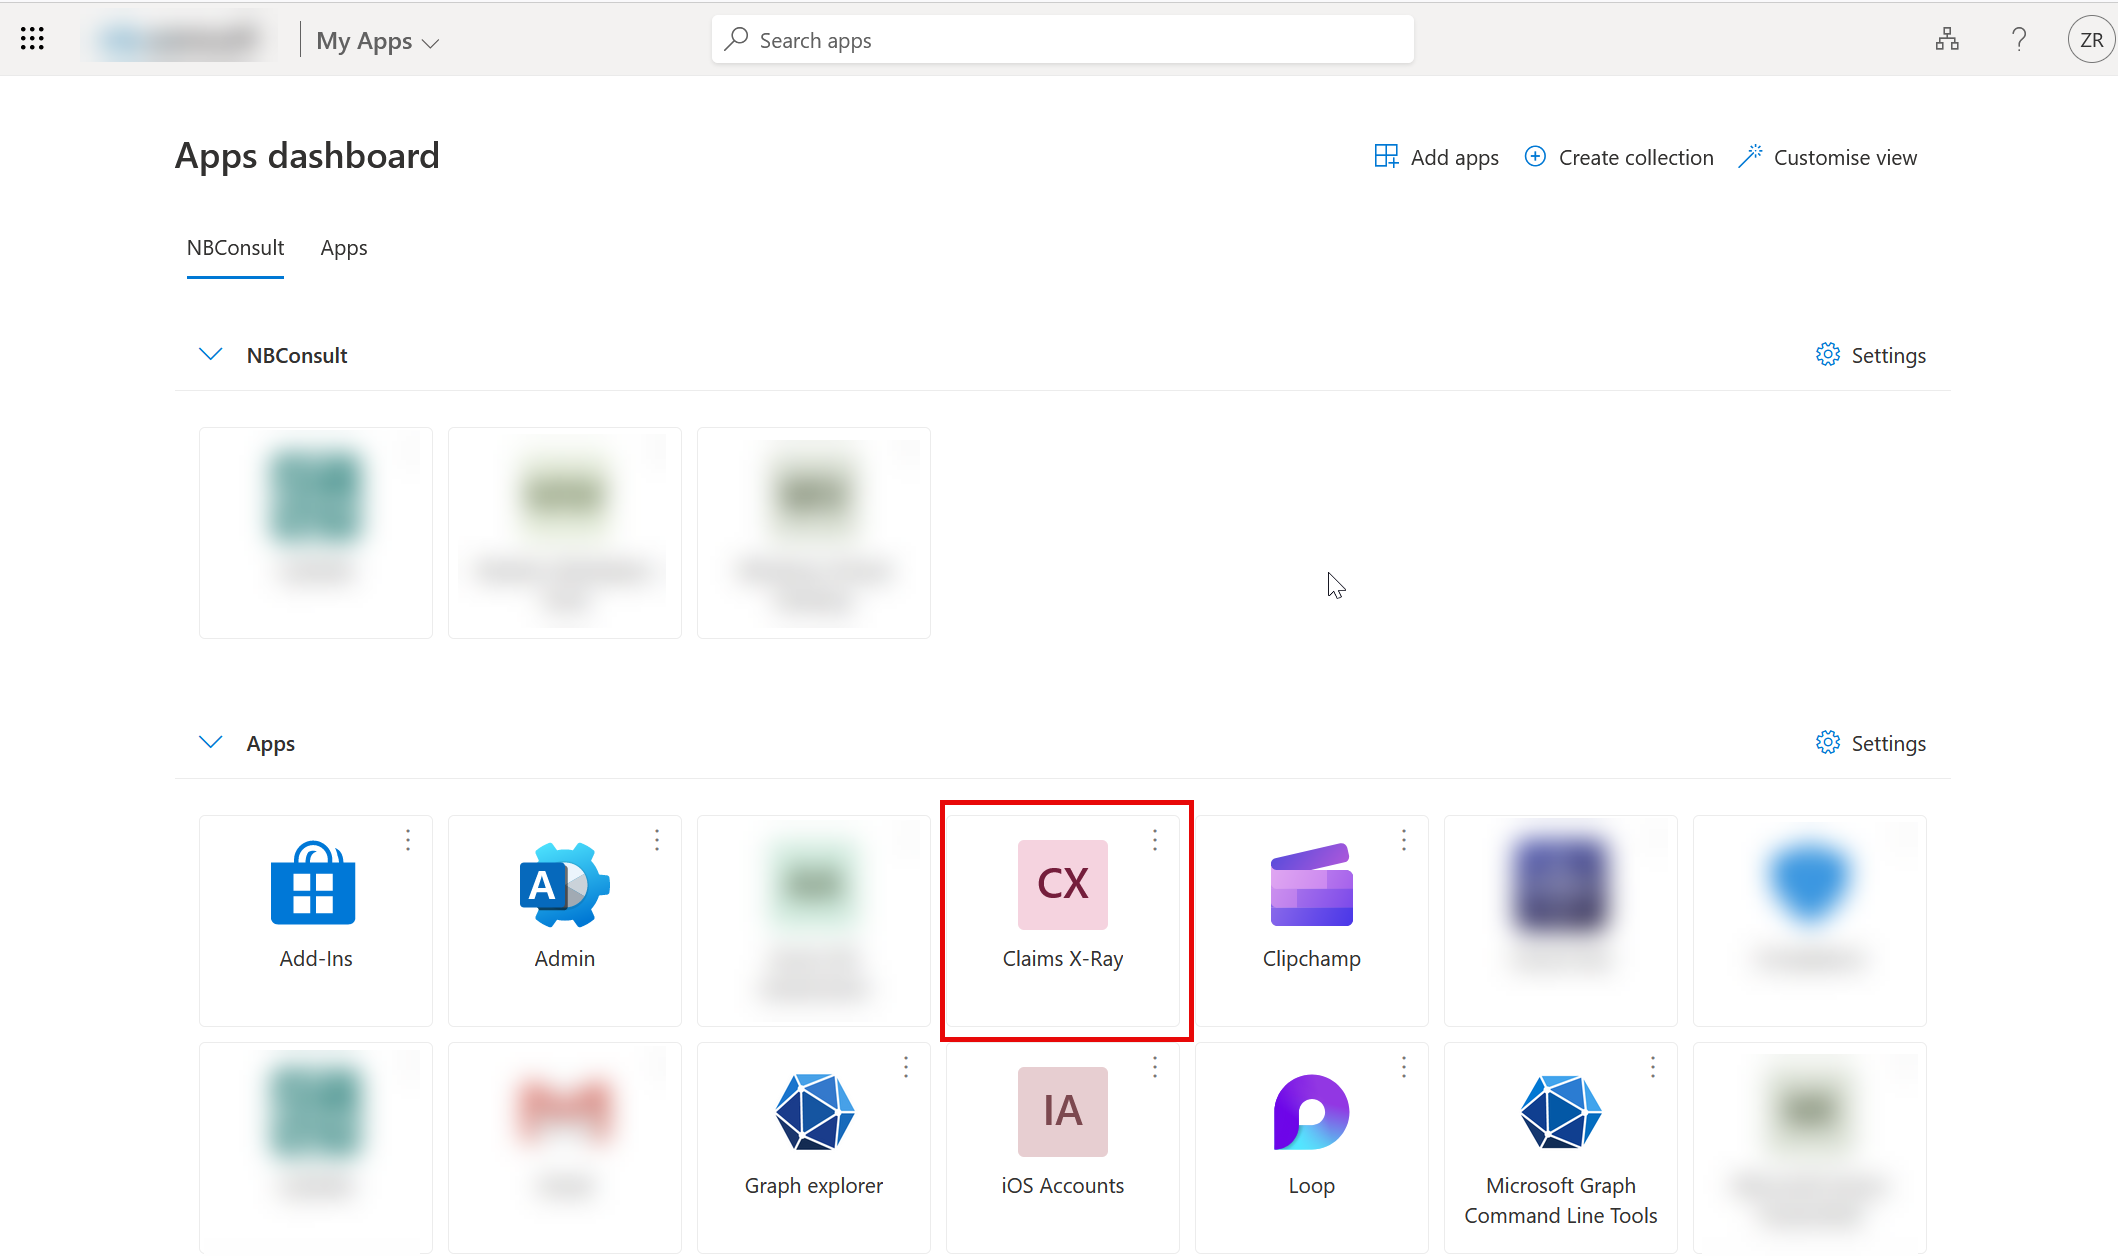
Now to test. You can do this in two ways, one is to visit https://myapps.microsoft.com and locate the “Claims X-Ray” application and click it, or the other (which you can do as admin), is to use the Test option displayed when saving the SAML settings:
You should see a successful reponse, echoing all your claims:

If you are using an Entra External ID external tenant (not a workforce tenant) for integrating with customers and not employees then SAML is in preview as of Nov 2024 and you can create the SAML app as above and test it via a user flow
The next step is to customize the claims we are going to send to Claims X-Ray, and in this case we are going to pick the claims that our 3rd party application expects us to send and which is erroring.
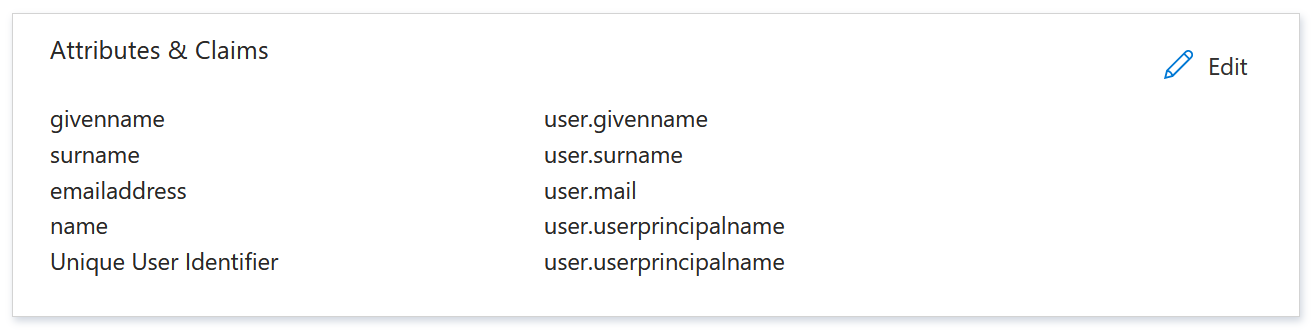
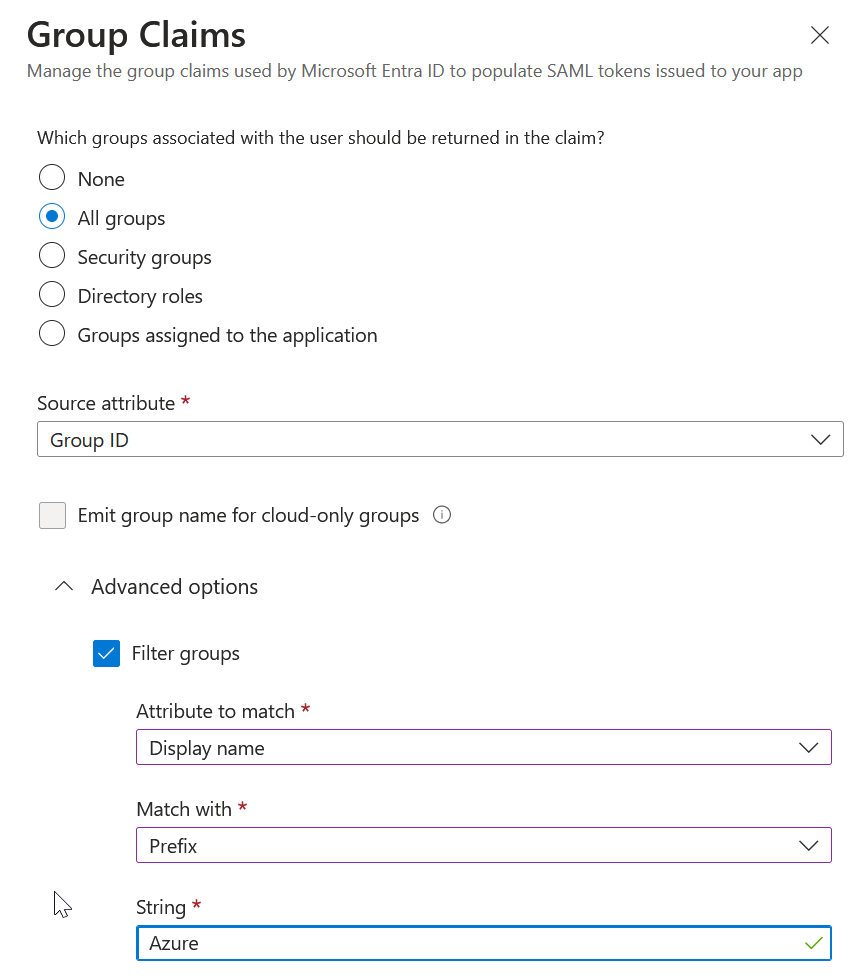
These attributes & claims are on the SAML page and the above is the default settings. You can add additional claims, group and role claims and claims from external providers. For example, a Group Claim with filtering:
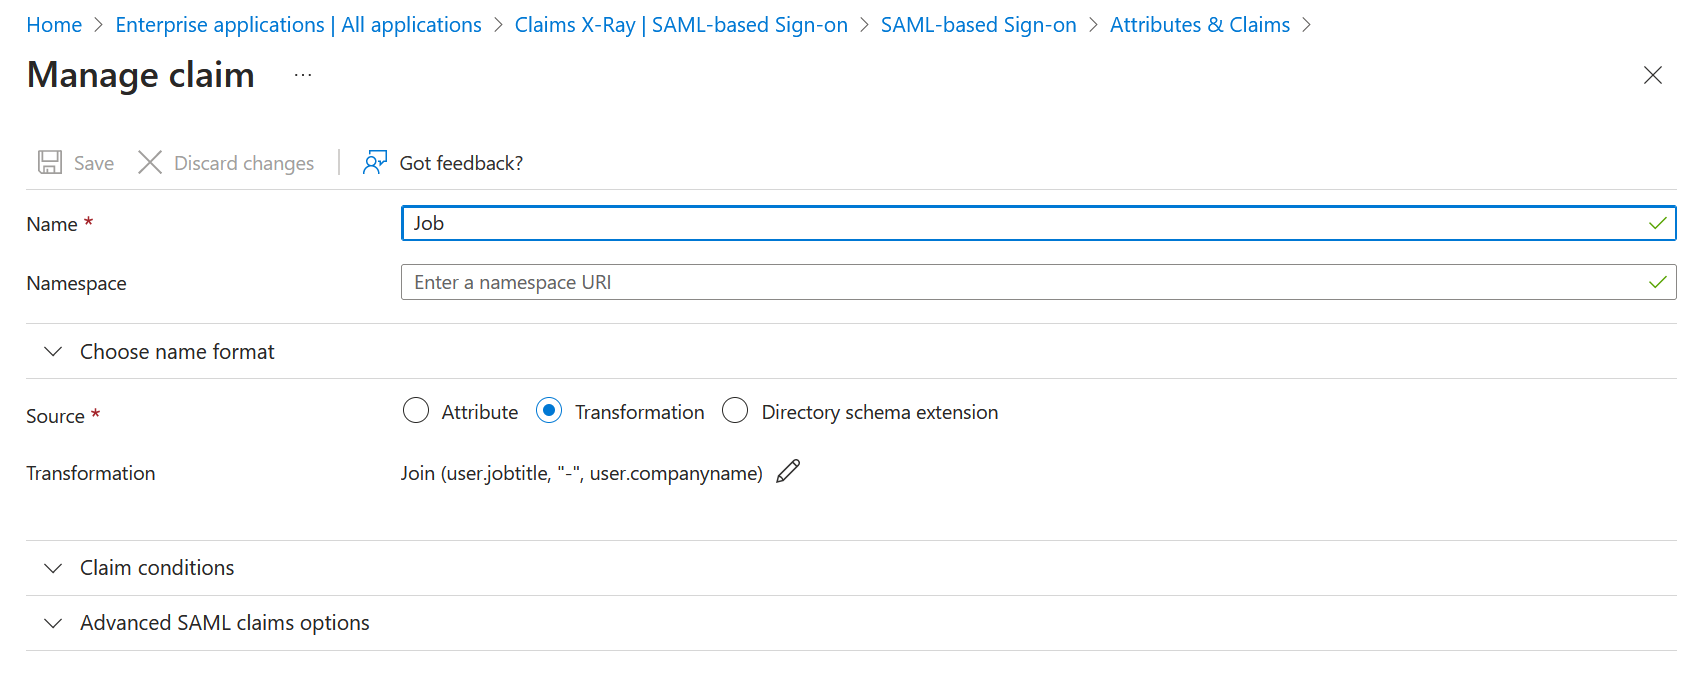
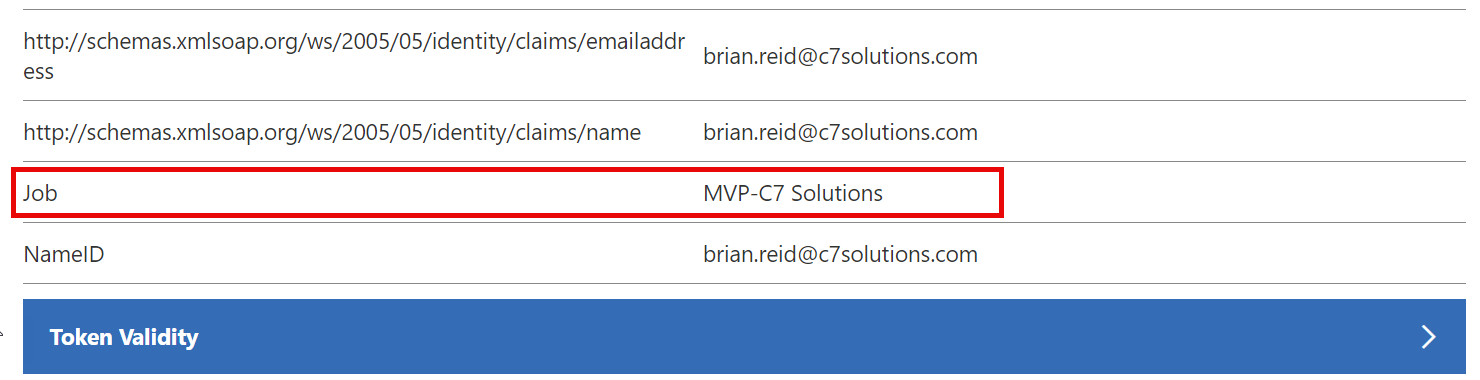
Or another example where the claim name is “Job” and the claim is the join of user.jobtitle and “-” and user.company:
Save your changes and ensure that your user account can match any claims that you require (for example, using the above, you have a “job title” and “company” property on your account).
If Claims X-Ray still works, its time to test it with additional users. For users in your tenant, just visit the My Apps portal, https://myapps.microsoft.com or indeed the Microsoft 365 portal at https://microsoft365.com.
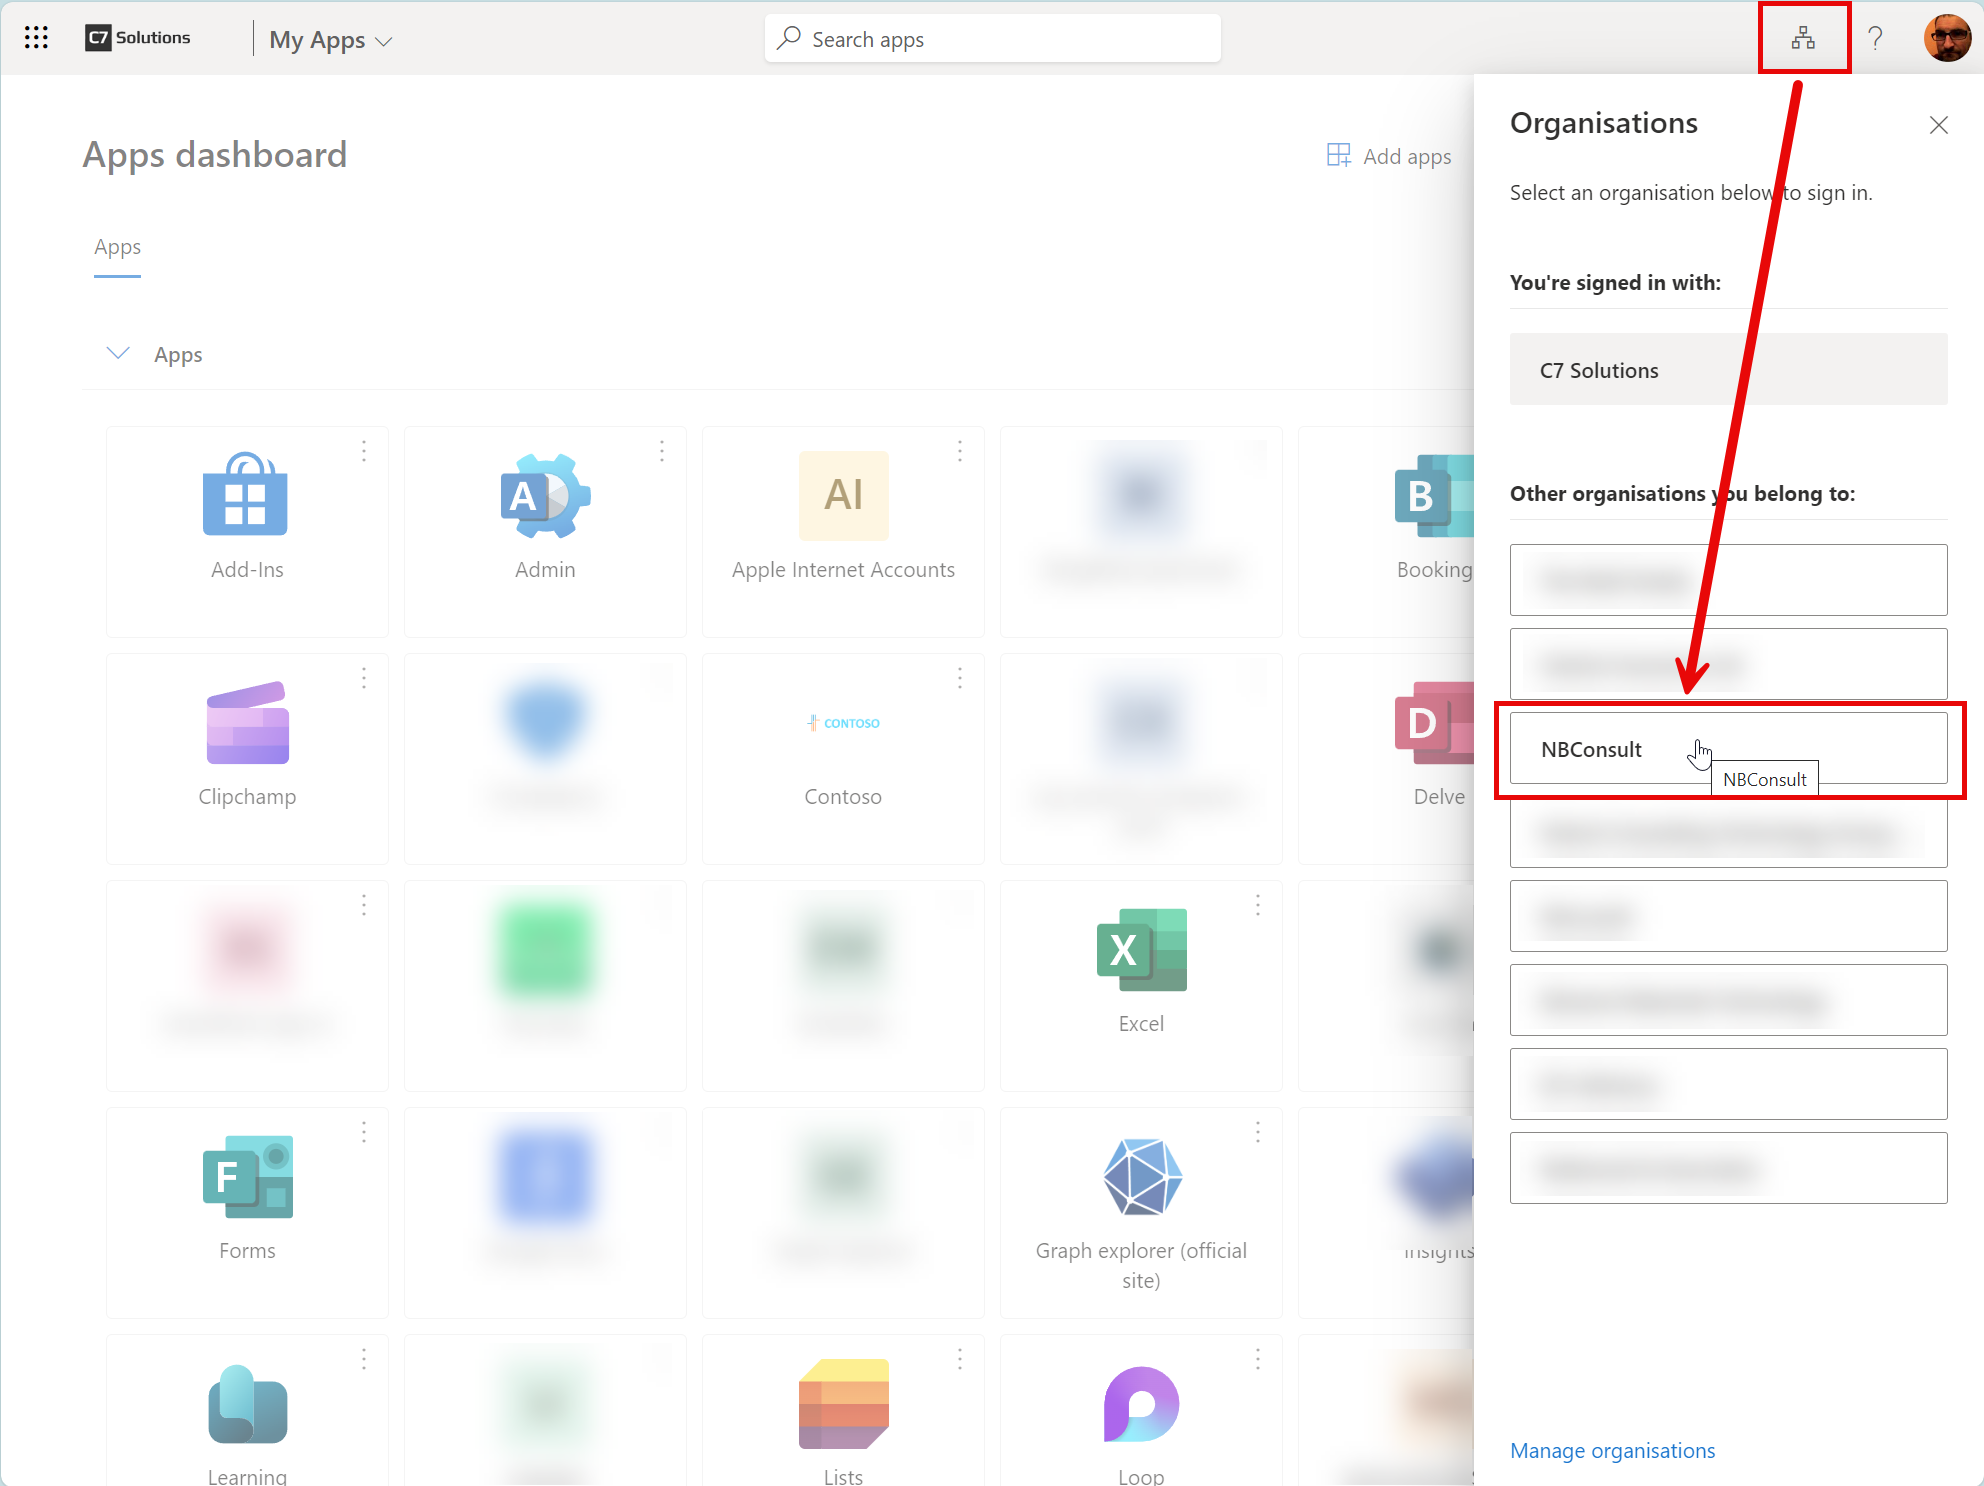
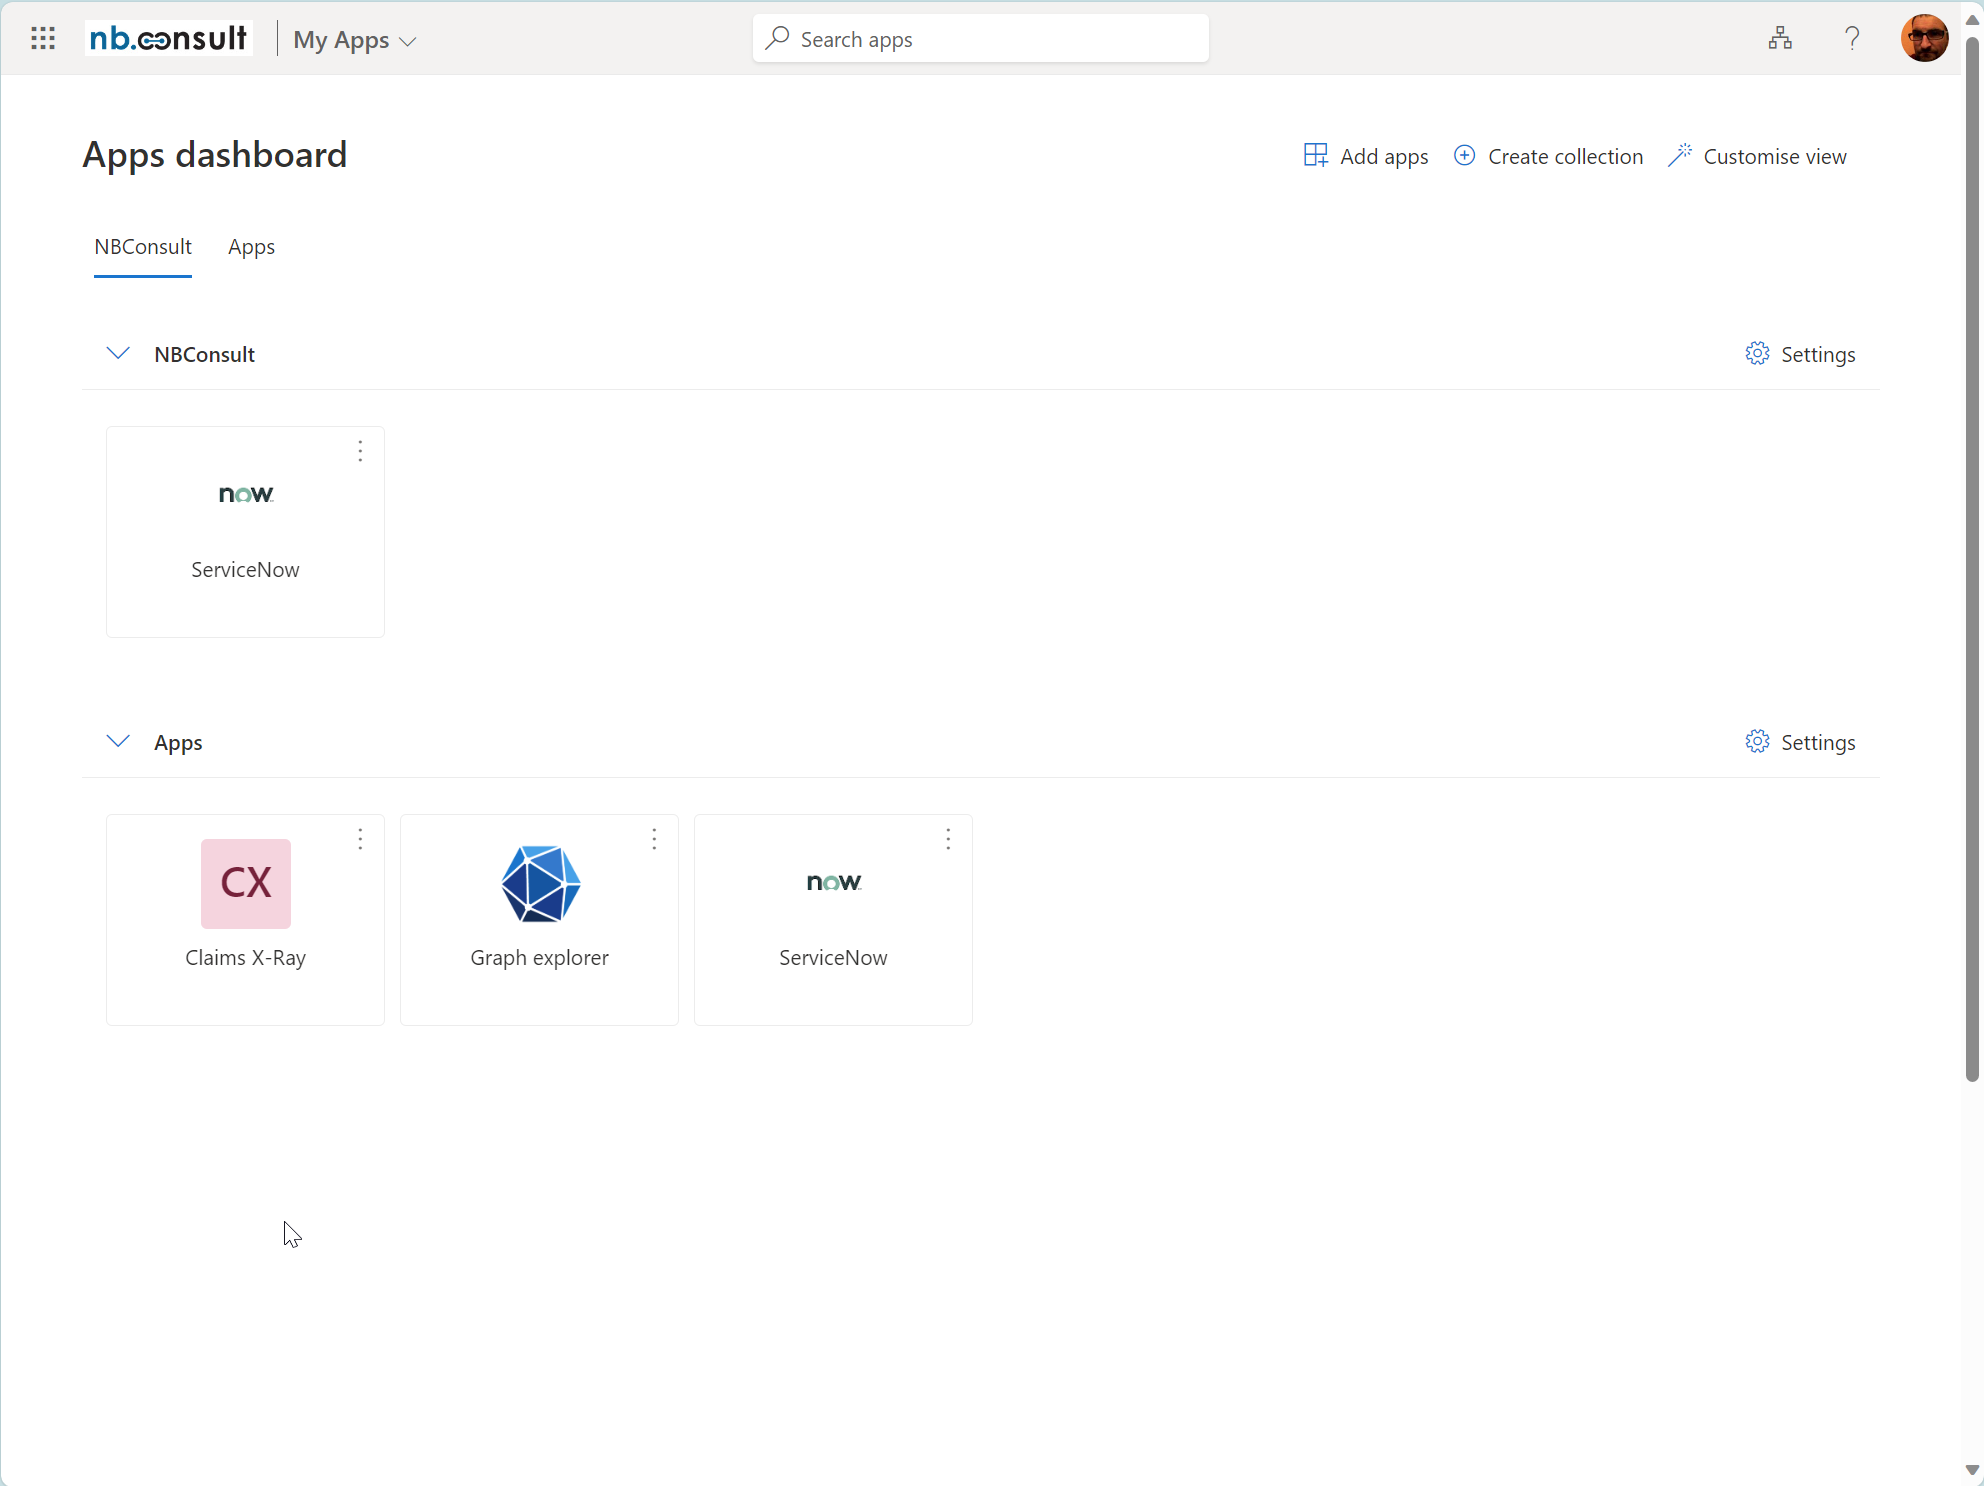
For external users, you need to go to the My Apps portal, change organization to the one hosting the app and then click Claims X-Ray:
For example, my guest user in my work tenant can see three apps:
And then an error:
In this case, I do not have the correct attributes on the guest account. Once these were fixed, I tried again:
If the properties for the claims are valid, and these can be put into your token, it is the job of the application to consume them.
If your guest accounts do not have the correct properties in your directory, though a sign in from your own tenant will work, a guest sign might not. Note that Entra ID does some “magic” with the properties it places in the claim – for example, if knows that the UPN in the form of first.last_source.com#EXT#@target.com (the UPN of the guest in the application tenant) would be confusing to the 3rd party app, so the claim that contains user.userprincipalname is auto-replaced for user.mail or the actual source UPN from the host tenant. If you need the UPN in the guest tenant, the include user.localuserprincipalname in the claim.

Photo by Markus Winkler: https://www.pexels.com/photo/a-luggage-conveyor-inside-airport-3693017/
Leave a Reply