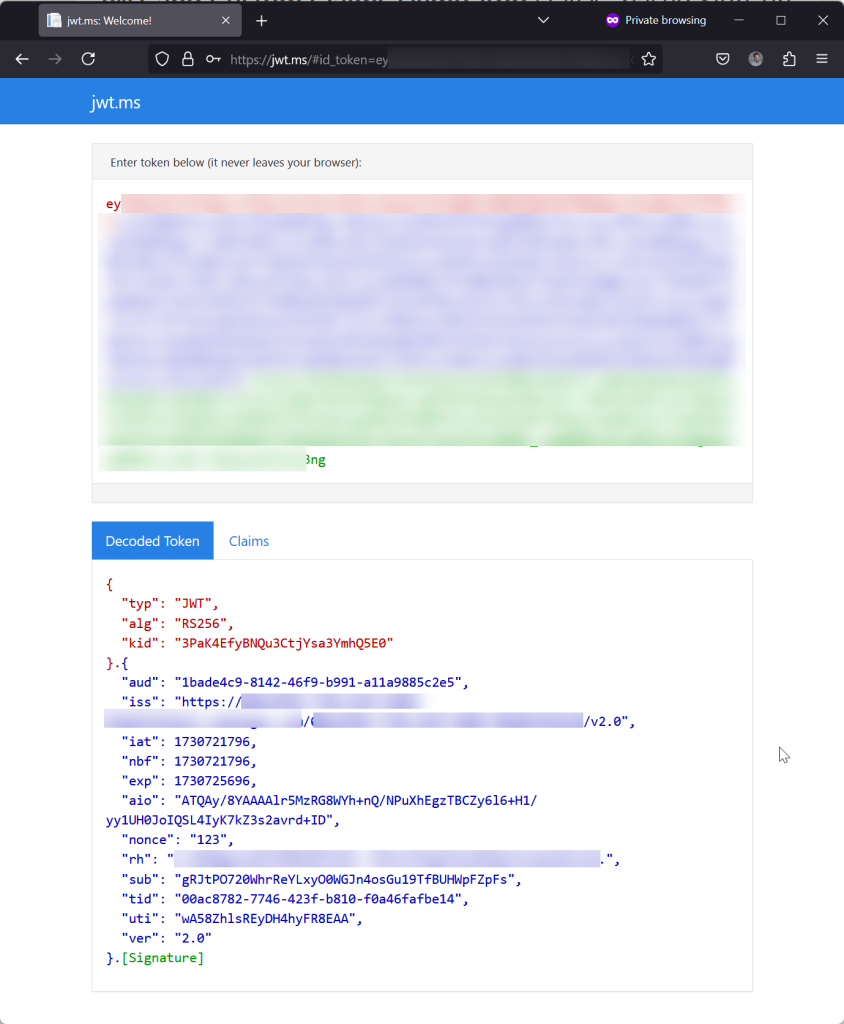
JWT.ms is an app that will show you the contents of any JSON Web Token (JWT) issued by Entra ID that you have access to and can paste into the top field in the browser.
But you can also use it to test apps in Entra ID – you can publish a web app that has https://jwt.ms as the Redirect URI and optionally customize claims and then login to that app and see your token.
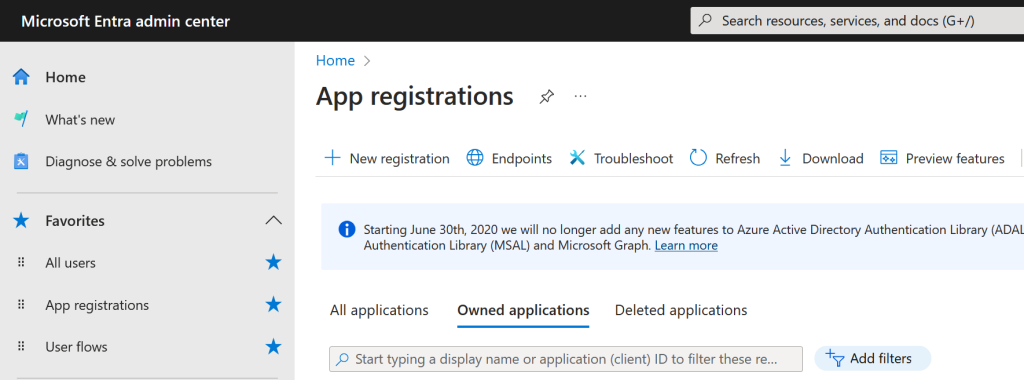
You can do this in a workforce or external tenant (Entra ID or Entra ID External tenants) or the older Azure B2C service as well. Start by opening Entra Admin Portal and signing into the tenant you wish to test logins against. From “App Registrations” create a new app registration:
In the below I have created an app registration called “JWT and Custom Claims Demo App” and only in this tenant (single tenant). Select a Web app and set the Redirect URI to https://jwt.ms:
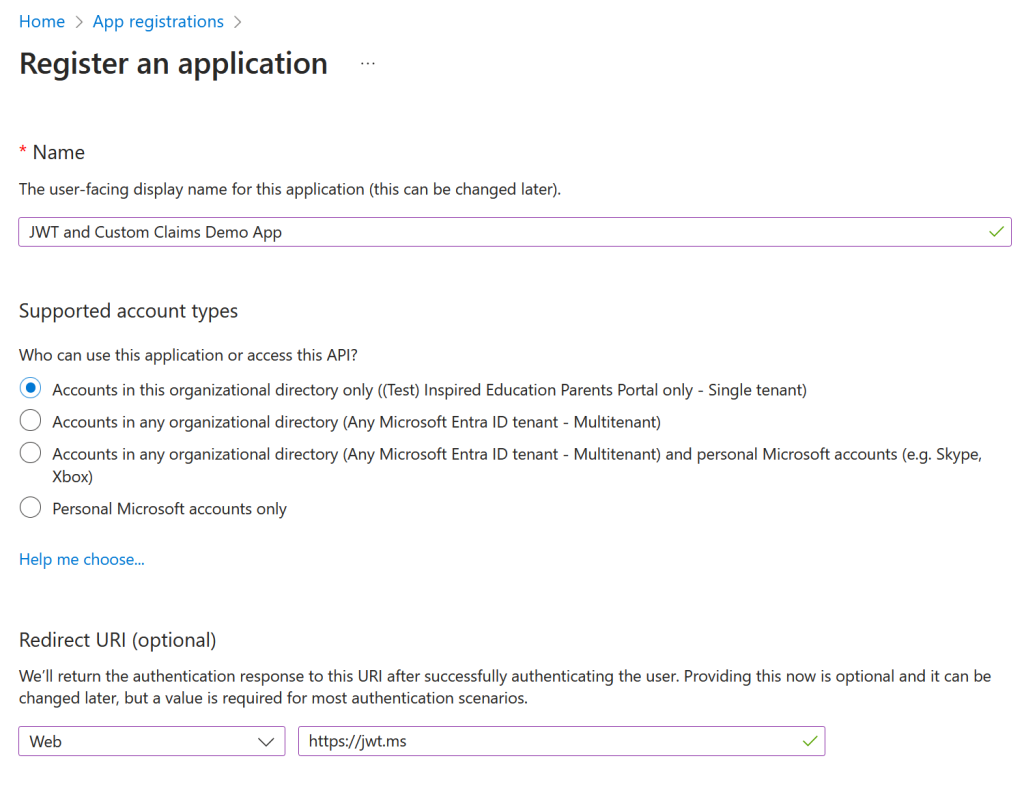
Click “Register” button to make your app.
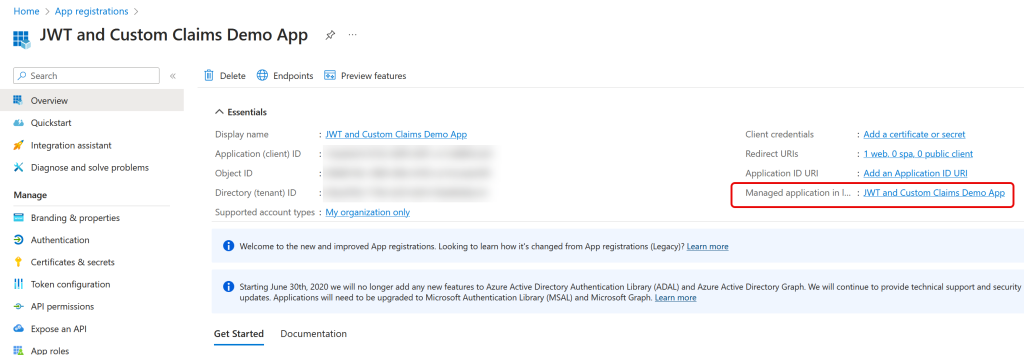
Once the app is created you need to view the managed Enterprise App. This is accessible from a link on the “Overview” page and to the right as shown:
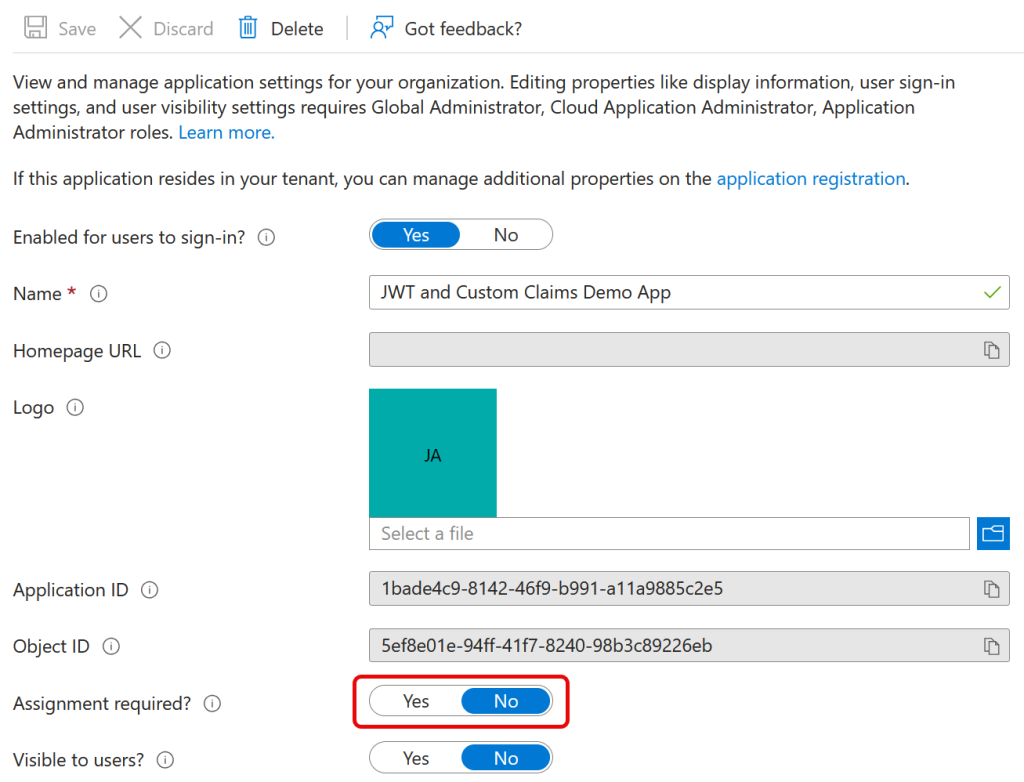
Click this link, choose Properties, and either set “Assignment Required” to No, or if it is set to Yes, add “Users and Groups” to that view for the users allowed to use the app:
From the Single Sign-On menu click Edit for “Attributes & Claims”. This is optional, but if you add additional claims they will appear in the token and shown on JWT.ms. Additional claims can be attributes, transformations (simple code to modify the attribute values in the claim) or directory schema extensions). For example here we are adding a claim called “TownOrCity” which is the users City value:

Save any changes and go back to App Registrations from the main menu and click “Authentication” from the menu. You need to turn on both “Access Tokens” and “ID Tokens”.
From the Overview page of the app registration, view the Endpoints:

Copy the OAuth 2.0 authorization endpoint value (v2). This will be the second entry in the list if using Entra External ID, or the fifth if you are using Entra ID. Paste this endpoint into Notepad and then copy the Application (Client) ID from the Entra Portal as well – both these values are blurred out in my screenshot above, but shown in a red box.
Modify the endpoint URL you have pasted into Notepad by adding ?Client_ID=xxxx to the end, where xxxx = Application (Client) ID from above.
Continue to modify the URL that you will use to access the app. You need to add a nonce value, a scope value, and the Redirect URI from earlier. Finish the URL with &response_type=id_token. For example the URL for an External ID tenant will look something like this:
https://tenant.ciamlogin.com/tenant_ID/oauth2/v2.0/authorize?client_id=client_ID&nonce=123&redirect_uri=https://jwt.ms&scope=openid&response_type=id_token
Tenant ID and Client ID GUIDs are unique to your tenant and app
Open this in an in-private browser session. First as a tenant admin if you need to consent permissions, and then as a test user.
If you added any custom claims you will need to add either an app specific secret (recommended for apps that can support these, unlike this example) or for testing, modify the app manifest (under Enterprise Applications) so that “acceptMappedClaims” is set to “true”.

Leave a Reply