
There are a few articles online about this, but I have written this one to link to my previous article on securing Graph access to limited mailboxes. That article has a simple test where we can login using a secret and access specifically allowed mailboxes using RBAC for Applications in Exchange Online. To keep that article on point, this article shows how to connect to a tenant using a locally accessible certificate instead of a secret.
The first step is to create the digital certificate on the client device that will be allowed to authenticate using the certificate. The second step will be uploading that certificate to the App Registration in Entra and the third step will be testing it all out. There are a few interim steps that can be added to all this as well, such as what do you do if there is more than one client that could run the application.
#1 – Create the Certificate
Using PowerShell on a Windows device (it does not need to be the client that will access the application, as you can export this certificate and import it to the target device), run the following:
New-SelfSignedCertificate -DnsName application-Graph123.cert -CertStoreLocation "cert:\LocalMachine\My" -NotAfter (Get-Date).AddYears(1) -KeyExportPolicy NonExportable -FriendlyName "Graph 123 Application Certificate"
This needs local administrator rights to run, as it will store the certificate in the Local Computer certificate store. Without local admin rights you will get the “Access denied. 0x80090010” error.
So if you are not local admin, or don’t want to create a certificate that anyone on your machine can use, you can create one in the Current User certificate store instead:
New-SelfSignedCertificate -DnsName application-Graph123.cert -CertStoreLocation "cert:\CurrentUser\My" -NotAfter (Get-Date).AddYears(1) -KeyExportPolicy NonExportable -FriendlyName "Graph 123 Application Certificate - Personal"
In either of the above examples the DnsName is arbitrary, and I am just using the convention “application” + “application name”. The certificate can also be for any duration you like, the shorter the more secure it is, but the more often you need to create a new one to successfully authenticate to the application in Entra.
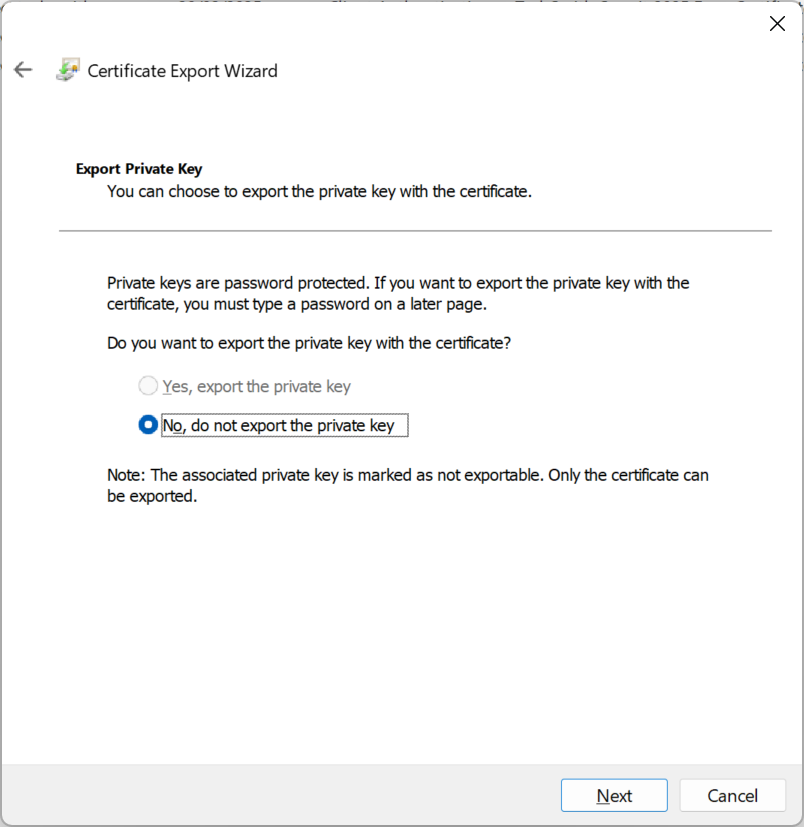
Finally for the creation step, the above examples both create certificates with non-exportable private keys. Therefore, the private key needs to be on the client that will connect to Entra ID and run the application that the certificate is authenticating you for, so if this is not the client machine or user profile and you intend to export the certificate, remove the “-KeyExportPolicy NonExportable” parameter.
Once you create the certificate the thumbprint will be displayed on the screen. This should match the certificate that we will add to the application later on in step 2.
If the machine on which the application will run from and connect to Entra ID is not the current machine, you should export the certificate and import it onto the target machine or user profile. I recommend at this point exporting both the private and public key (that is required) but when importing, set the private key to be non-exportable (this is optional, but highly recommended). This way, the certificate on the destination machine or user profile cannot be further exported. Therefore, the end result is similar to the original cmdlets above which created a non-exportable private key.
You will need to do the export/import steps if your application runs from multiple load-balanced clients as well.
Exporting the certificate using MMC/Certificates you will see dialogs as follows, first for a certificate that was created with “NonExportable” as the KeyExportPolicy:
And then a certificate where the key can be exported, but where the future import from a PFX file cannot be exported again:
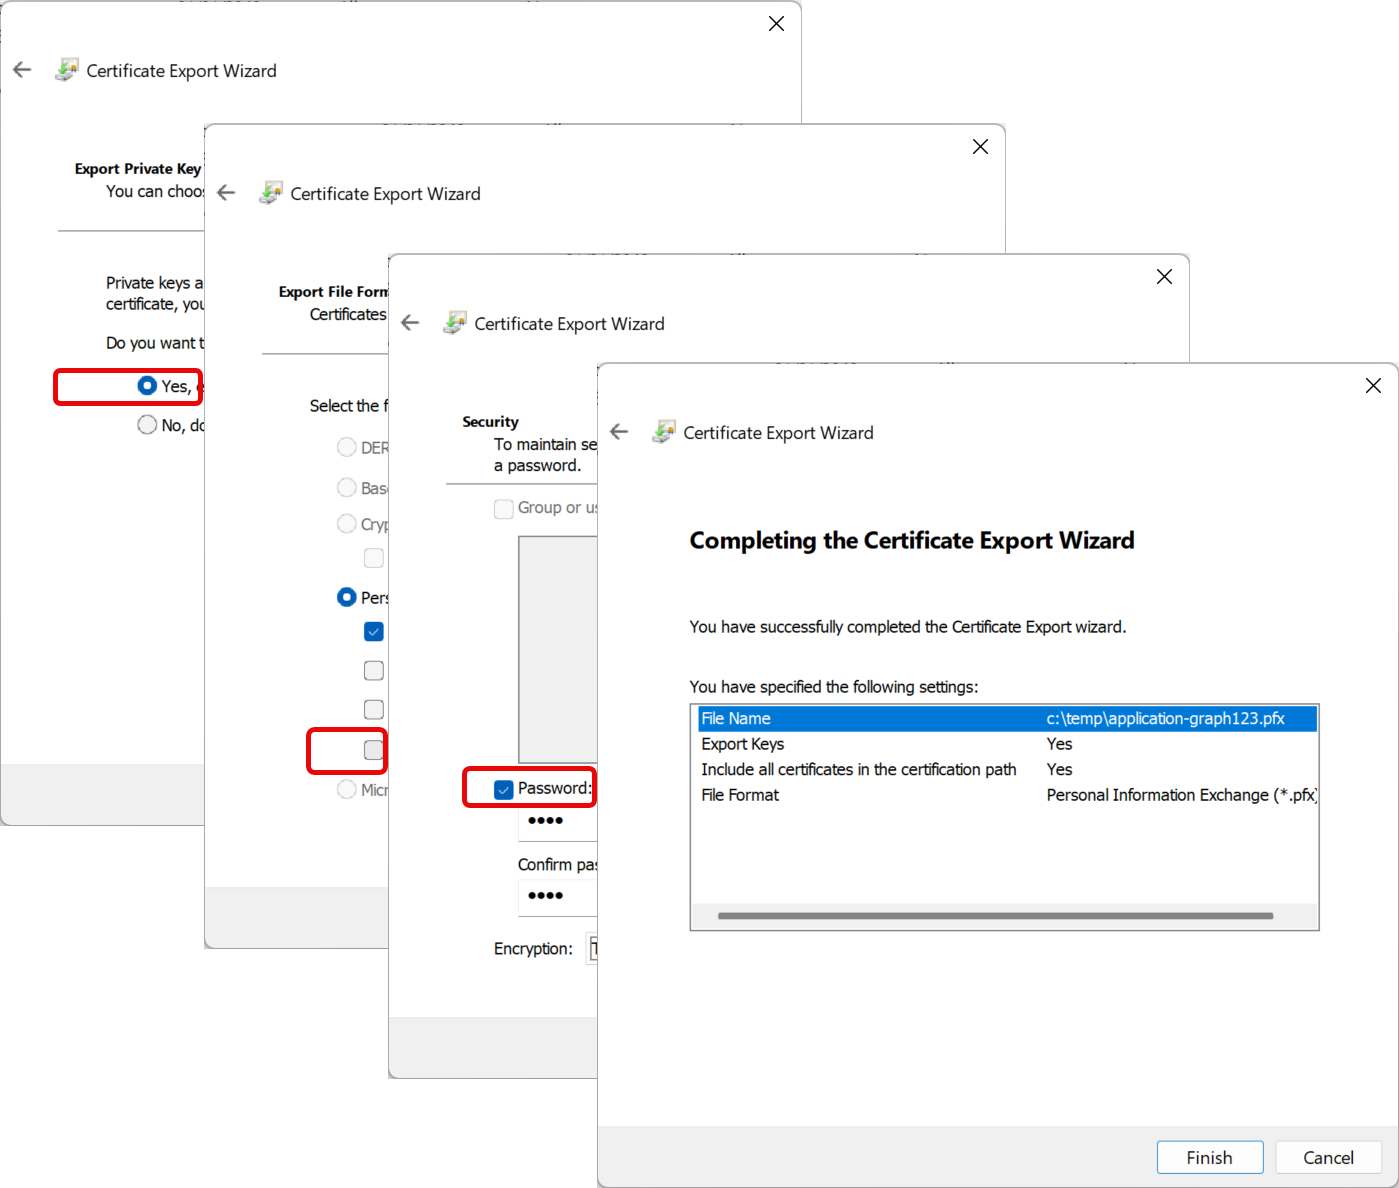
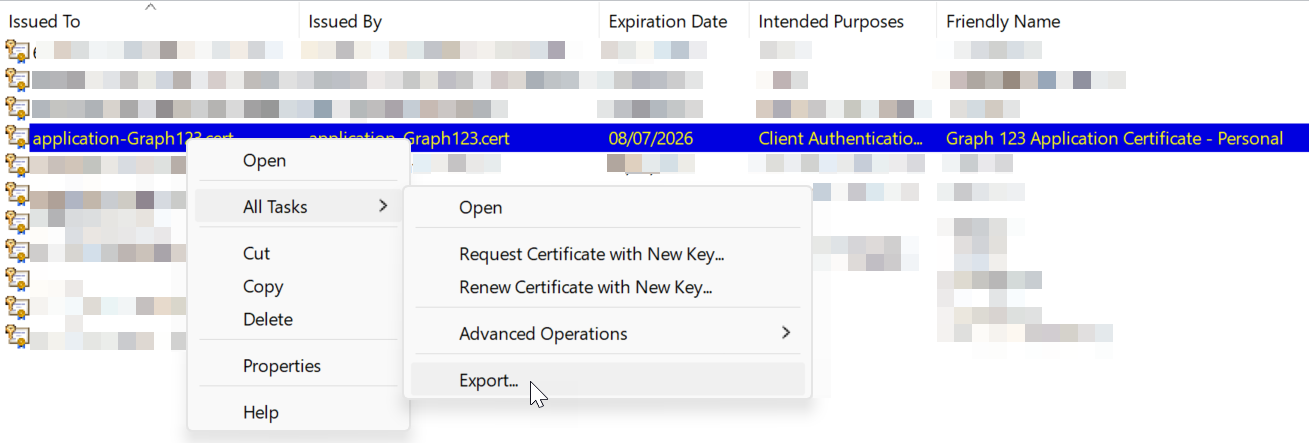
Once you have the certificate where you need it to be, you need to save the certificate without the private key as a certificate file (.cer file). This will be uploaded to Entra ID to secure the authentication to the application.
#2 – Uploading the Public Key and Certificate to Entra
Once you have exported only the certificate public key to a .cer file you can go to the App Registration in Entra and upload this certificate. In this example I already have an App Registration with permissions to access some mailboxes created and that is covered on the above linked blog post.
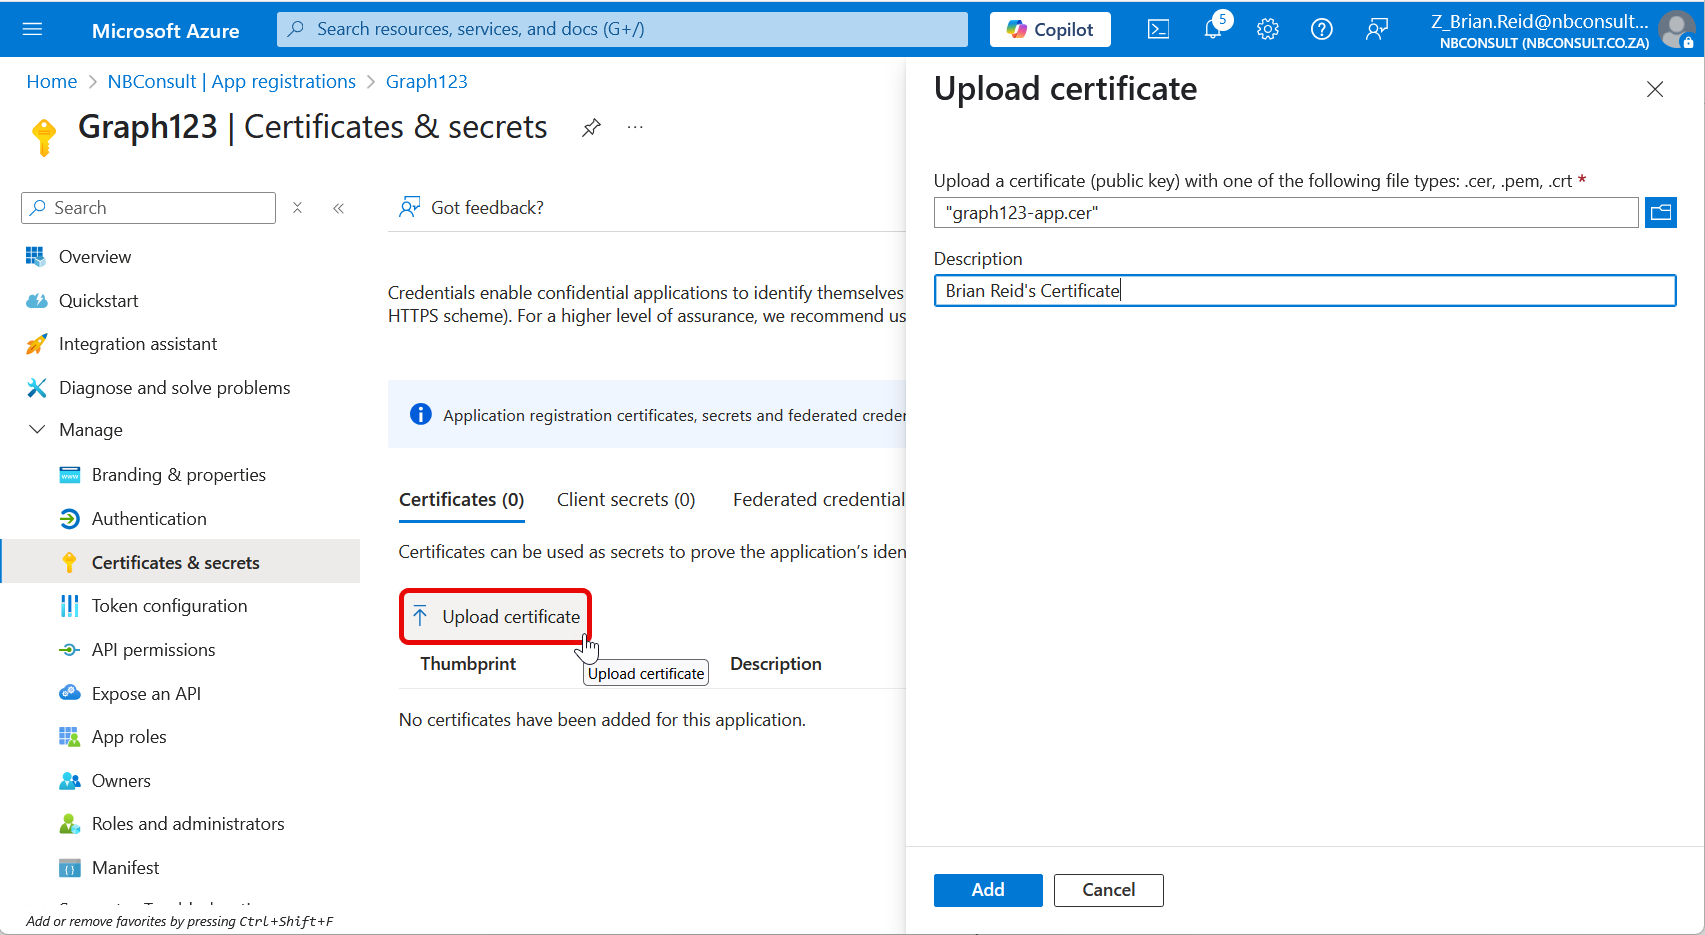
After uploading, the thumbprint shown in Entra/App Registration will match the thumbprint of the certificate on the machine or user profile.

You will need to have this value to hand, as well as the Application ID and Tenant ID to connect to this Entra App Registration and authenticate as the application.
#3 – Authenticating to the Application with the Certificate
To connect to Entra ID using the certificate you need the Tenant ID, the Application ID (client ID) and the certificate thumbprint. We will test all this in PowerShell, so first we will set some variables to contain these values and then connect to Microsoft Graph and access the target mailbox that the application has access to:
$TenantID = "69xxxxxx-xxxx-xxxx-xxxx-xxxxxxxxxx77"
$AppID = "65xxxxxx-xxxx-xxxx-xxxx-xxxxxxxxxx57"
$Thumbprint = "1B016155DC6DB2EB1687B66CA8A21804D824872F"

Connect-MgGraph -TenantId $TenantID -ClientId $AppID -CertificateThumbprint $Thumbprint

$uri = "https://graph.microsoft.com/v1.0/users/brian.reid@c7solutions.com/messages"
$messages = Invoke-mgGraphRequest -Method GET $uri
Success, that is as long as the application has the permissions to do what you asked of it anyway (so Mail.ReadWrite or Mail.ReadBasic.All etc. in the above example).
Photo by Lukas: https://www.pexels.com/photo/person-holding-pen-pointing-at-graph-590020/
Leave a Reply