A recent update to Azure AD Premium 1 (P1) licence has been the use of hardware tokens for multi-factor authentication (MFA). This is excellent news if your MFA deployment is stuck because users cannot use phones on the shop floor or work environment or they do not want to use personal devices for work activities. But it requires a P1 licence for each user. Now a P1 licence gives lots of stuff in addition to hardware token support for MFA, such as (but not exclusively) Conditional Access, which is a better way to implement MFA than when used without P1, which requires MFA in all circumstances and for all apps from all locations.
But if you want MFA in all circumstances and for all apps from all locations, and also need hardware tokens, this is where programable tokens come into play. I recently purchased a miniOTP-2 token from Token 2 (www.token2.com) and they provided me with a C300 token as well so that I could write this blog post.
In the scenario that I am going to describe here, I have two different programable tokens and I will walk through the MFA registration process for a user (using the new user interface for this service that was released end of Feb 2019).

Enabling the new MFA Registration Process
Open the Azure AD Portal from https://aad.portal.azure.com, click Azure Active Directory from the primary menu and then select User settings from the sub-menu. Under Access panel, click Manage settings for access panel preview features. You will see the following:

In this I have previously turned on the preview features for registering and managing security info that was rollout out early 2018 and now I can see a second option for the same, but called refresh.
Set both of these options to All (or a selected group if you want to preview for a subset of users initially). Click Save.
For what follows, it will work even if you have None set for both options, just the screenshots will look different and the latest refresh of this feature is much easier for users to work with – so I recommend it is turned on for both options.
Configure MFA Settings for your Tenant
In the Azure AD portal sub-menu click MFA under Manage MFA Server and click Additional cloud-based MFA settings under Configure. This opens another tab in your browser where you will see the Multi-Factor Authentication / Service Settings.
Under Verification Options ensure that Verification code from mobile app or hardware token is enabled. Other options such as “app passwords”, “skip for federated users”, “trusted IPs” (available if you ever once had the AAD P1 licence on your tenant even if you do not have it now) and “remember multi-factor authentication” can be set to your requirements.
Register a Programable MFA Token for a User
Once you have MFA settings configured you can enable the service for a user and have the token registered for the user. If you have a P1 licence you upload the token serial number to Azure AD, but if you do not have a P1 licence then you need to use a programable token as these appear to act just like authenticator apps you get on your phone.
In Azure AD you can register a user’s token by logging in as the user (they would do this for you) by visiting https://aka.ms/mfasetup. End to end this process takes about 10 seconds – so its very possible to add this process into new user joining procedures or have help desk visit the user or the other way around. This process needs an NFC burner app and device (Android phone is good), but don’t require the user to do this themselves using their phone – burn the token for them using a help desk PC or phone. If you get the end user to walk through all these steps you will confuse them totally!
The new UI for end user security settings:

As mentioned above, the UI you see is based upon the User settings options in Azure AD. If you have just the original refresh enabled, you will see the following instead:

In the first of the above two screenshots I have already registered some MFA devices. If the user has never registered a device before then they will see the following when browsing to https://aka.ms/mfasetup from the initial login and then the MFA registration page, with the registration process ready to start:


If you have already registered some security info, then you will be able to add a hardware token from the + Add Method button and selecting Authenticator App and clicking Next.

The initial steps will show you the following dialog, depending upon if you are a new user (on the left) or adding a new MFA method (on the right):


You are walked through the process of installing the Microsoft Authenticator app on your phone. In this case though, we have a hardware token instead of the app, and so you need to click I want to use a different authenticator app instead. The Microsoft Authenticator App supports push notifications, which hardware tokens do not, and so the QR code provided for the Microsoft Authenticator app will not work for hardware or other authenticator apps.

 (QR code intentionally blurred)
Now you need to scan the QR code using the Token 2 Android app or click Can’t scan image and copy and paste the secret key into the Token 2 Windows app. Links to the apps are available from the Token 2 website software page (with the Windows app shown below):

Click the QR button (or Scan QR button if using the NFC Burner 2 software) and scan the QR code on the screen. This enters the seed in HEX into the app. If you need to enter the QR code by hand, click enter Base32 and type in the secret key value that you get under the Can’t scan image link.
Next, turn the hardware token on (it will remain on for 30 seconds) and hold it to the NFC reader on your Android device (usually next to the camera) or plugged into your PC.

Click the Connect button (or Connect Token depending upon the app you are using) – one of the Android apps are shown below:

Then finally click burn seed.

Turn off the token and turn it back on again – this displays the next valid code. The code that was displayed when the token was first turned on and before the new secret was burned to the device is not valid.
Click Next on the registration wizard on the computer screen. You are asked to enter the code displayed on the token. Azure AD has a 900 second range for codes, so any code displayed in the last 7 or so minutes should be valid to use

Success – if not, turn the token off and on again and try again. If not, go back, scan the code again and burn to the device another time – you are not restricted on the number of times you do this (though doing this wipes previous users of the token from using it again).

Click Done and see your first method of providing MFA shown to the user.

I recommend you add the users phone (for a call or text) as a second method at this point (in case they loose the token, they have a second route in). The user experience for when adding a phone looks as follows:

It is a shame we cannot rename the MFA method – that would be useful, as we could indicate the token name/type and then login to Azure AD could ask for this token by name.
If you were adding a new token to a user with existing MFA methods already in place, you end up in a very similar place:

Success – a new “app” added:

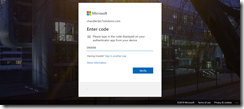
Then at next login when going to the MFA registration page, you need to enter your code:

Note that you don’t need the code yet for logging into Office 365 and Azure AD generally – you have to enable MFA for that and that is the next step.
Enforcing MFA for User
For all other logins apart from the MFA registration page, you need to finish by enforcing MFA for the user. If you have a P1 licence and Conditional Access then this will happen based on the rules, but where you don’t have AAD P1 licence, then you need to enforce MFA for all logins. Do this by browsing to the multi-factor authentication and users page via the Office 365 admin portal > active users > ellipses button > setup multifactor authentication:
Search for your user:

Once you have found the user to enable, select the user and then click the Enable hyperlink:

Followed by enable multi-factor authentication

The comment about “regularly sign in through the browser” is not valid for modern authentication supporting apps such as Microsoft Teams or where you have enabled Modern Authentication for Skype for Business Online and Exchange Online (you need to do this if your tenant exists from before August 2017)

Finally for completion, there is an MFA setting called Enforce. Enforce requires MFA for all logins including rich client applications that do not support MFA – therefore if you have modern authentication enabled and are using Outlook 2013 (with the Modern Auth settings for Outlook 2013 turned on) or Outlook 2016 and later then having the end user remain in Enable mode is fine. If you are using older clients that do not support MFA then Enforce mode will force them to use App Passwords for non-browser apps, and you want to try and avoid that.
Therefore we need to take the user to a minimum of Enable mode in Office 365 MFA so that MFA is triggered for all logins. This step is probably done after hardware token registration as when we set up the token for the user or when we sent the user through the registration workflow we did not first enabling MFA for the user – therefore the user is registered for MFA but not required to use it to login.
Set the user to Enable mode to trigger MFA for all logins:

Leave a Reply to Brian Reid Cancel reply