The following list of steps and screenshots are taken during the enrolment process to add an iPhone and an Android phone to Office 365 once the free MDM solution that comes with Office 365 is enabled for the user.
| Step | Details | Image from iPhone | Image from Android |
|
1. |
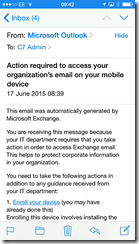
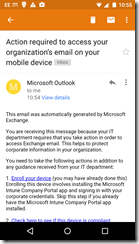
Once your IT Administrator enables MDM for your Office 365 account you will get the following email on your device if you already have email configured. It may take 24 hours from the admin configuring MDM for this to arrive. Once this email arrives no further email will arrive from that account any device until the devices are enrolled with the company for management. |
 |
 |
|
2. |
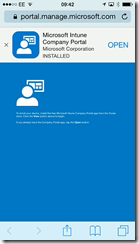
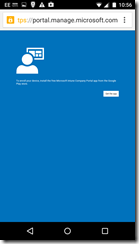
Click “Enrol your device” link in Step 1 of the email. This will take you to the relevant app store of your device to install the Company Portal (iPhone as shown and Android devices). Windows Phone users will see the Workplace Join settings (not shown) In the iOS example, the Company Portal app is already installed so we can click Open at the top. For Android to the right, it shows that the app needs installing from the page they see in the App Store. |
 |
 |
| 3. | Once the app is installed you are required to login. Enter your Office 365 username. Upon entering your username you will either be directed to your network to login (if your company uses AD FS to login) or you enter the password here. Step 4 shows the AD FS login page, which will probably have your company logo on it. If your IT department does not use AD FS you enter your password here (the page will wait for you to enter it) |
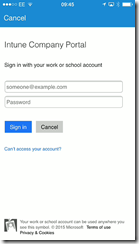 |
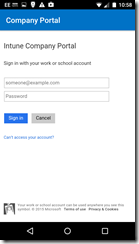 |
| 4. | This is an example AD FS login page with company logo. If you are required to login with other information as well as your password you will be prompted for this as well. | 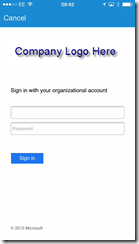 |
|
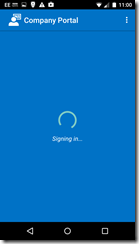
| 5. | Upon login being successful your device will start the enrolment process by connecting to both Office 365 and the device manufacturer to download required secure management info. | 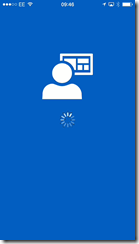 |
 |
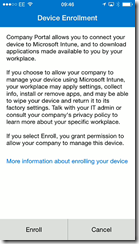
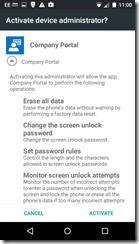
| 6. | For iOS click Enroll to start the process. For Android you need to click Activate.
The company you are enrolling your phone into will have some rights over some of the data on your phone – for example they will be able to remove the work email account from it if you leave the company. Enrolment conditions will be enforced based on your companies requirement for using phones to access company data, for example a PIN number of a minimum length (see http://bit.ly/o365mdm for more on this) |
 |
 |
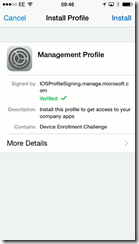
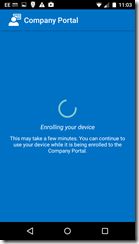
| 7. | Enrolment goes through a series of steps with the screen changing a few times automatically. Within a seconds you end up at the “Install” screen. Click Install to add the management profile for the displayed company here.
Android and Windows Phone have less steps to go through. |
 |
 |
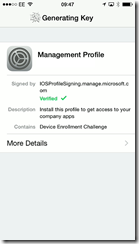
| 8. | A unique encryption key is generated for your device when using iOS devices.
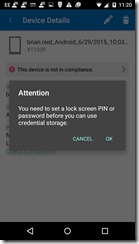
For Android, you need to accept the compliance requirements configured by your administrator. If you do not complete these requirements then business applications will not be available on the device. |
 |
 |
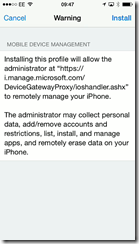
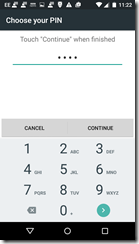
| 9. | You need to click install at the personal settings screen when using iOS devices.
For Android, once compliance requirements are set (in this case a PIN number is entered). Note that for iOS, you have 1 hour to enter a PIN number to become compliant, but not for the Android. |
 |
 |
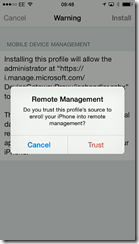
| 10. | You need to confirm that you trust this company for remote management of your device when using iOS devices.
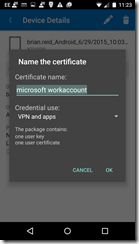
For Android you need to name and install the certificate. |
 |
 |
| 11. | The management profile is installed and you can click Done when using iOS devices. | 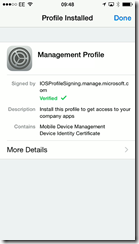 |
|
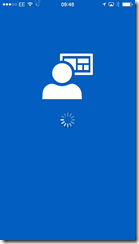
| 12. | Device checks that it is enrolled and what the device settings are and if these settings are compatible with the companies required restrictions on the device.
On Android you may get a prompt about entering a PIN number or other compliance requirements if you did not enter them earlier |
 |
|
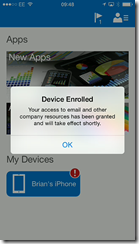
| 13. | Enrolment is confirmed. Notice that my device(s) are displayed and my current device is not compliant with company policy (the red exclamation mark).
For Android devices, the My Devices tab will show your devices, including if there are any compliance issues. |
 |
|
| 14. | Clicking my device in the Company Portal app shows the compliance status of the device. Here the device is still checking compliance | 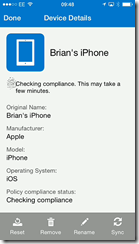 |
|
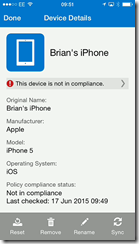
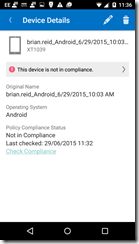
| 15 | And here the device is shown not to be compliant.
For Android devices not in compliance, it shows an Enrollment update available (if you did not meet compliance requirements during the Company App enrollment process) or if you are not compliance (for example device is not encrypted) then it will show that the device is not in compliance as shown. |
 |
 |
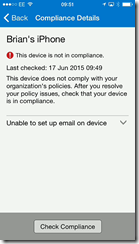
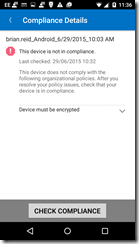
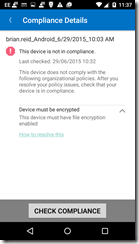
| 16 | Details on compliance state is iOS shows the “This device is not in compliance” message.
Further details on the compliance failure are shown under the message. In this case the iOS device is unable to set up an email profile on the device and the Android devices need a longer password and device encryption |
 |
 |
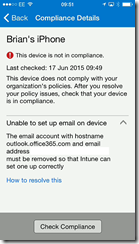
| 17 | Clicking the “Unable to set up email on the device” message shows the full details. In this case the device already has an email profile configured and for the iPhone this needs to be removed and the Company Portal will recreate it. It is this recreated email profile that the iPhone/iPad can manage.
Android and Windows Phone users do not need to delete their email profile and have the device recreate it but Compliance requirements must still be met. |
 |
 |
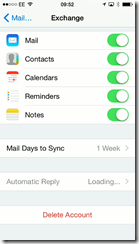
| 18 | For the iPhone/iPad the steps to delete the existing profile are Settings > Mail, Contacts, Calendars > Click the email profile > click Delete Account
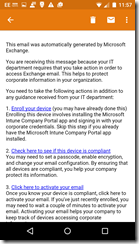
For Android, if the device is compliant in the Company App then you need to check Exchange Server to validate this for you so that your email continues to work. Back in the email program view the enrollment email as shown – click hyperlink #2 in the email and sign into the web based Device portal |
 |
 |
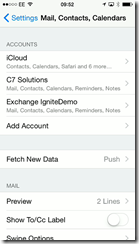
| 19 | Once the account is deleted on the iOS device it is not visible in the list of email accounts.
In this example the iCloud account remains along with two Exchange / Office 365 accounts that are not managed by MDM. You can only have one MDM managed account per device at any given time. Other compliance settings may be required such as a PIN number. You have 60 minutes in iOS to enable this if required. |
 |
|
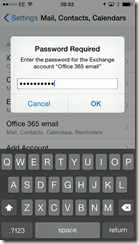
| 20 | Once the Company App checks for compliance again and if you are compliant, a new email profile for your work appears. Clicking it (called “Office 365 email”) requires entry of your password.
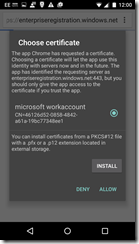
In Android, once the device is shown as compliant in #2 of the email, click the hyperlink for #3 in the email. Click Allow on the certificate prompt if you see one. |
 |
 |
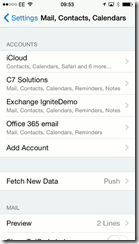
| 21 | You then see the email profile created. Compare this to the image in Step 19 for the difference.
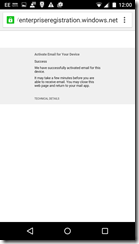
An Android, you will be informed that your device has successfully authenticated for email. |
 |
 |
| 22 | It is possible to rename the email profile. In this case it is via Settings > Email, Contacts, Calendars > Office 365 email > Account and then change the “Description” value | 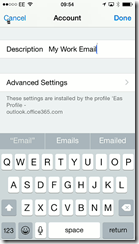 |
|
| 23 | Updated email profile listed | 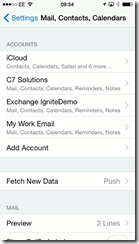 |
|
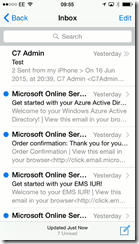
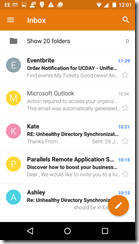
| 24 | Email should now sync with your device again. Notice that the email about needing to set up MDM is now missing and has been removed automatically.
On the Android, drag the Inbox screen down to refresh it and your emails will appear. |
 |
 |
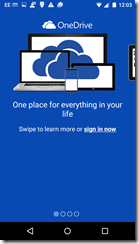
| 25 | Now that the device is compliant (excepting the PIN number, which gives you 60 minutes of grace to complete this step) you can start other Office 365 aware applications. Here we are going to sign into OneDrive and show our OneDrive for Business data | 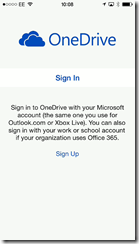 |
 |
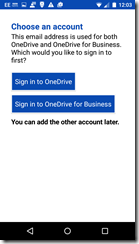
| 26 | Your app requires a login | 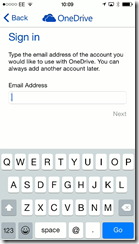 |
 |
| 27 | Which if you have an AD FS additional login you may also see | 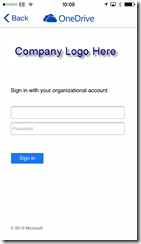 |
|
| 28 | Your other app is now working, and in the case of OneDrive for Business did not need configuring | 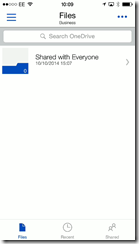 |
Leave a Reply