In a recent update for Teams Room, pro licence, you have the ability to display relevant messages in your meeting rooms when there is no meeting taking place. Options include a default message for any room that has “digital signage” enabled, and specific messages per room or group of rooms.
Though there are third party services for helping you do signage, this blog post will look at creating a simple, single message for all rooms in the company in a few minutes. There is no options for rotating displays or time-based messaging – for that you need more complex code or the third-party services that integrate with Teams Rooms.
Step 1 is to create a simple webpage and host it on an accessible web server and not to require any authentication – the page must not be behind a login screen (so SharePoint Online will not do) and must be accessible to all the Teams rooms, so a public web site will do for this example.
This is a single web page and a single image. The image is a full screen cover image with two lines of text as can be seen below. In my example I made a new folder on my web server called “digitalsignage” and placed these two files in this folder.
<html>
  <head>
  <meta http-equiv="refresh" content="3600">
  <style>
  body {
    background-image: url('skier_jumping.jpg');
    background-repeat: no-repeat;
    background-attachment: fixed;
    background-size: cover;
  }
  h1 {
    font-family: Arial, Helvetica, sans-serif;
    font-size: 40px;
  }
  h2 {
    font-family: Arial, Helvetica, sans-serif;
    font-size: 30px;
  }
  .bottomleft {
    position: absolute;
    bottom: 32px;
    left: 16px;
    padding-bottom: 50px;
    padding-left: 80px;
    color:navy;
  }
  .bottomleftlower {
    position: absolute;
    bottom: 0px;
    left: 16px;
    padding-bottom: 50px;
    padding-left: 80px;
    color:navy;
  }
  </style>
  </head>
  <body title="Digital Signage Demo">
    <h1 class="bottomleft">Company Skiing Holiday</h1>
    <h2 class="bottomleftlower">December 19th - 28th</h2>
  </body>
</html>
And here is what the above HTML looks like:

Once you have taken the HTML, found a suitable picture and modified both lines of text to suit your purposes (the H1 and H2 lines near the end of the HTML) you can upload this to a dedicated folder on your public website (“digitalsignage” folder in my case). The meta tag near the top causes the page to reload every 3600 seconds (once an hour), so if you change the page HTML or graphic, the Teams rooms will update within an hour.
Step 2 is to add the required settings to Teams Rooms. You need to login to the Teams Room Pro Portal (https://portal.rooms.microsoft.com) and under Settings enable “Digital Signage”. You need to have permissions to complete this, and the default role of “Teams Room Pro Manager” is the only role that allows you to do this. It is possible for someone holding this role to create a custom role that will allow another user to manage just the digital signage management and nothing else.
If you have never enabled Digital Signage you will be prompted to turn this on:
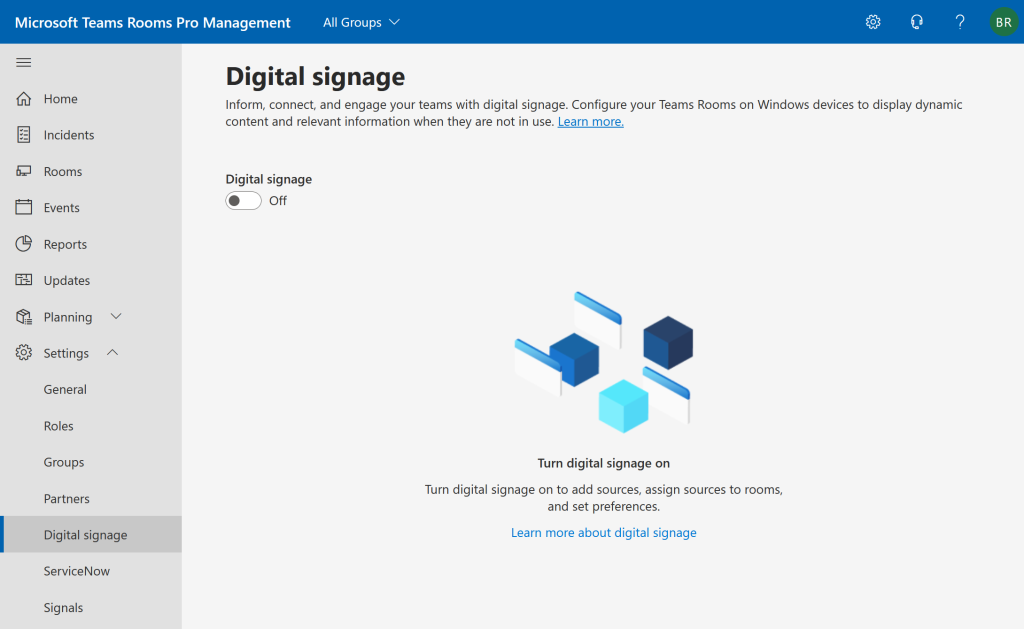
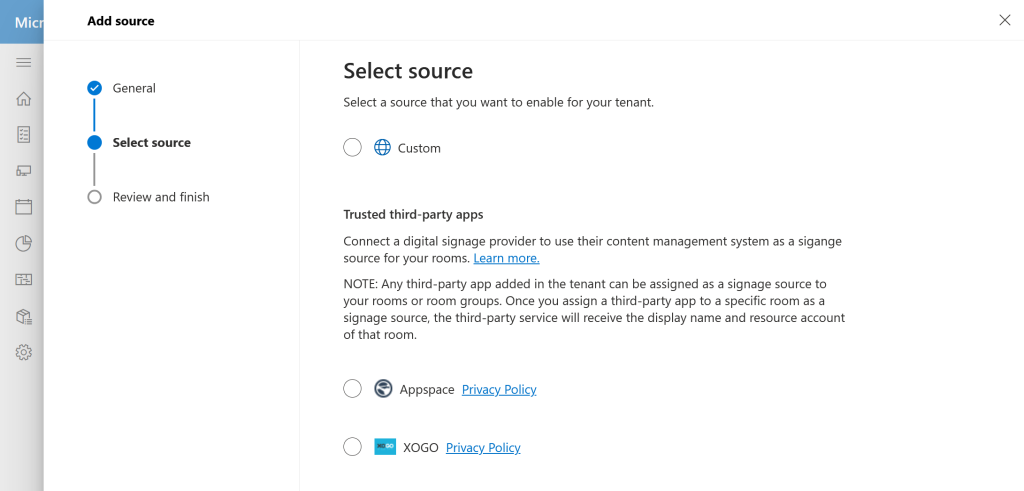
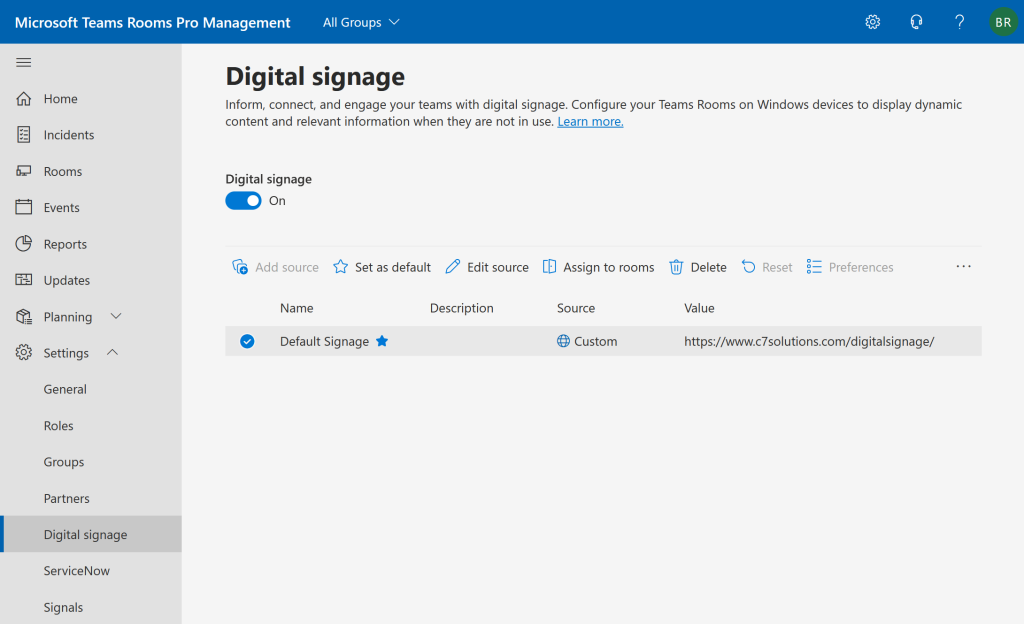
And once enabled you can add a source. If you have multiple rooms and multiple messages (and separate web pages for each, then add multiple sources). For hosting the content on your own web server, choose “Custom” as the source.
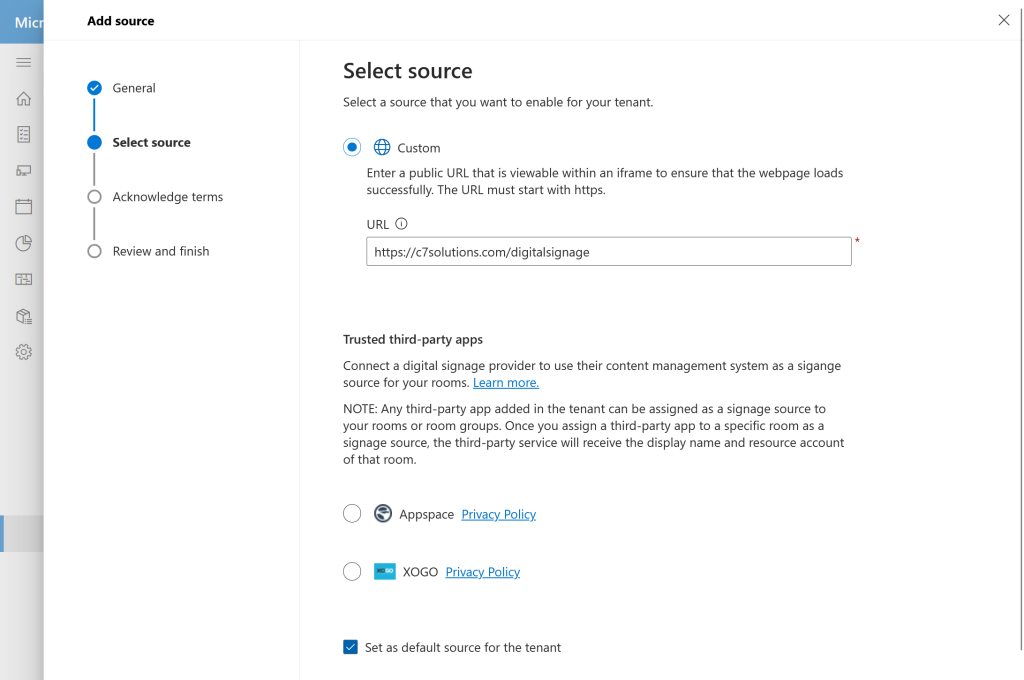
Once you select “Custom” you need to enter the URL to the digital signage website, which is my case is https://c7solutions.com/digitalsignage. You also get the option to set this as the default source for the tenant. This means rooms without a specific source, but enabled for signage, will get this source.
Click Next to complete the process and check your settings are correct. Once you are done you can assign rooms to the signage source.
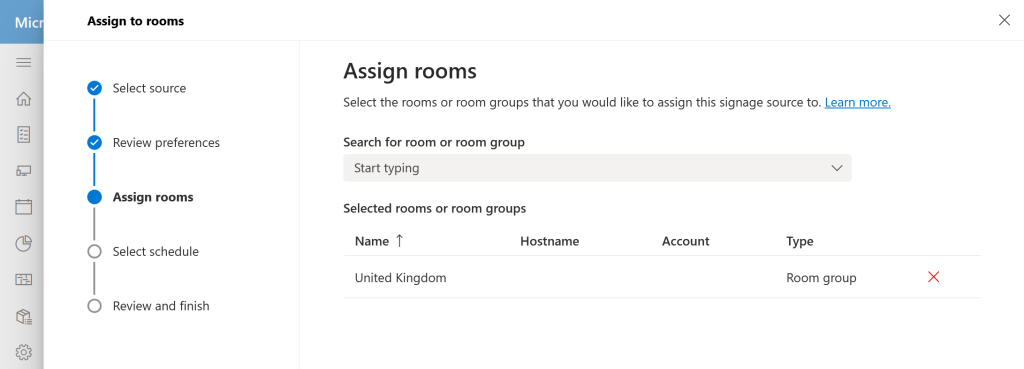
Step 3 is to assign rooms to the digital signage source. You can assign rooms individually or in groups if you have already configured groups of rooms. There is a simple click through process for doing this, initiated from the end of the digital signage setup process.
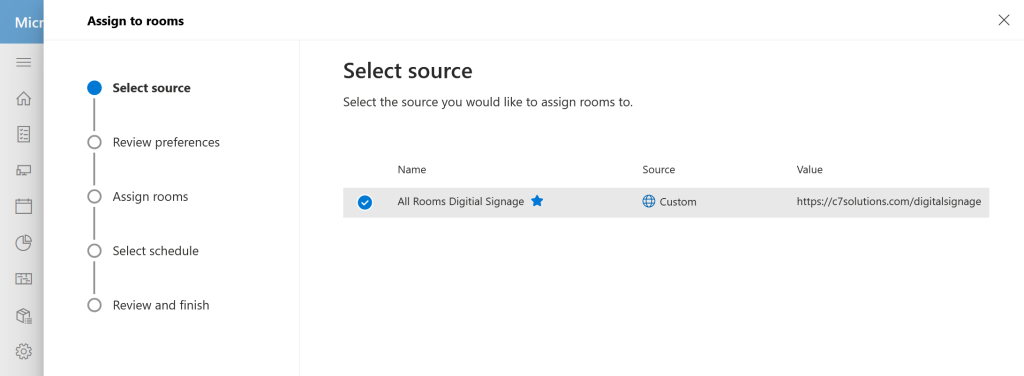
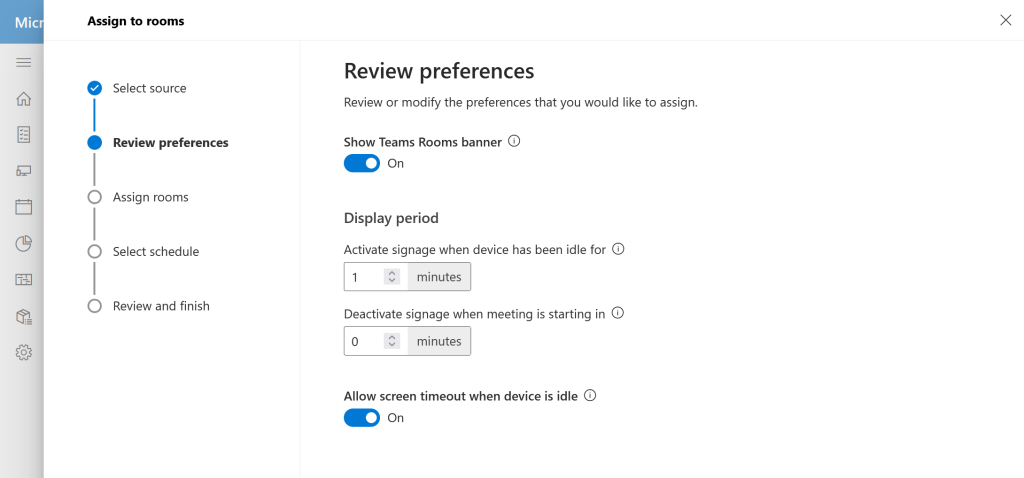
You also get to specify when to enable the signage (after how long the room has not been running a meeting for (idle time) and can be 1 to 100 minutes after the meeting has finished. The messaging can be removed from the room before the meeting starts, and this defaults to 0 minutes but can be longer.
You can also ensure that the device timeout is allowed to complete as well. This will ensure that the screens power save etc. You can turn this off globally or on selected rooms, though note that for the custom source this means rooms will display their signage on their screens overnight as well as during the day (always on signage).
The Teams Room banner, shown in the images below, can also be removed. If you leave this in place, make sure your messaging is below this banner.
Enter the names of your rooms or room groups (shown below):
Then apply your changes. The option exists to apply the changes during the maintenance window, though if you choose to “Apply Now” your devices might reboot. Apply Now will not include rooms with active meetings happening.
I had noticed that I was not always successful on idle rooms if I choose “Skip and Close”. I suspect that if I choose that option I needed to wait until after the maintenance window, but even then I was not certain that it was working, especially when I was trying to turn off digital signage.

The Teams Room Pro Management portal will now show digital signage as enabled and each source you have added. Preferences can be used to change the idle timeouts.
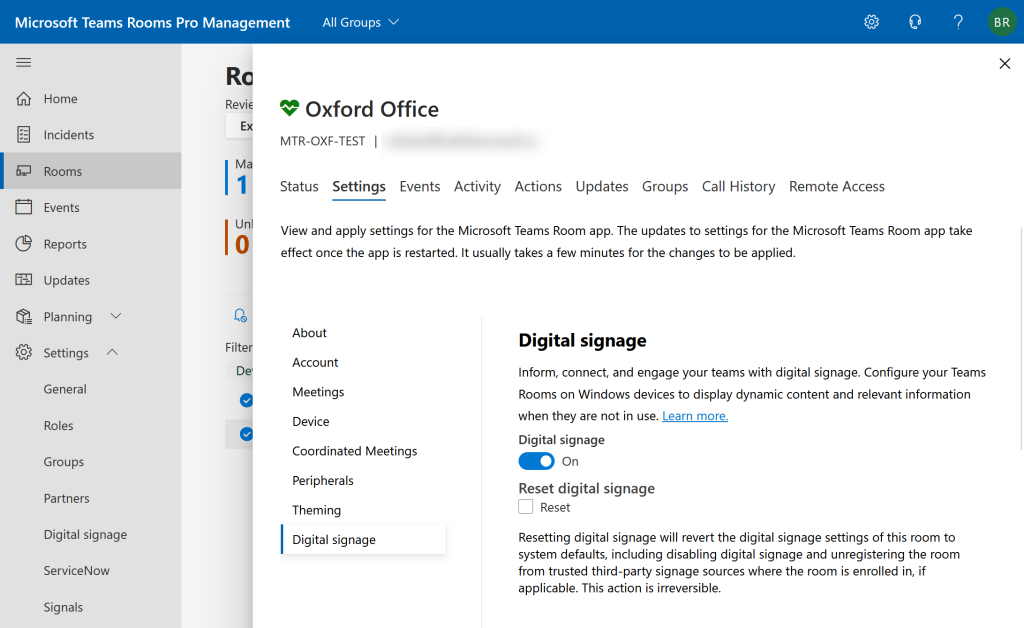
Each room will also show the source if you view those settings.
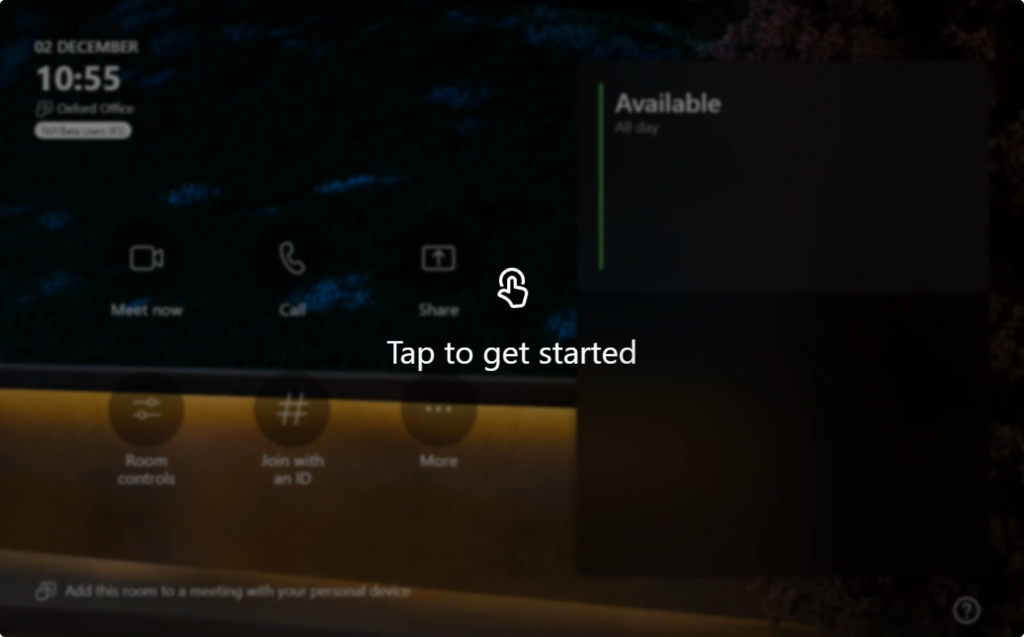
Once the settings are pushed to the room and the idle timeout has passed, the room console will show “Tap to get started” to allow the user to remove the signage and start and schedule meetings, and the main display will show the web page full screen (in this case with the Teams Banner across the top):

Finally, if you want to restore the settings to the defaults, you can choose to reset your settings. This option will remove all sources and turn off signage in all rooms. I was most successful with this if I choose not to skip the wizard but waited until it was completed.
Header photo by fauxels: https://www.pexels.com/photo/group-of-person-sitting-indoors-3184306/

Leave a Reply