
For the last two years (or more) that High Volume Email (HVE) has been in preview in Exchange Online it has been a free to use service. From June 1st 2026 it will cost $42 per million recipients (internal, it does not deliver to external recipients) and is billed via an Azure subscription.
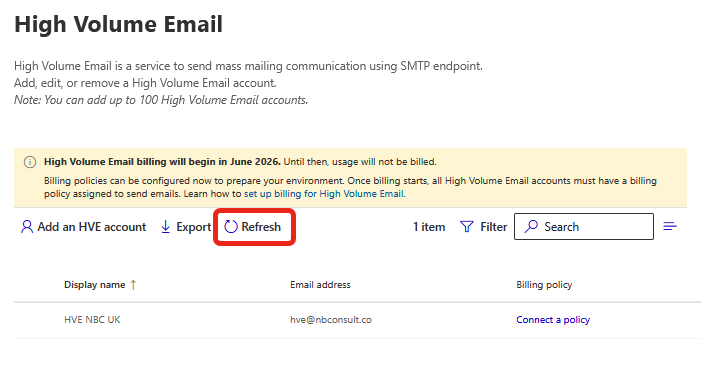
So how do we configure all the bits. We start with the Exchange Online admin portal at https://admin.cloud.microsoft/exchange > Mail Flow > High Volume Email and we see a new message about requiring a billing policy. If it is past June 1st 2026 and you do not have a policy in place for an account, that account will no longer work and you will see a message saying “Not active”.
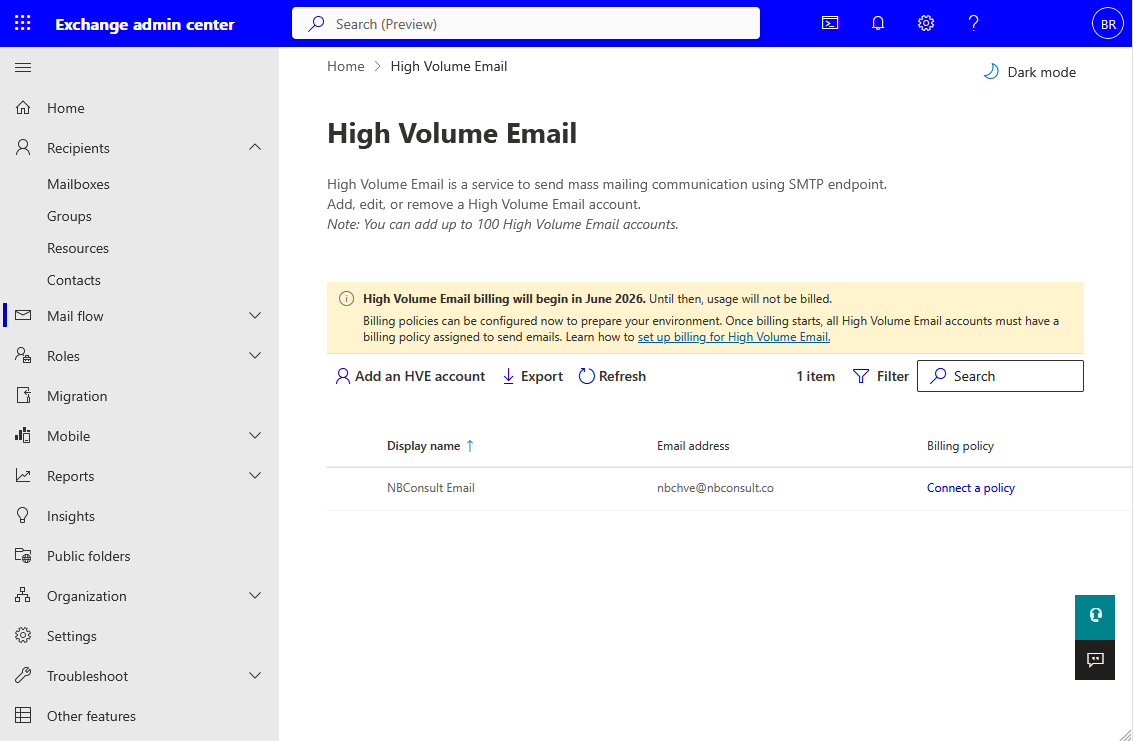
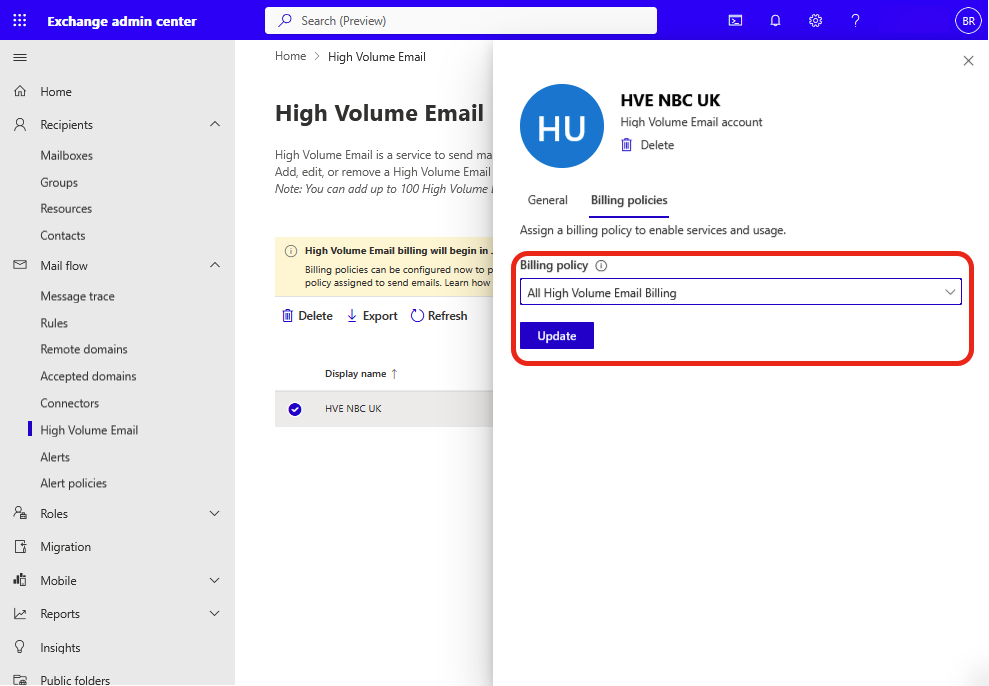
Before you assign a billing policy to an HVE account, ensure that Microsoft 365 pay as you go billing is set up for your tenant. If you have this in place for an existing HVE account you can just click the Connect a policy link to the right of the account name. Each account needs a policy and each account can have its own policy, and therefore its own billing, or share a policy or something inbetween. Note though that one HVE account cannot have more than one policy – you cannot share billing across policies.
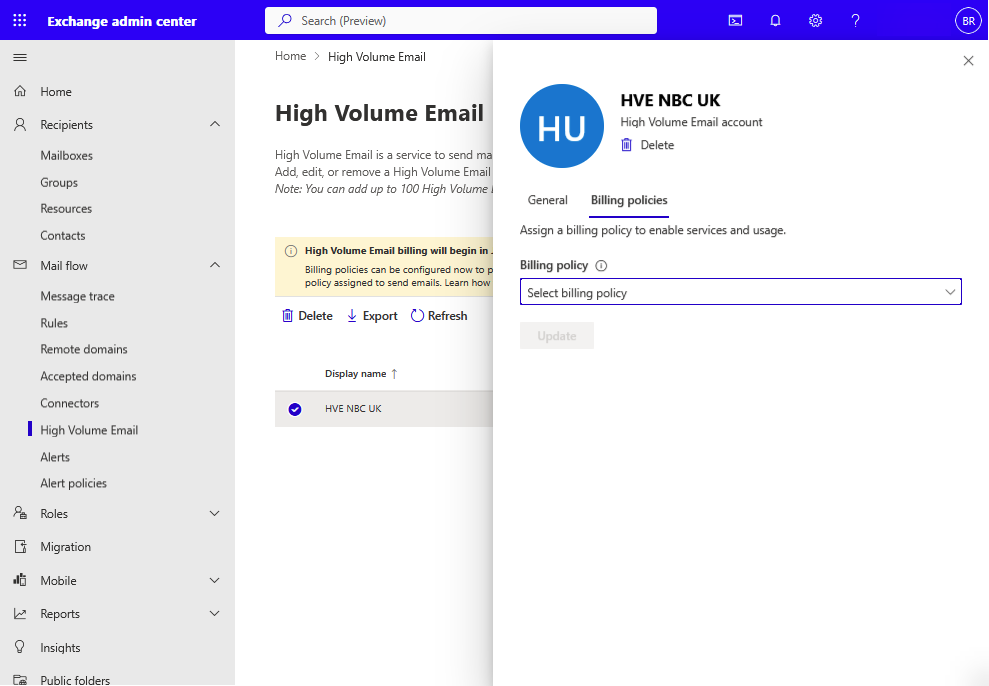
In the above screen I have no available policies, so there is nothing to select in the “Select billing policy” drop-down. The General tab contains the HVE settings and this I have covered elsewhere. In the event there is an issue with the billing policy then this will show an error state here as well.
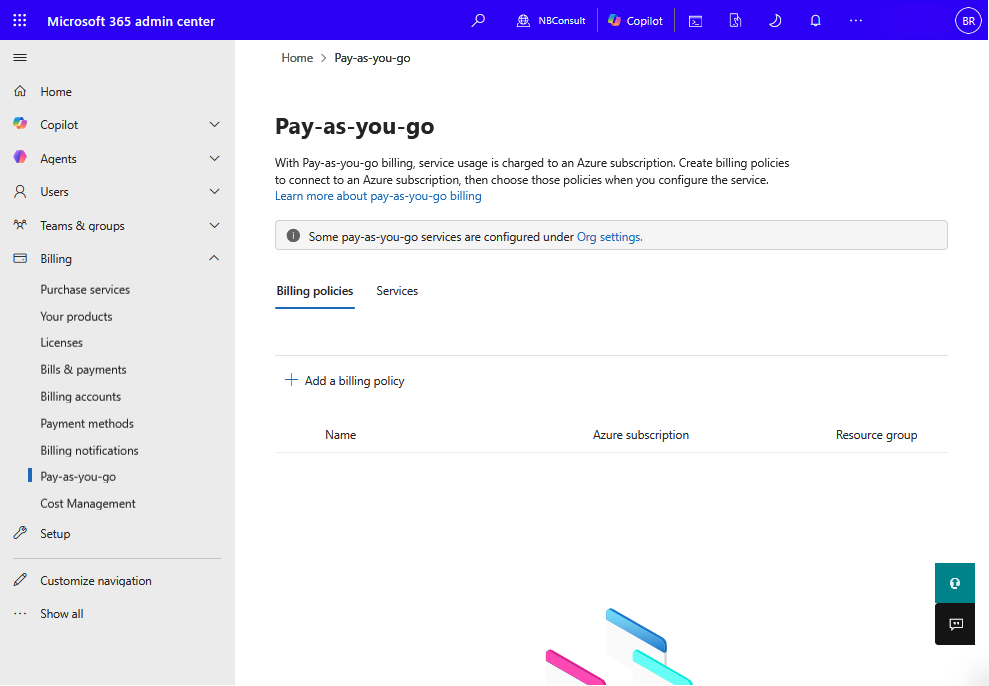
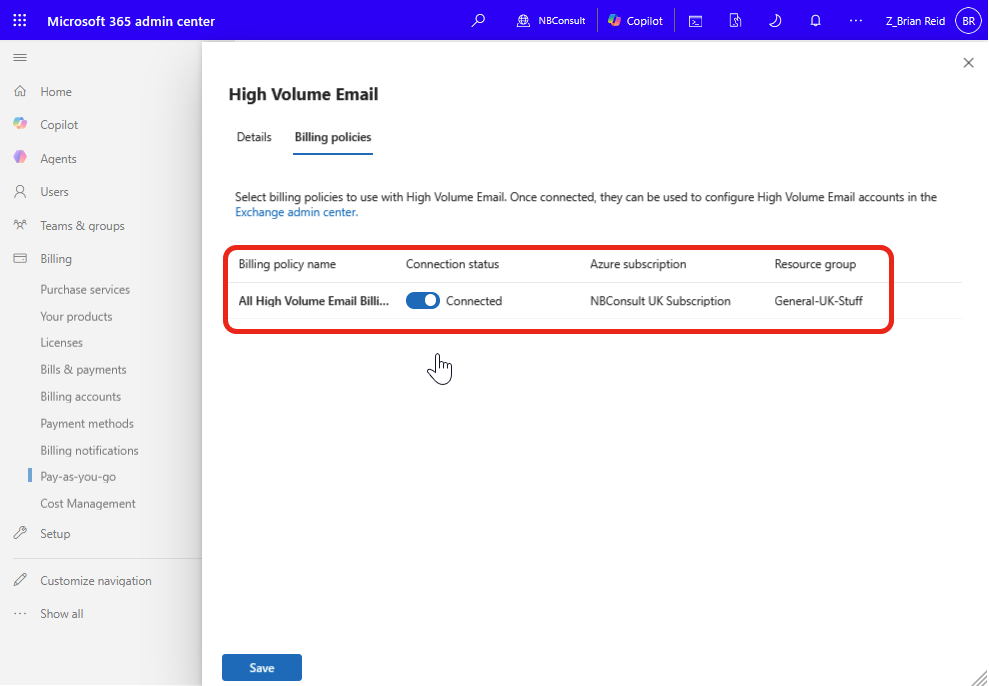
To configure HVE billing, navigate to the M365 Admin Center at https://admin.cloud.microsoft/ > Billing > Pay-as-you-go.
From the M365 Billing pay-as-you-go portal, add or update an existing billing policy. The flyout will ask for a name and then three Microsoft Azure values. In my example below I am going to create one policy for all my HVE accounts, so I have named it “All High Volume Billing” and I have selected an existing Azure subscription, resource group and region. You can make a new subscription, resource group and select whatever region makes sense to you.
You can also assign multiple services to a single billing policy, but that makes tracing spend a little harder, so separate policies per service is probably the best idea.
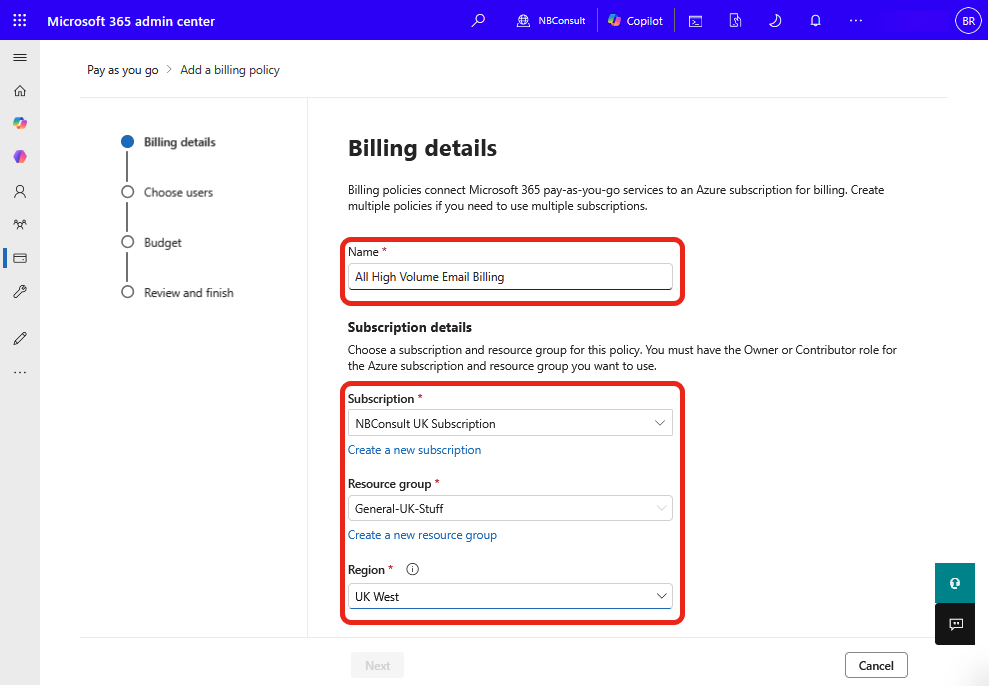
As this is tied to Microsoft 365 billing, a name that indicates what the resource it that is being billed is a good idea – the person in charge of billing might not know what you mean by HVE, so I have opted to include “email” in the name. Your final option, not shown in the above screenshot, is to accept the terms of the pay-as-you-go billing service and click Next.
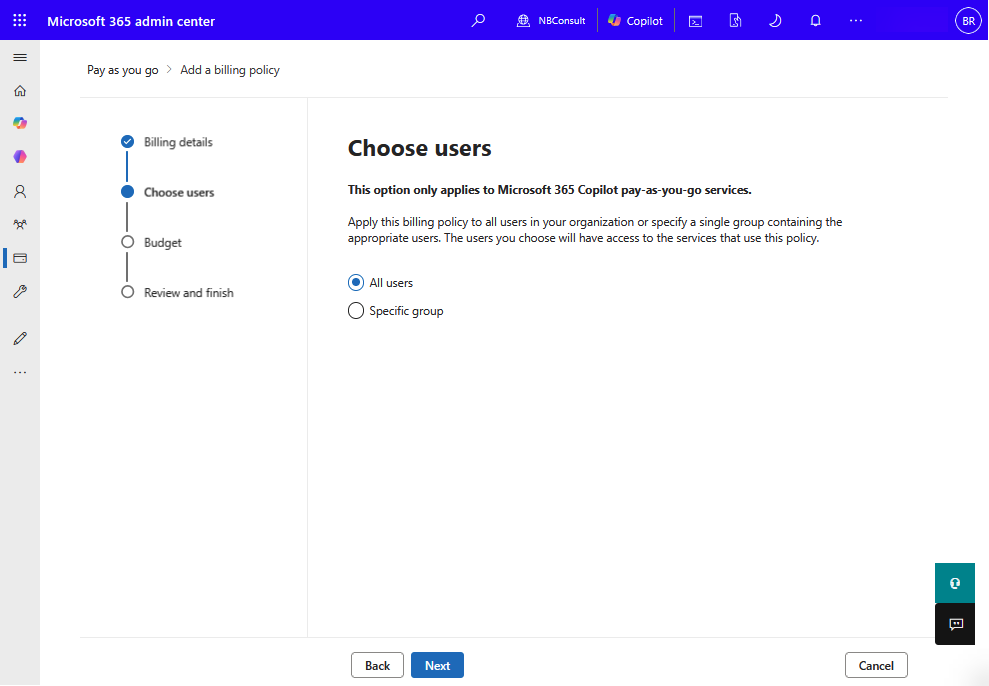
The second page is the Choose Users page where you will select who can use this billing profile. You need to ensure that any group you select would contain the Exchange Administrator who is setting up the billing policy. They do not need to be the person paying the bill – that is managed by the Azure subscription settings. You need to select the user of the policy here.
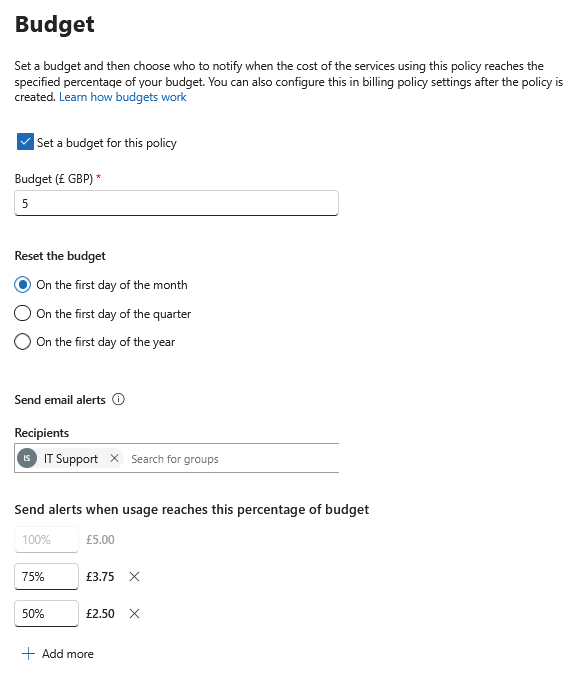
Page three of the pay-as-you-go billing policy creation allows you to set budgets. Now HVE is $0.000042 per recipient, so its unlikely to hit any budget, but just in case of run away code or agent, you can set a policy here as well as who gets notified and at what percent and on what day the budget resets. So below is a monthly budget of £5 with alerts to IT Support on 50%, 75% and 100% of budget.
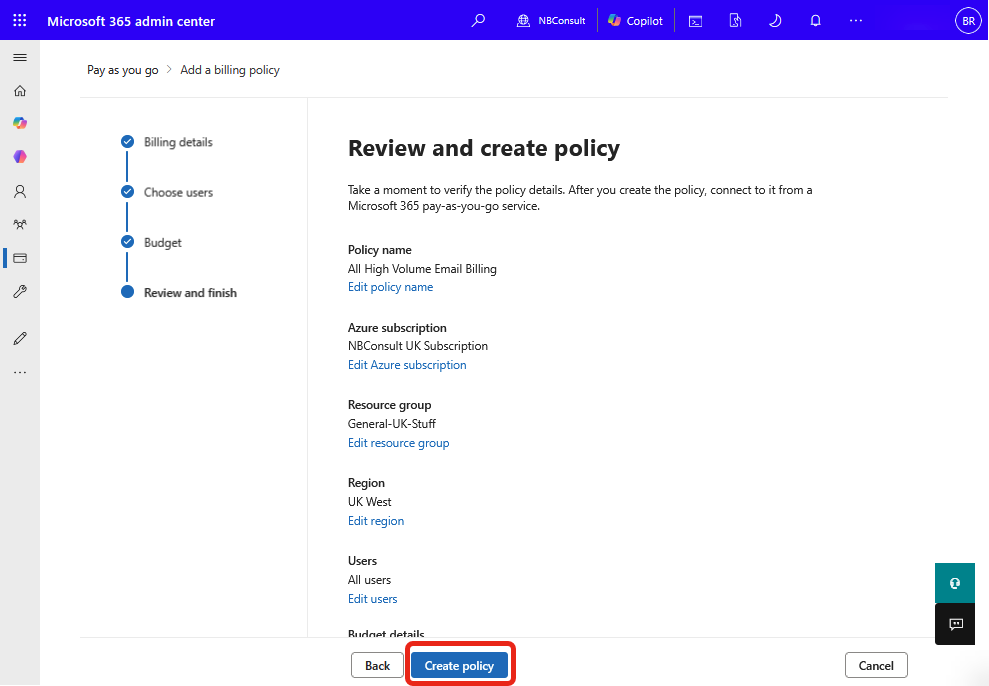
The final page sumarizes the policy settings and allows you to create the policy.
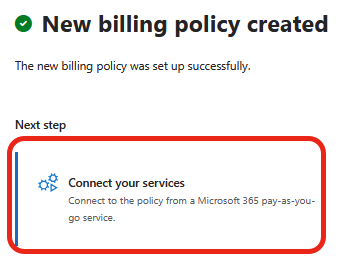
Once the policy is made you need to connect it to the High Volume Email service or you will not see the policy available in the Exchange Admin Center.
Note the other services that are listed. You can do pay-as-you-go billing for Microsoft 365 Copilot and Microsoft 365 Backup. Save the changes and return to the Exchange Online Admin Center.
Back in the Exchange Admin Center click the Refresh button to load up the newly connected billing policy:
Click “Connect a policy” and select the correct policy from the list. Click Update to apply and you are done.
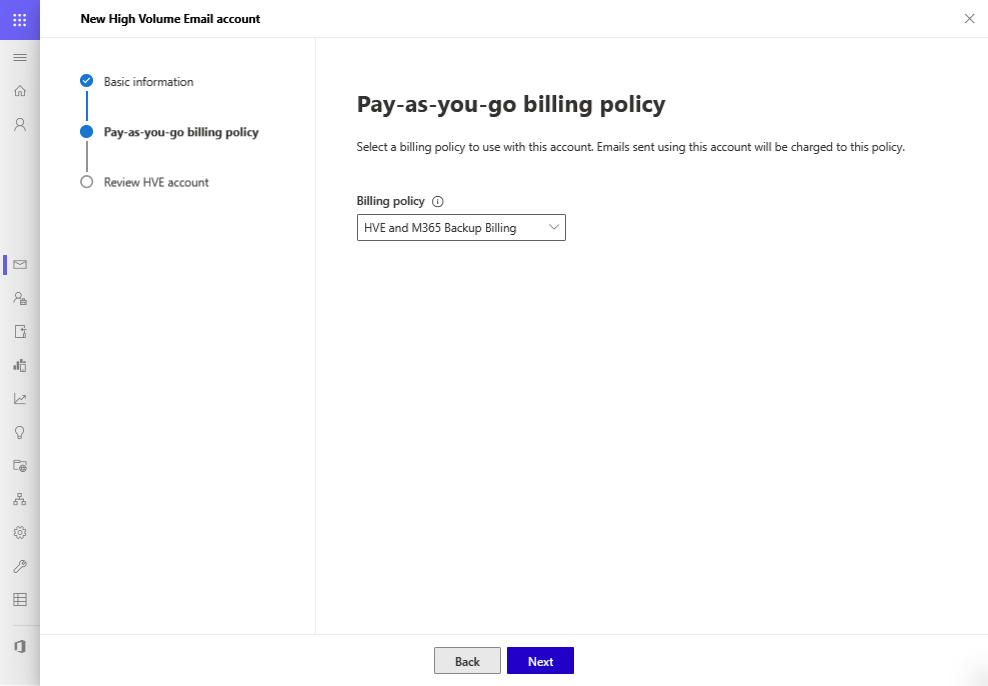
If you are creating a HVE account from scratch, the Pay-as-you-go billing policy is requested during the account creation process.
To configure HVE billing using PowerShell you need to connect to Exchange Online. To view the available billing policies use Get-BillingPolicy -ResourceType HVE. To view the policy assigned to a HVE account use Get-HVEAccountBillingPolicy -Identity hve_account@domain.com.
To assign a billing policy to a HVE account using PowerShell run the following:
[array]$billingPolicy = Get-BillingPolicy -ResourceType HVE
Set-HVEAccountBillingPolicy -Identity hve_account@domain.com -BillingPolicyId $billingPolicy[0].Id
Or, to assign a single billing policy to all your HVE accounts, use:
[array]$billingPolicy = Get-BillingPolicy -ResourceType HVE
[array]$HVEAccounts = Get-MailUser -HVEAccount

ForEach ($Account in $HVEAccounts) {
  Set-HVEAccountBillingPolicy -Identity $Account.PrimarySmtpAddress -BillingPolicyId $billingPolicy[0].Id
}
In my tenant, using PowerShell showed me an error “BillingPolicyMismatched” and “The specified billing policy is mismatched to requested data” that was not fully visible in the Exchange Online Admin portal, as the portal just showed a – for the “Billing policy” field and an “Active with warning” for “Account status”:

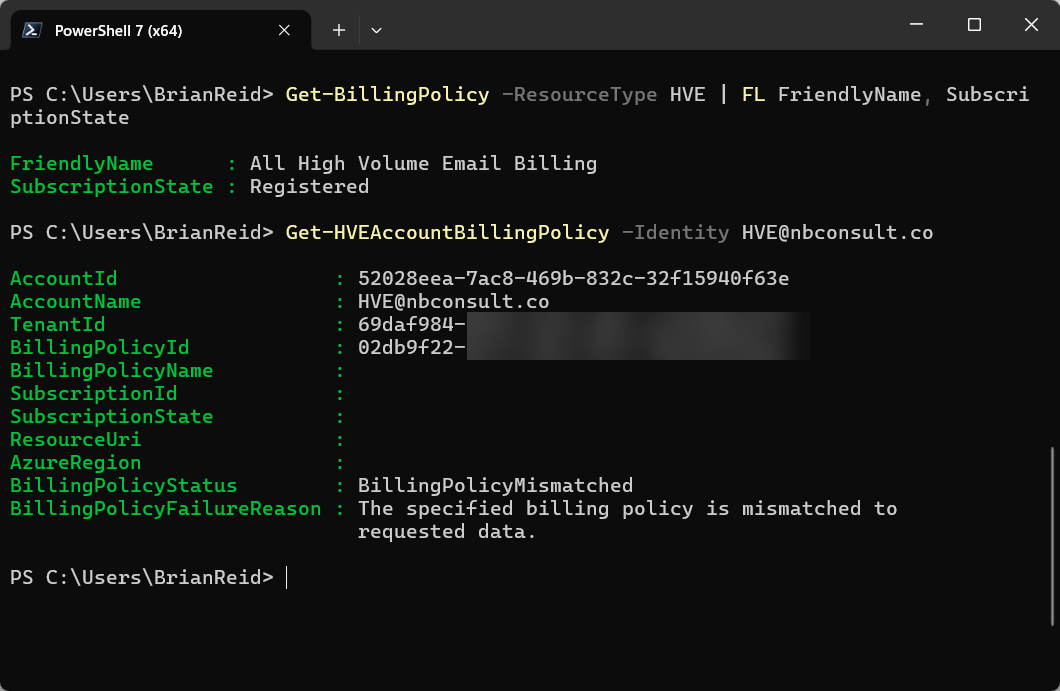
Microsoft documentation for this error helpfully says “This is an uncommon scenario” and that this particular error does not show itself in the admin portal!
I have tried a number of things to remove this issue, but in the end I needed to raise a support ticket with Microsoft and by the time it was escalated internally the issue was fixed!
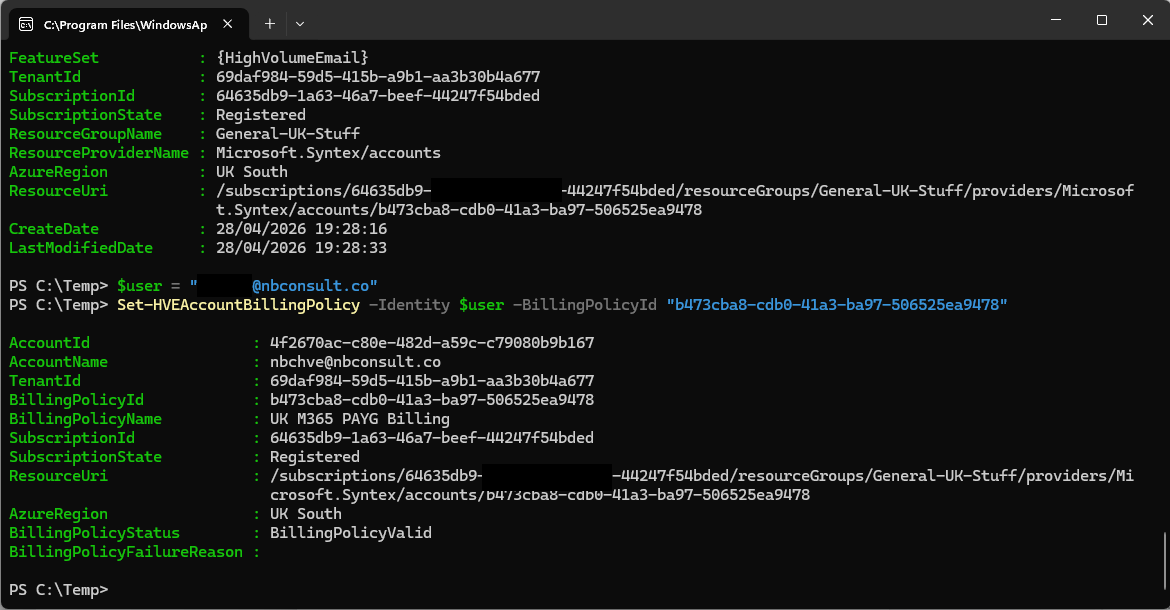
Using PowerShell I ran Set-HVEAccountBillingPolicy -Identity HVE@nbconsult.co -BillingPolicyId “” to clear the existing billing policy (which I cannot do via the admin portal) so I could remove a policy.
Once done, and any errors out of the way, I can use Set-HVEAccountBillingPolicy -Identity $user -BillingPolicyId $billingPolicy[0].Id
HVE will bill to the Azure Subscription with alerts and budget restrictions if you have them in place. And if you are doing this in April and May 2026 its important to have this in place before billing starts on 1st June 2026.
Leave a Reply