This is a issue where you enabled Admin Approved Consent in Azure AD (as you should) and you require apps that have high data access rights to be approved. The Zoom add-in/desktop app falls into this category as it requires write access to your calendar and your contacts in Exchange Online.
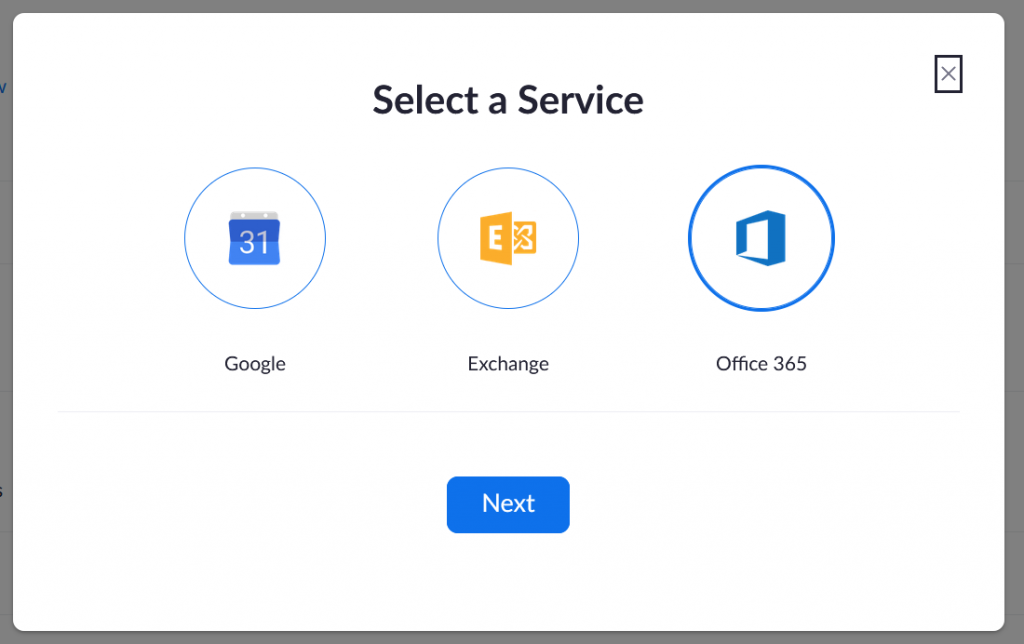
But if you set up admin consent requests in Azure AD you may find this breaks – the user requests consent calendar and contact access via the Zoom profile page (https://zoom.us/profile), chooses Office 365 and gets the following prompt.

The admin gets a request for approval email (as consent requested permissions are high [write calendar and write contacts]) and then once approved the user gets an email telling them so.
So the user goes back to the Zoom profile and tries again – and they get the same option as above. Though the admin has approved the app, it appears the user keeps asking for the admin to approve it.
The fix for this is in the Zoom admin Account Settings pages at https://zoom.us/account/setting and then scrolling down a long way to the “Calendar and Contacts” section (just search the page for 365 to find this bit).
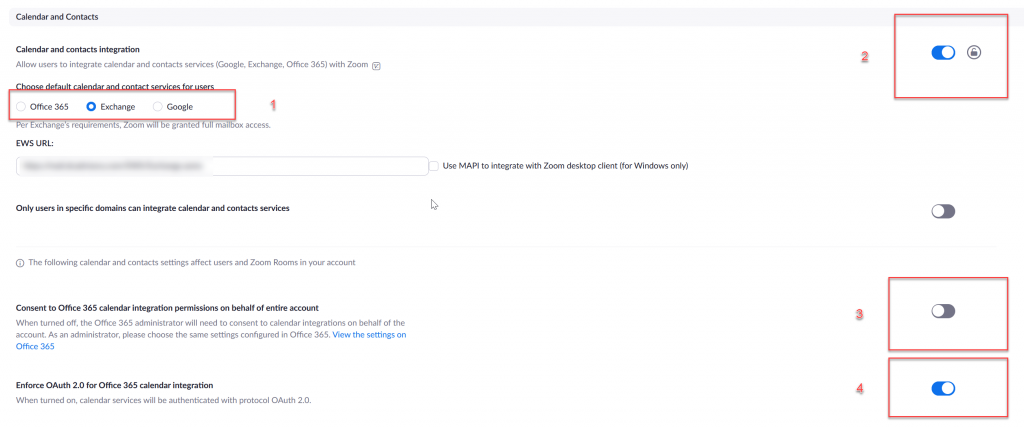
Here you need to disable the option where users are asked to request consent. As in Azure AD you have set “admin grants consent”, you need to match this setting in the Zoom admin pages. This setting is as follows:

Ensure the option highlighted matches your Azure AD consent settings – that means, as admin approval is recommended in Azure AD this setting in Zoom should be turned off (user does not request consent).
Other useful options you can set when you are here are to force the user to only consent for Office 365 (remove Google and Exchange Server options). Obviously if you have users mailboxes on either of these platforms and O365 you would not set the lock to the right as shown below:

This hides this option from the user when they go to choose consent:

Once the platform is locked, the users experience removes the above page and shows the following in their Zoom profile:

Then finally, you can enable the “Enforce OAuth 2.0 option” for Office 365, which is the last option in this section. This stops the user consenting via a legacy method that uses EWS and requires more than necessary permissions. By disabling this option you reduce the end user choices during calendar consent – that is the user chooses to consent and it is done, otherwise the user is presented with more steps than might be useful!
Here are my recommended settings for Zoom consent if using Exchange Server or Exchange Server and other providers (i.e. Exchange Hybrid with mailboxes in both Exchange Server and Exchange Online) as described above:

- Choose your service provider. If using Exchange Server (or Exchange Server and one or more of the other options), set Exchange Server as the default so that the EWS URL is visible and enter this value of your EWS ExternalURL from Exchange Server. If you set the other providers as the default the EWS URL is blank and the user will need to enter it if they select Exchange Server during their consent steps.
- Lock this option if using only one provider.
- Turn this off and ensure you require Admin Consent (Microsoft default to this since the end of 2020).
- Set Office 365 consent to OAuth 2.0 to turn off the EWS option for Exchange Online. This setting does not affect your Exchange Server EWS URL mentioned above.
My recommendations for a company using Office 365 are as shown below:


Photo by Julia M Cameron from Pexels

Leave a Reply