This article is the second in a series of articles about protecting and sharing your content no matter where it is and how you made it. To protect your content so it can be used by those that you allow alone you need to assign rights to it. Here we are going to look at Windows Azure Active Directory Rights Management, or AADRM, or “the new RMS” to do this.
In this series of articles we will look at the following:
- What is Rights Management
- Turning on Azure Active Directory Rights Management (this article)
- Managing Azure Active Directory Rights Management
- Enabling and Configuring AADRM in Exchange Online
- Enabling Microsoft Rights Management in SharePoint Online
- Creating Microsoft Rights Management Templates and Policies
- Configuring Exchange On-Premises to Use AADRM (the RMS Connector)
- Configuring Exchange On-Premises to Use AADRM
- Configuring SharePoint On-Premises to Use AADRM
- Using Microsoft Rights Management from Microsoft Office
- Using Microsoft Rights Management to protect anything/everything else
The items above will get lit up as the articles are released – so check back or leave a comment to the first post in the series and I will let you know when new content is added.
To use and protect our content for any of the scenarios described in the following articles we need to sign up for AADRM and activate it. If you are an Office 365 E3 or E4 subscriber then you have done the signup already.
Signup and activate AADRM
- Sign into Office 365 as a global administrator or create a new Office 365 Enterprise trial
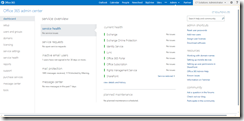
- Once in the Office 365 portal check you have an Azure Active Directory Rights Management subscription

- If you have an E3 or E4 subscription you will have this already – to see the licence
- Click licencing on the left
- OR click purchase services on the left and view current subscriptions on the right.
- If you do not have these licences or subscription levels, then you can purchase (and a trial is available) a AADRM subscription for as many users as are needed.
- To add an AADRM trial click purchase services on the left and search for Azure Active Directory Rights Management in the list and add the trial or make the purchase.
- If you do not have a Microsoft partner helping you with this deployment then use 1019411 as your Microsoft Partner info.
- If you have an E3 or E4 subscription you will have this already – to see the licence
- Click service settings on the left and rights management on the top of the right-hand pane
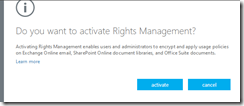
- Click Manage. You will be taken to the Windows Azure Active Directory admin pages where you will need to activate Rights Management

- Confirm you want to activate Rights Management

- Rights Management is activated a few seconds later.
Leave a Reply