
I saw this issue in July 2025 for the first time and worked around it but did not document it here. By November I had the pleasure of staffing the Microsoft Entra stand at the massive Microsoft Ignite conference in San Francisco answering any and all questions pass my way (that is good fun, and hello to you if I answered your questions). Within a few hours of being on the stand I had this question twice – organizations where setting up Multi-Tenant Organizations (MTO) and the sync was not working. More specifically when you go to start the sync you cannot as certain options that you need to select are greyed out. You can make a new sync, but the pre-created sync settings are broken.
The bottom line to this is that you can fix this issue by deleting the sync settings that MTO creates automatically and letting MTO create them again. Let’s walk through this process.
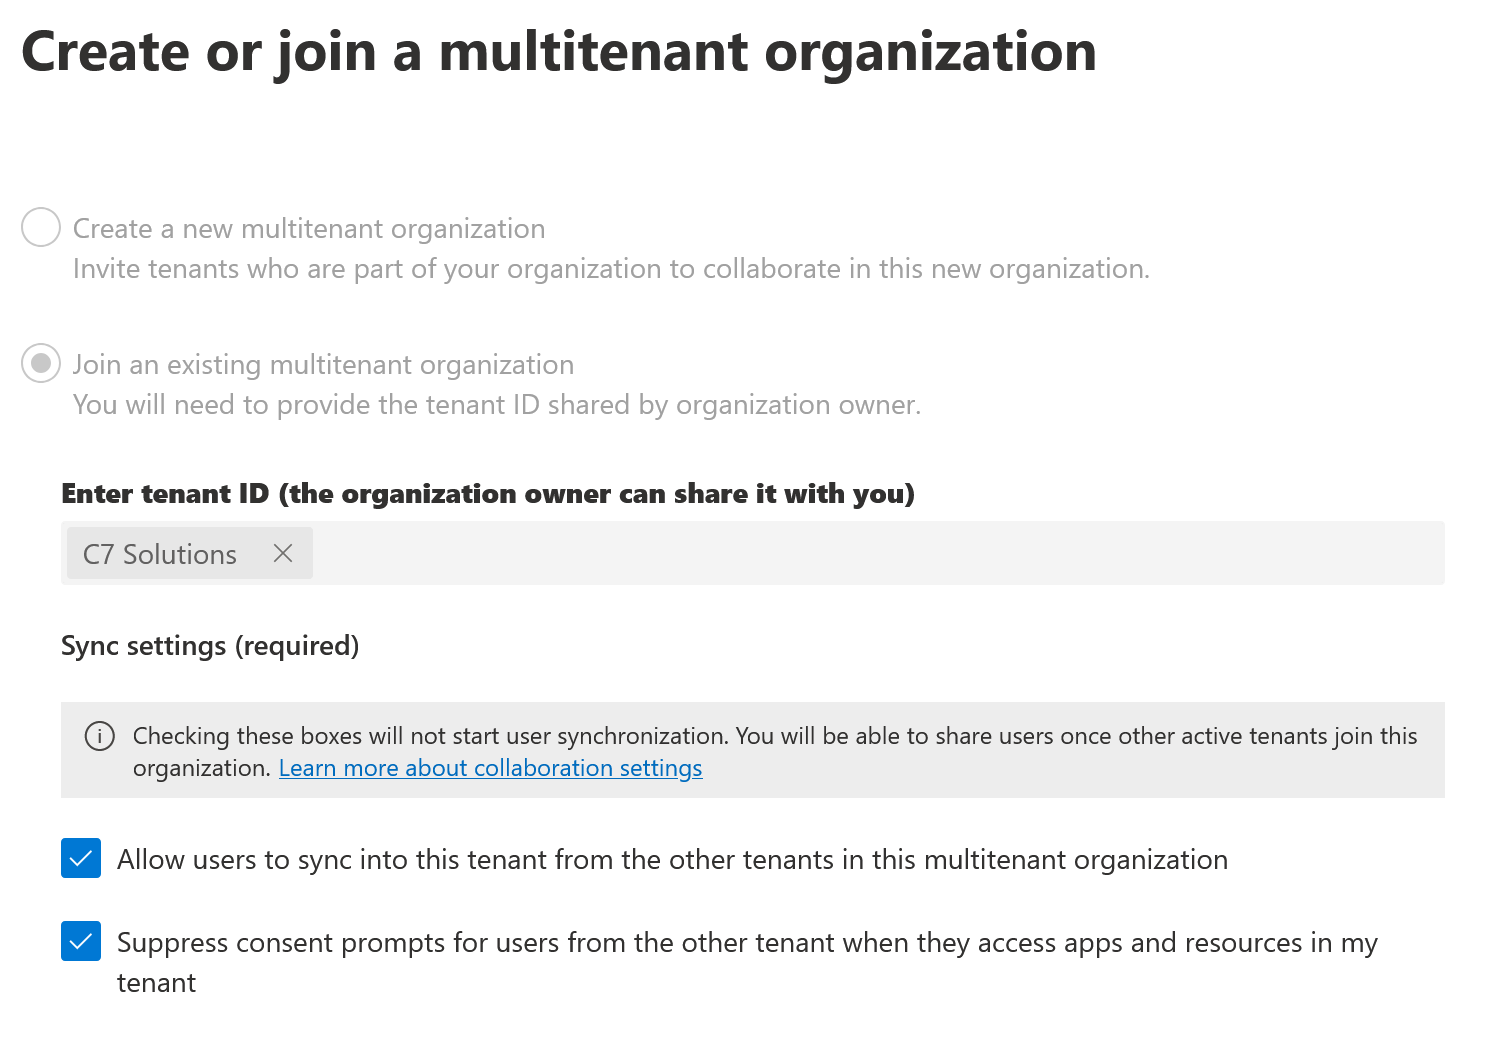
You start in the M365 Admin Center > Settings > Org Settings > Multitenant Collaboration. You create a new multitenant organization and you fill in the details for the tenant in your organization you want to connect to your current tenant.

On the second page of the setup wizard, select both the option to sync into this tenant and suppress consent prompts. The click Next and create the multitenant organization.
This will provide a link for you to send to the administrator of the other organization. They follow the link, or choose to join a multitenant organization and enter your tenant ID. They should then complete the settings as shown:
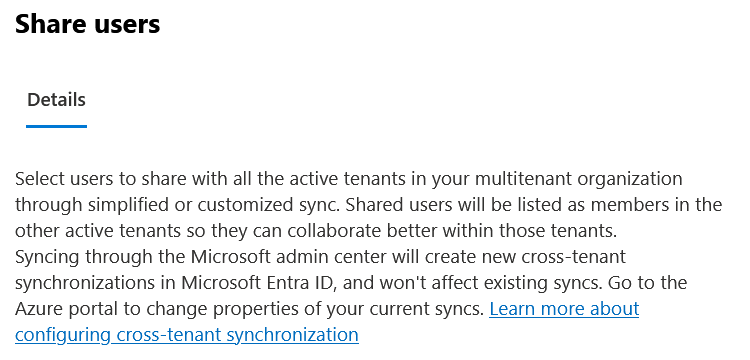
Once the multitenant organization is completely set up, the management page informs you to “Use the Share users button in the multitenant collaboration page to select users and groups you want to share across the organization.” So we are going to test our sync process from the child tenant (the second one added) to the parent tenant. For this we will use a group called “Sync To Parent Tenant” with just two users in (for testing).
The Share Users button will appear once all the MTO settings are in place. This typically takes 5 minutes:
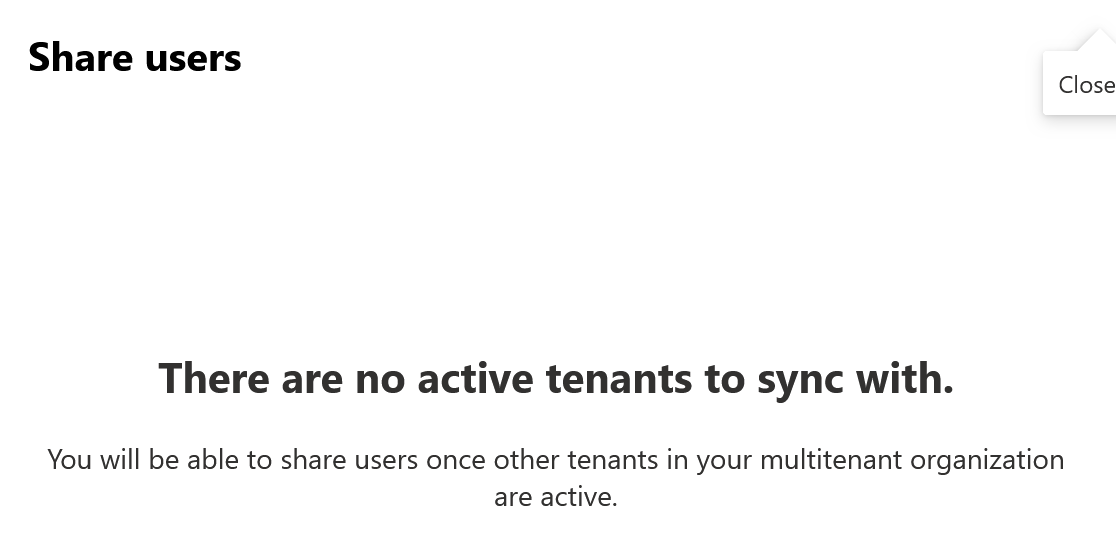
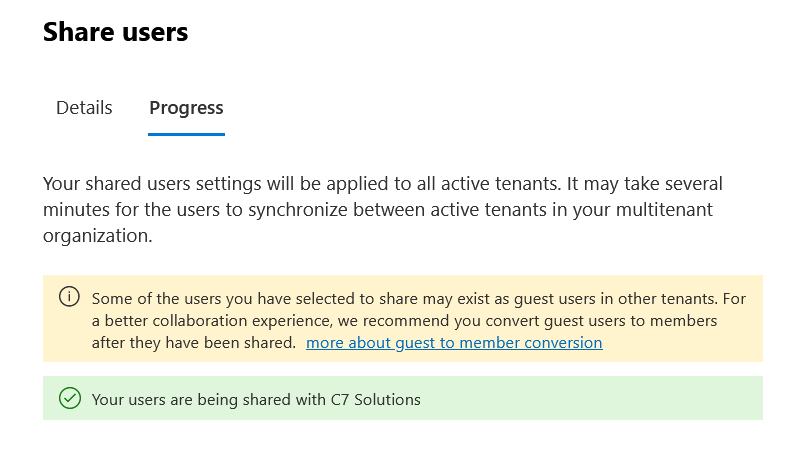
Once the multitenant organization is fully synced in the background, clicking the “Share Users” button shows a flyout as follows:
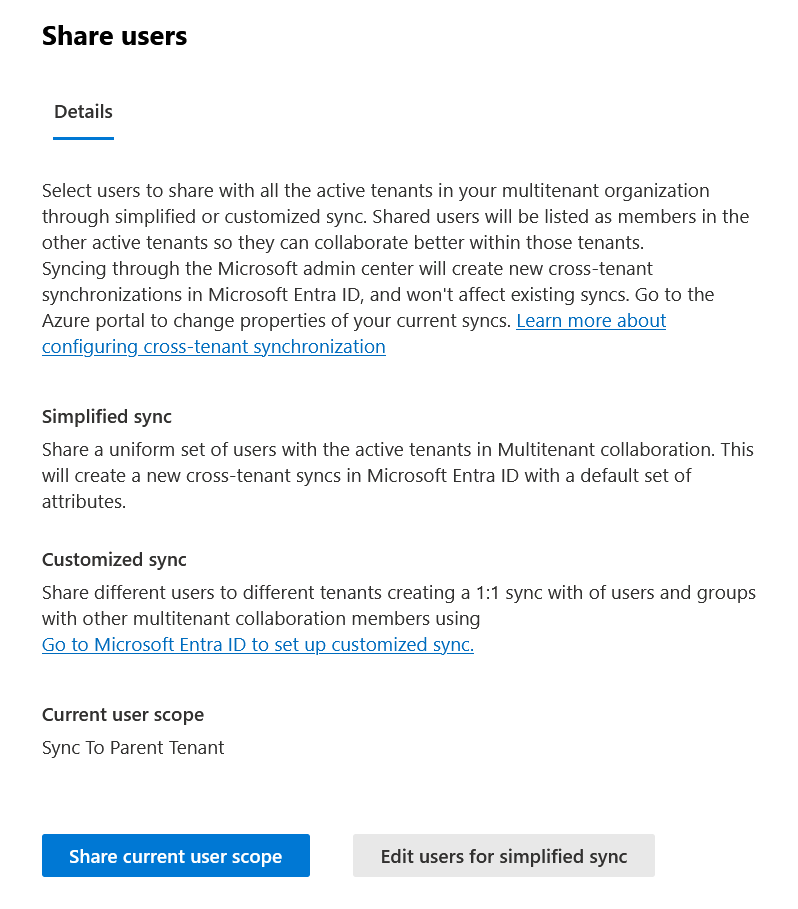
As the current user scope is correct for my testing, I will click “Share current user scope” rather than edit the users and share a different set of users:

This configures the sync and sets up the sharing of users. This should work, and should return the following:
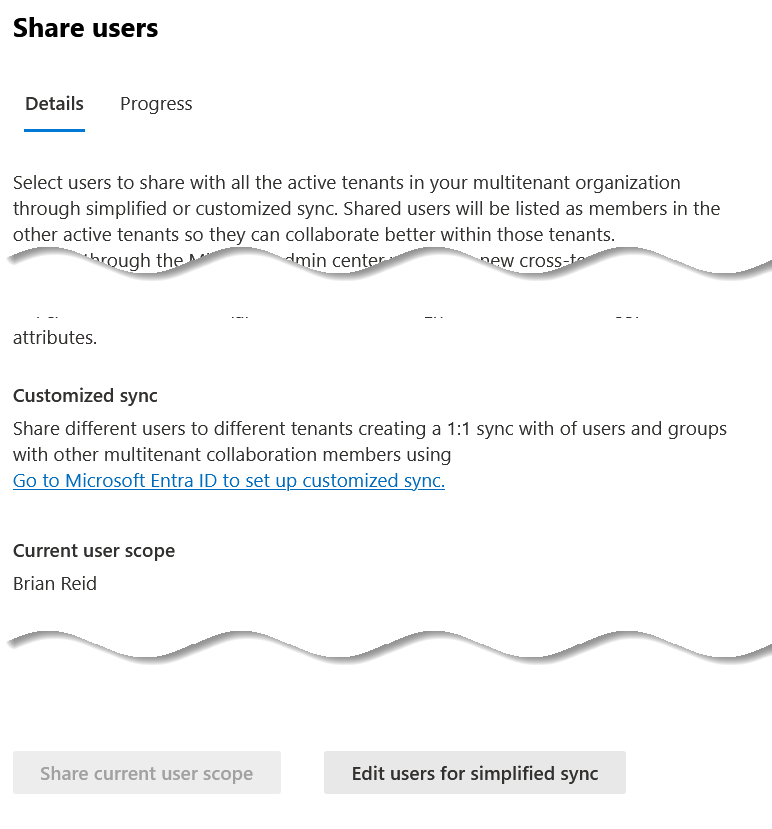
But if instead of sharing the default list of users, you choose “Edit the users for simplified sync”
If you edit the users here and click Save then the sync is set up in Entra and provisioned for you successfully. But if you go to the Entra ID portal > Cross-Tenant Synchronization page you will see your target tenant under Configurations but it will not be ready to use.

Change the provisioning mode to Automatic, expand the Admin Credentials section and click Test Connection.
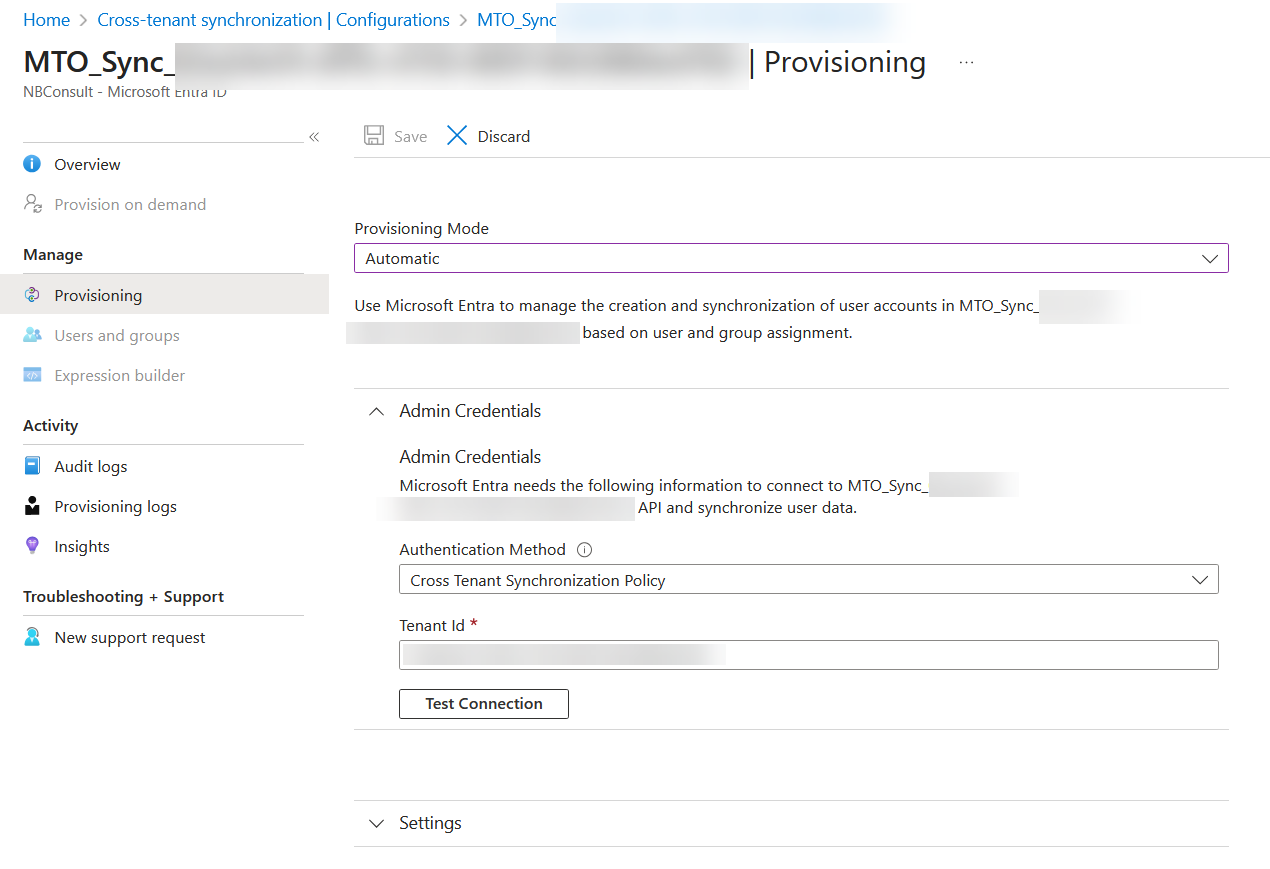
The problem here is that you need to click “Test Connection” but when you do, the Save button does not become available and so this breaks the ability for the sync tool to start. To fix you need to start the user sync settings from the M365 Admin center, as that will fully configure the Entra ID Sync. Manually visiting this page will stop it working. So to fix if this has already happened, is to close the above dialog and delete the cross-tenant sync in the Entra ID portal for this organization.
Once it has been deleted (hit refresh on the page a few times to confirm) and then return to the MTO page in the M365 Admin Center and fully refresh that browser page. This will trigger both the deletion and then recreation of the provisioning settings. This will take 20-30 minutes at most.
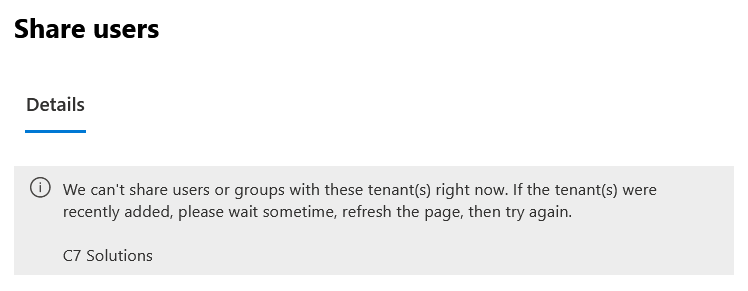
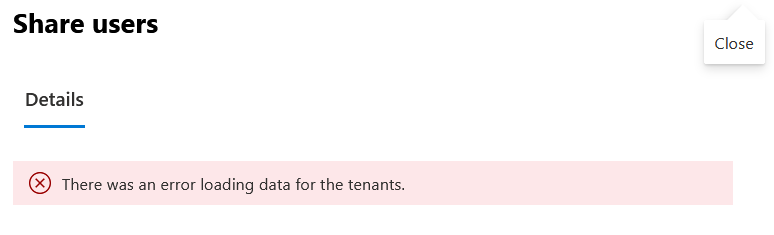
Whilst the sync configuration is broken, the “Share Users” flyout warns that “We can’t share with users or groups…” or “There was an error loading data for the tenants.”. Once it is fixed it does NOT warn that the configuration is not in place.
So from this view:
Or
To this:
From here click either of the “Share current user scope” (if its available) or “Select users for simplified sync” buttons to pick a user to configure and start the sync – don’t attempt to start it in the Entra ID admin portal.
Just pick one user for now – this is enough to configure the sync. As mentioned above, don’t go to the Entra ID portal to configure the sync as mentioned in the fly out under “Customized sync” until you have done one user.
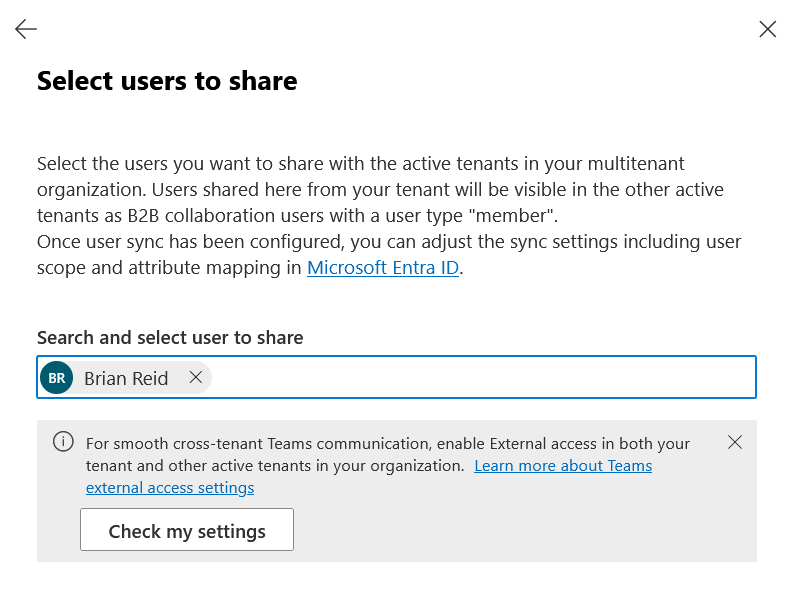
This one user will be the default user for all outbound sync from your tenant to all other tenants that you enable sync for. This one user (or a few) that you add at this point are stored in Entra ID even though the dialog says “Azure Active Directory”!!!
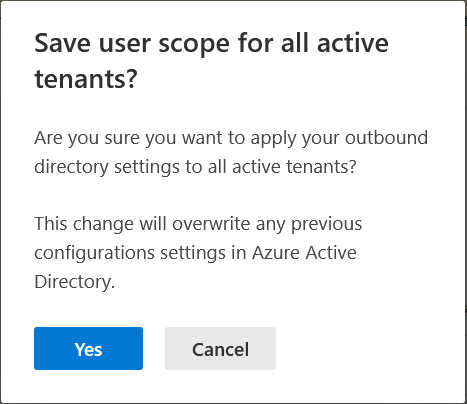
Once you click Yes, the “Current user scope” settings for all your syncs are changed. So if you are having setup problems with synchronization and you have more than two tenants in the multitenant organization then do not fix the sync this way, as it will overwrite all your tenants outbound sync configurations.
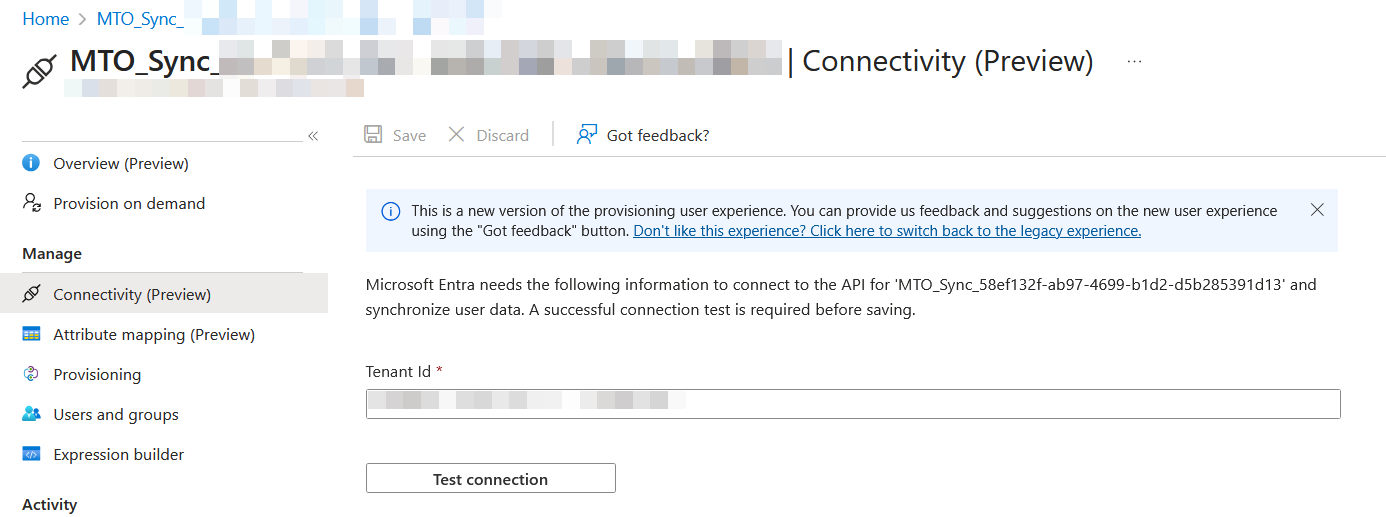
Of note, and possibly interesting moving forward into 2026 – there is now a new Connectivity page in the Entra ID Cross-Tenant Sync settings. Maybe this page will work where the old one does not. This is inside the MTO_Sync_GUID settings, and is called “Connectivity (Preview)”
Once sync is up and running, further advanced customisation can be done via the Entra ID portal later, for example with the need to change the mapping for userType to “Member” and “All the time” (so external guests that are already synced become external members instead of staying as external guests) and optionally updating displayName to an expression:
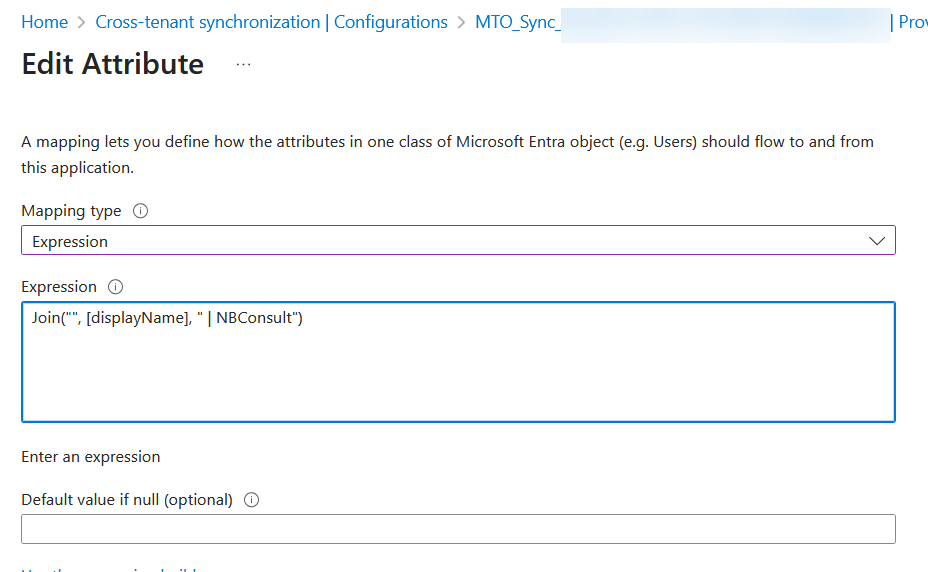
Finally, other attributes to sync include Company Name, mobile, and usageLocation are good to include in the multi-tenant organization.
Photo by Landiva Weber from Pexels: https://www.pexels.com/photo/abstract-background-with-colorful-circles-27645908/
Leave a Reply