A SharePoint Organization Assets Library allows you to have a central location for Office templates, fonts and images. Various Microsoft 365 apps show this location when in use, for example when creating a new document in Word, the organization templates library can be listed as a source of templates.
To create an Organization Assets Library you need to create a new SharePoint Online site (or modify an existing one) so that it is a public site and has read permissions to the special group Everyone except external users. This second requirement generates lots of online searches and people looking for the answer – well look no further, here is exactly what you need to do.
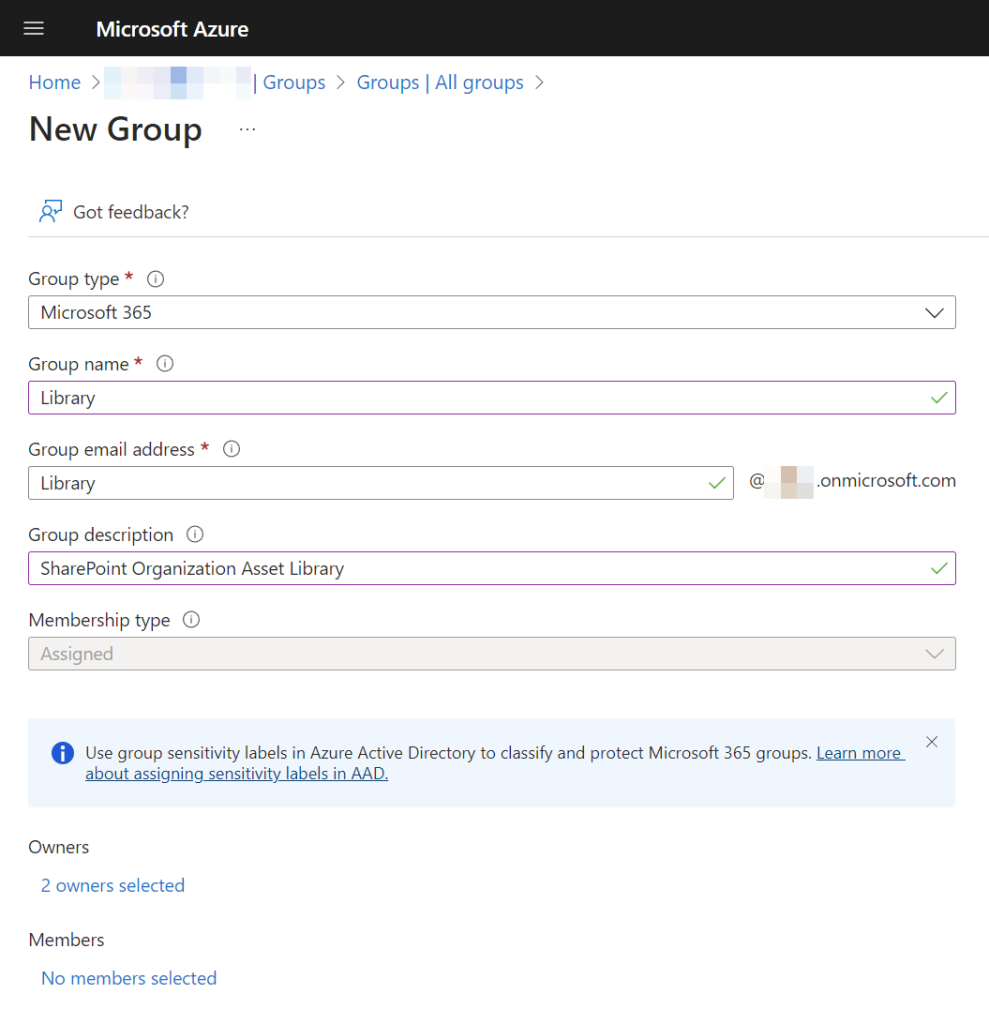
- Create yourself a new Microsoft 365 Group. For this example, lets call it “Library”. Here it is being created via the Entra ID portal, but numerous places exist to create this group:

- Add those who will upload content to the asset library as owners of this group
- This will create, amongst other things, a SharePoint site under the URL https://tenant.sharepoint.com/sites/library (in this example).
- Go to the SharePoint Admin Center (https://tenant-admin.sharepoint.com) and ensure that you have “All Sites” view (top-right) selected.
- Click on the name (not the URL) for the group you just created. A fly-out appears to the right:

- Change to the Settings tab and make the group a “Public” group. It cannot be a Private group for this to work. Private groups cannot have “Everyone except external users” as members.
- Also at this time set your sharing permissions and if you want to hide the group in Outlook etc.
- Close the fly-out once you have saved your changes and then click the URL link for the site (../sites/library in my example). The next set of changes are done on the site and not in the admin center.
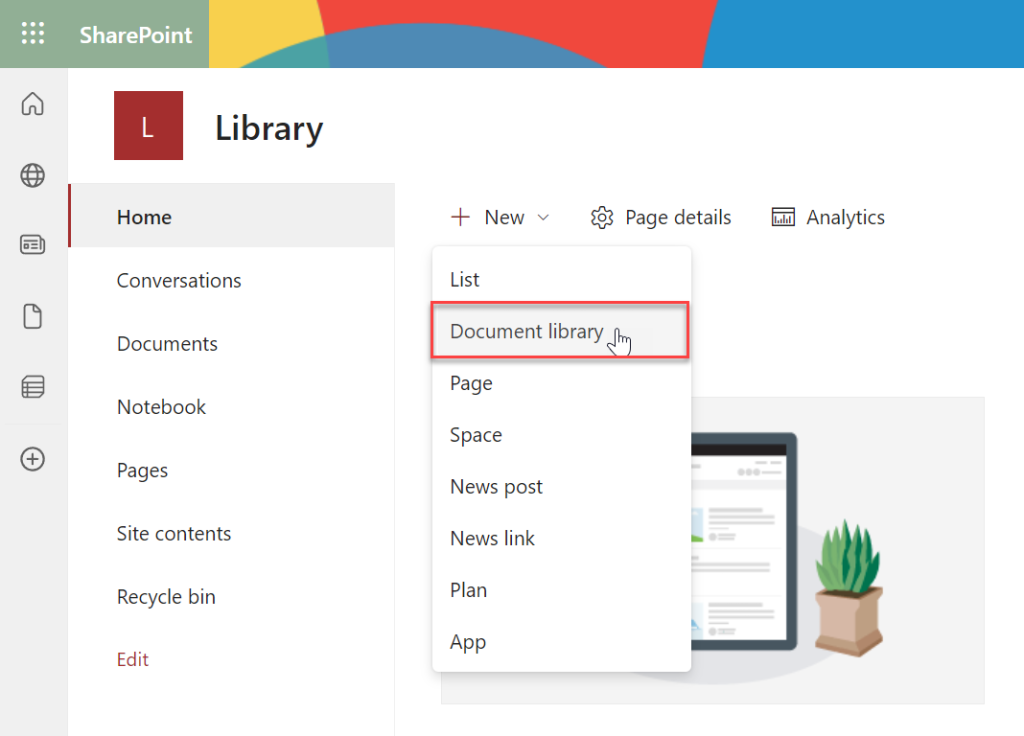
- Create a few new document libraries. You need a seperate library for organization wide images, another for organization fonts and a third for organization templates. If you have multi-geo licences in place, you need to repeat all this per SharePoint geo.

- Here is an example of creating your organization Templates document library:

- Return to the Home page and create the remaining Document Libraries. In my example I have created “Photos and Images” and “Fonts”
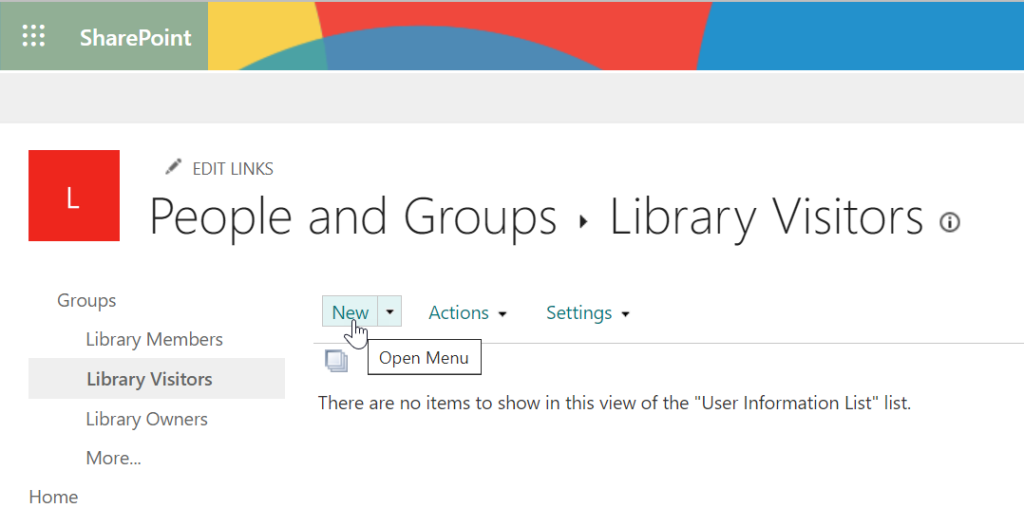
- Grant read-only permission to “Everyone except external users” via the settings cog icon top-right. Settings > Site Permissions > Advanced permissions settings > Library Visitors.

- Add a new user to this area. Add “Everyone except external users” and click Share. They will not get a notification even if this option is left enabled:

If the above does not work, make sure the site is Public. You cannot do this to a Private site, and if you change a Public site to Private this group will be removed. There is a “alloweveryoneexceptexternalusersclaiminprivatesites” SharePoint PowerShell setting that you could enable to turn this on as well. We are not doing this here as we are make the site a public site.
Once you have the permissions done we need to make use of SharePoint Online PowerShell, so make sure you have the PowerShell module installed. For this installation you need local admin permissions, but if you are uploading a font asset library you will also need to run all these cmdlets as local admin as well.
Here is the PowerShell you will need:
Install-Module Microsoft.Online.SharePoint.PowerShell
# Or, if already installed
Update-Module Microsoft.Online.SharePoint.PowerShell -Force

Connect-SPOService -Url https://tenant-admin.sharepoint.com
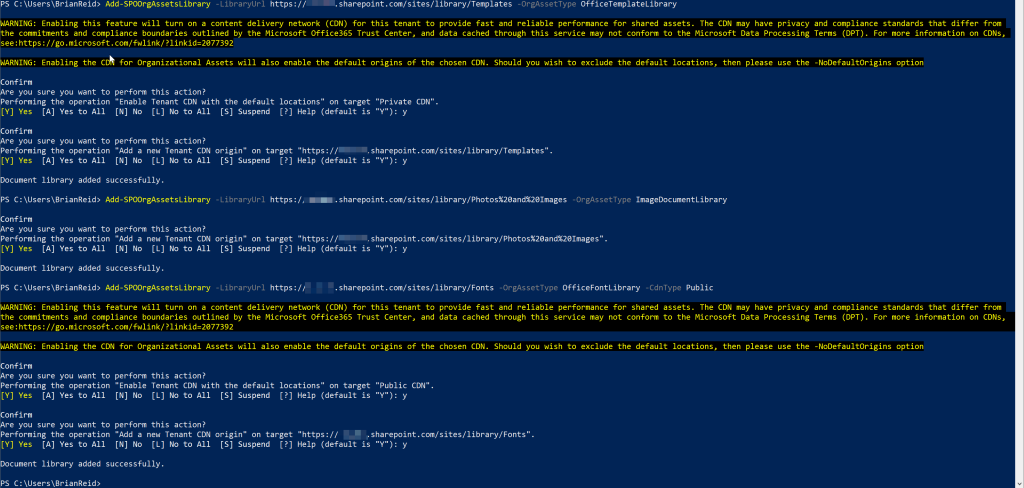
Now that you are connected, you need to run the following three cmdlets, each one for one of the Document Libraries you made above. That is, if you are not doing a Font Asset Library, don’t run the cmdlet about fonts. For these, run them one at a time and confirm any prompts you receive. Asset Library will enable the Microsoft CDN (part of your SharePoint Online licence) if it is not enabled already and will get you to confirm this. Font Asset Libraries are shared via the Public CDN and all the other content is via a private (login only) CDN. You will need to confirm these changes as appropriate.
Each URL in the PowerShell needs to be correct for the Document Library and site name you created as well
Add-SPOOrgAssetsLibrary -LibraryUrl https://reidco.sharepoint.com/sites/library/Templates -OrgAssetType OfficeTemplateLibrary
Add-SPOOrgAssetsLibrary -LibraryUrl https://reidco.sharepoint.com/sites/library/Photos%20and%20Images -OrgAssetType ImageDocumentLibrary
Add-SPOOrgAssetsLibrary -LibraryUrl https://reidco.sharepoint.com/sites/library/Fonts -OrgAssetType OfficeFontLibrary -CdnType Public

Once you have done the above, the only other step is to upload any fonts if you have created a font asset library. To do this, create a folder on your computer that contains all the fonts you wish to share across the organization. No other files, and no folders – so a single folder full of all the fonts you will use. Then run the following PowerShell:
Set-SPOCustomFontCatalog -FontFolder "C:\temp\font assets" -LibraryUrl https://tenant.sharepoint.com/sites/library/Fonts
If this throws an error that says “Set-SPOCustomFontCatalog : Access to the registry key ‘HKEY_LOCAL_MACHINE\Software\Microsoft\StrongName\Verification*,*’ is denied.” then make sure that you are running PowerShell with local admin permissions, and add the registry keys mentioned in the error – I needed to add two keys, “StrongName” under ‘HKEY_LOCAL_MACHINE\Software\Microsoft‘ and then “Verification” under that. There were no required values in these keys. You need to close and re-open your PowerShell window (as local admin) once these keys are created and try again:

If you added “StrongName/Verification” keys then delete them now.
Your Organization Asset Library will appear within your applications and online within 24 hours.
Photo by Brett Jordan: https://www.pexels.com/photo/brown-wooden-blocks-on-white-surface-10044788/

Leave a Reply